Craig's SCAMP build

Finish up

9/14/2015

7 Comments

 
Well, well. It has been quite a while since the last post. There is a good reason for this - I have been beavering away, trying to get ANNIE B launched while there is still nice weather for sailing. Did he make it? Stay tuned .....

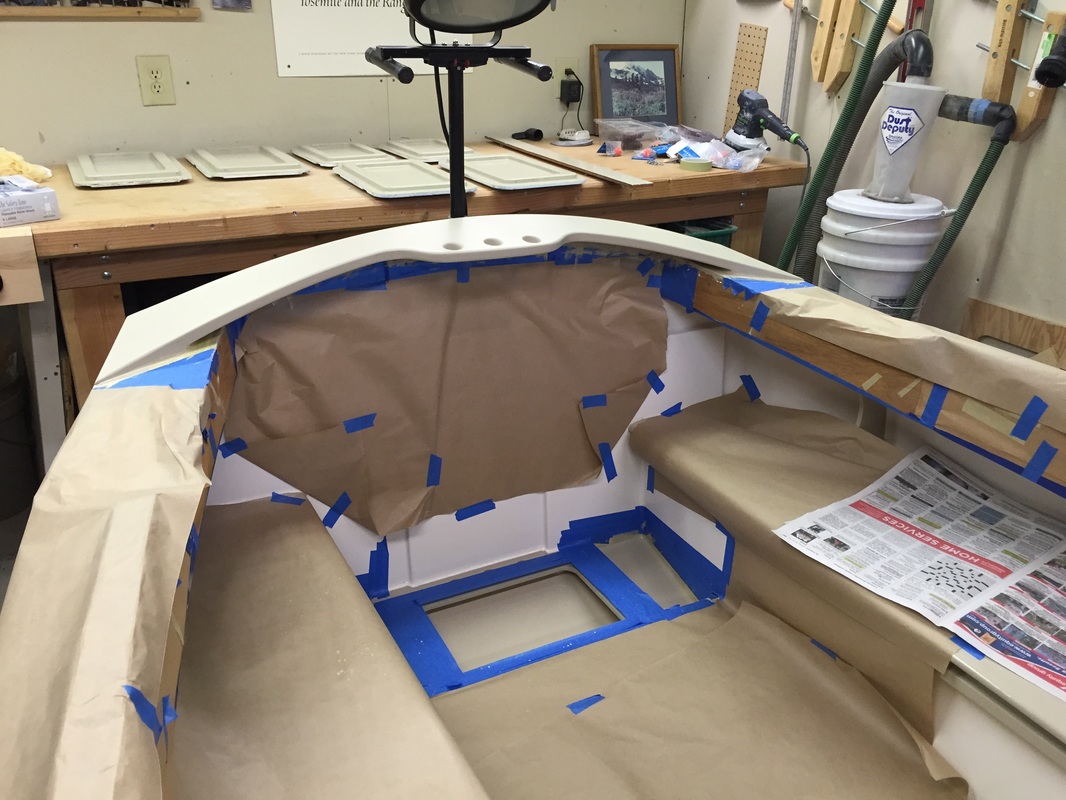
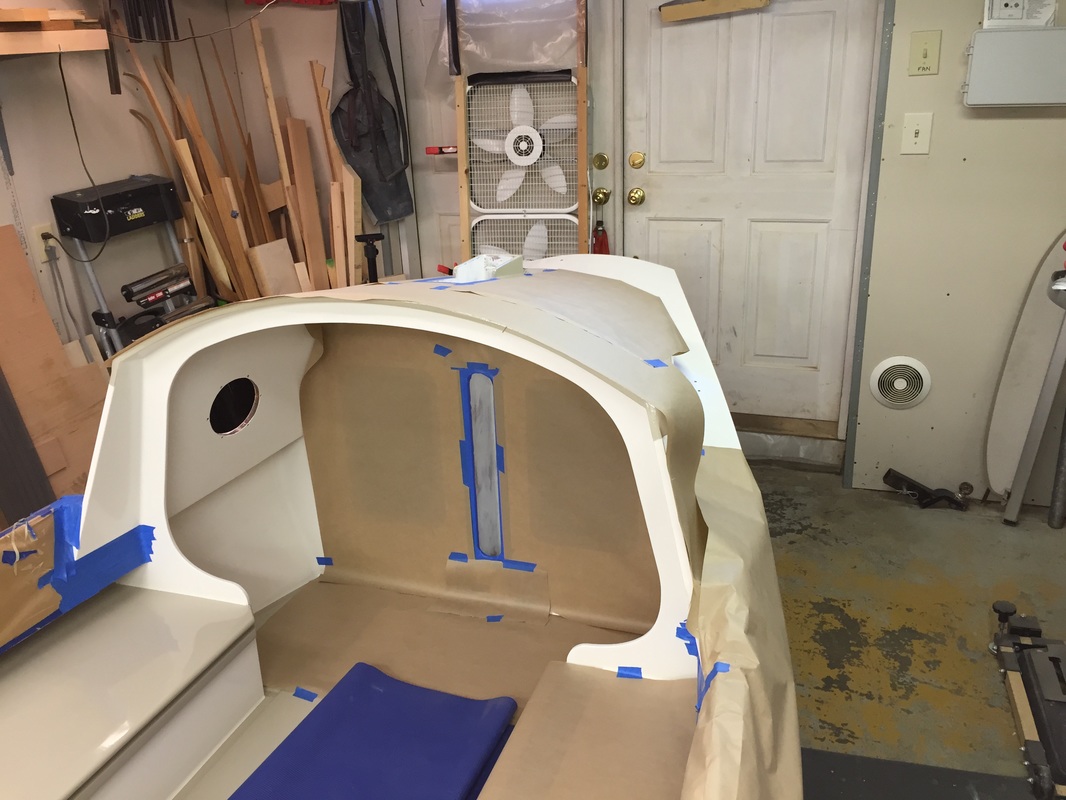
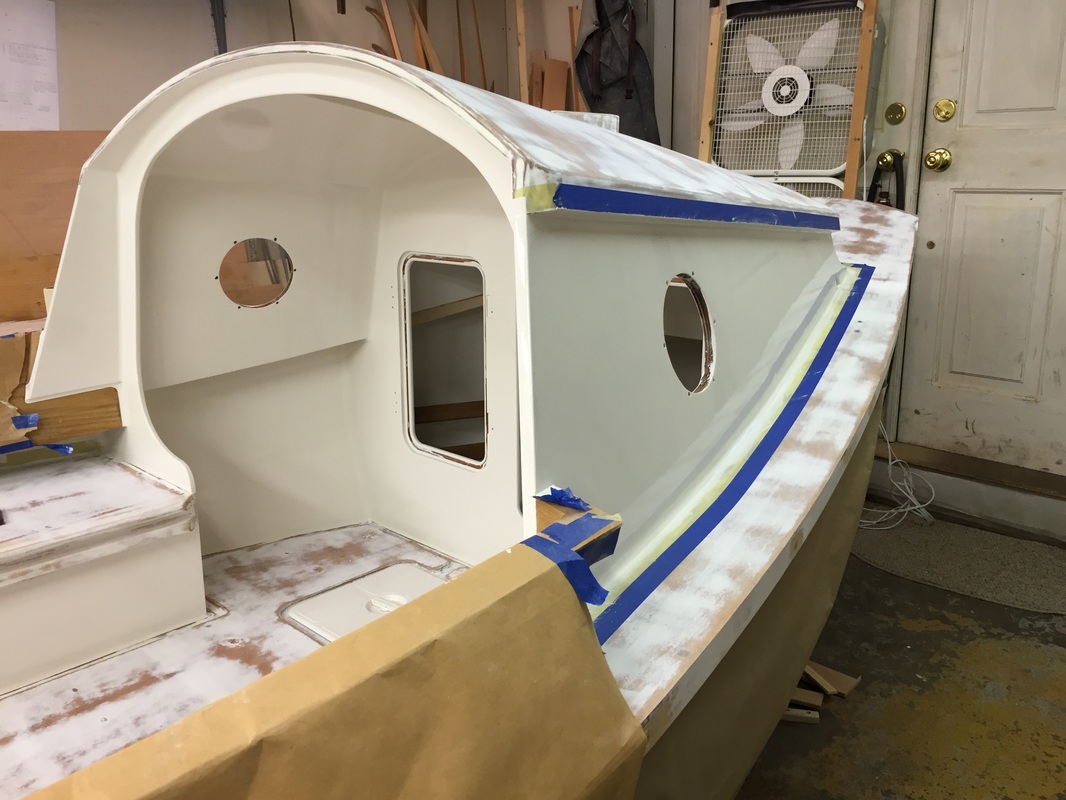
Continuing painting up top, there are an amazing number of areas to be painted, each one seems to want to be painted as a separate task.


Picture
Picture
Picture
Picture
Picture
Picture

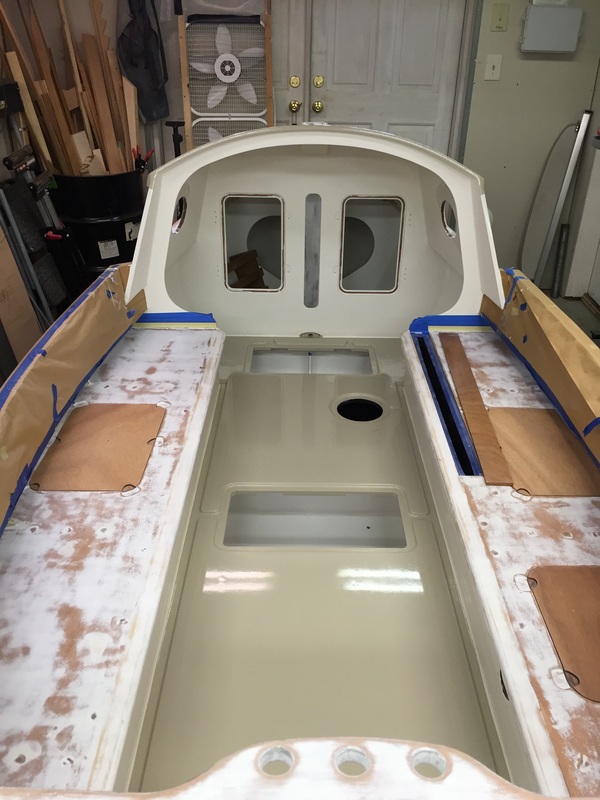
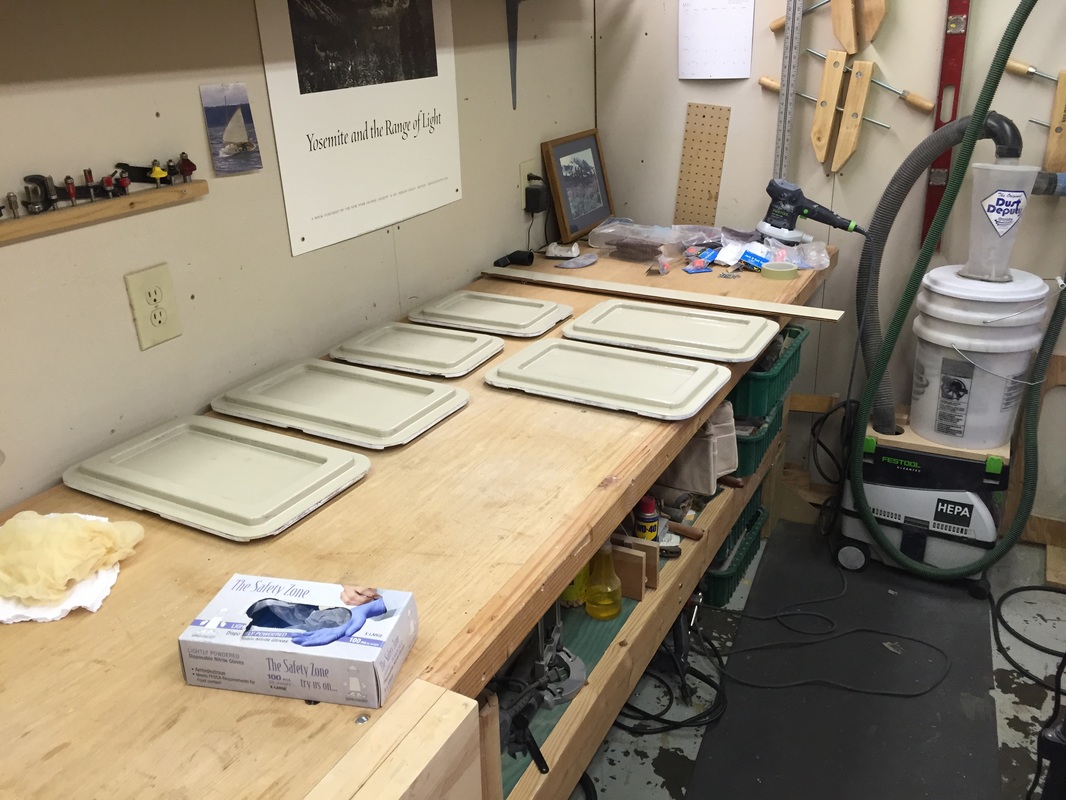
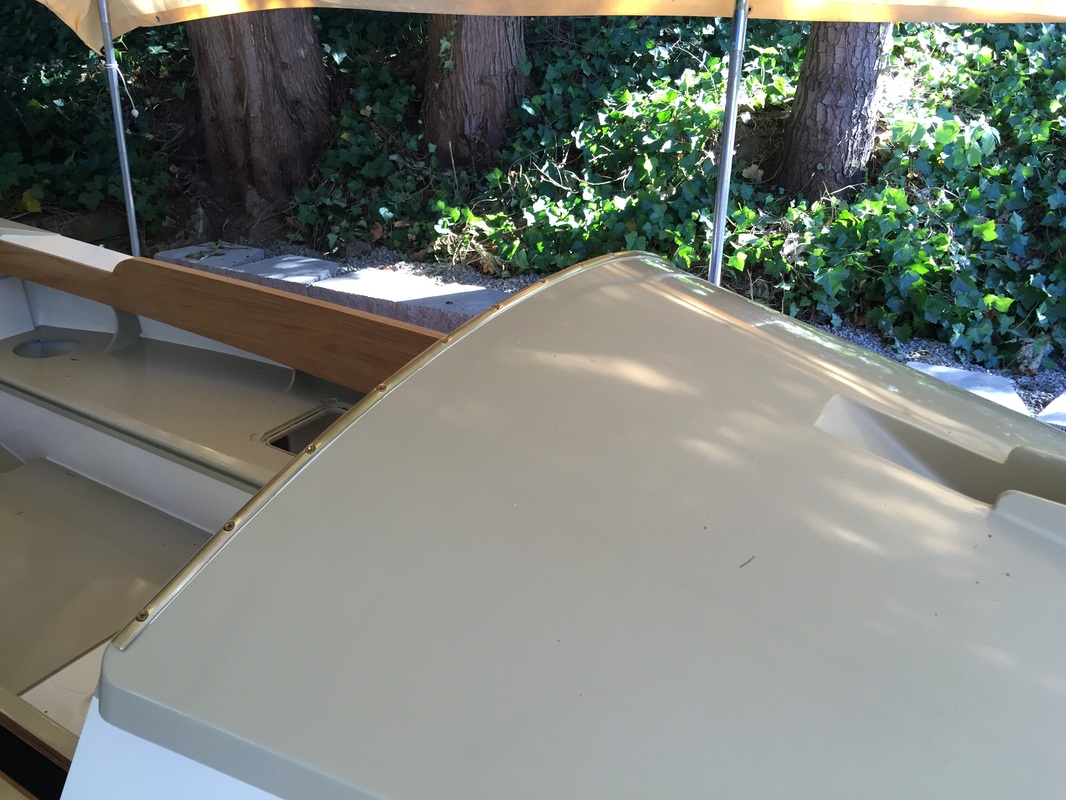
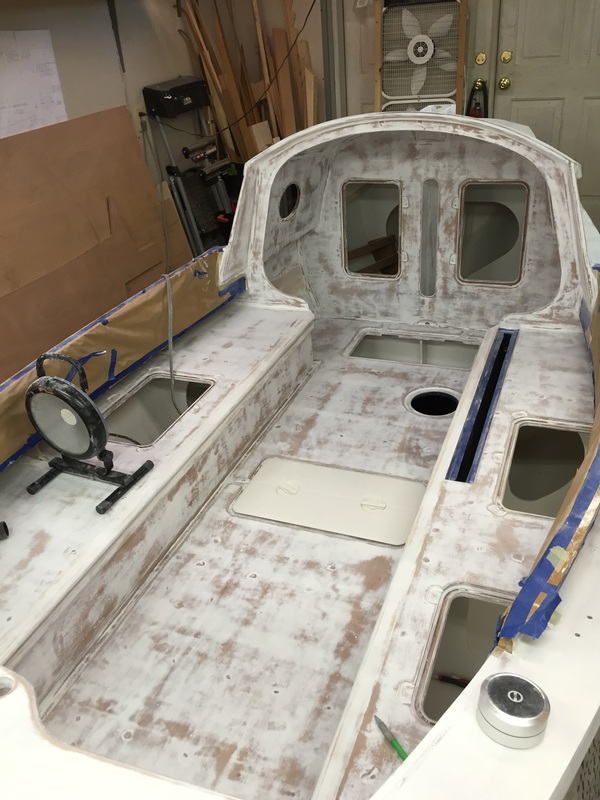
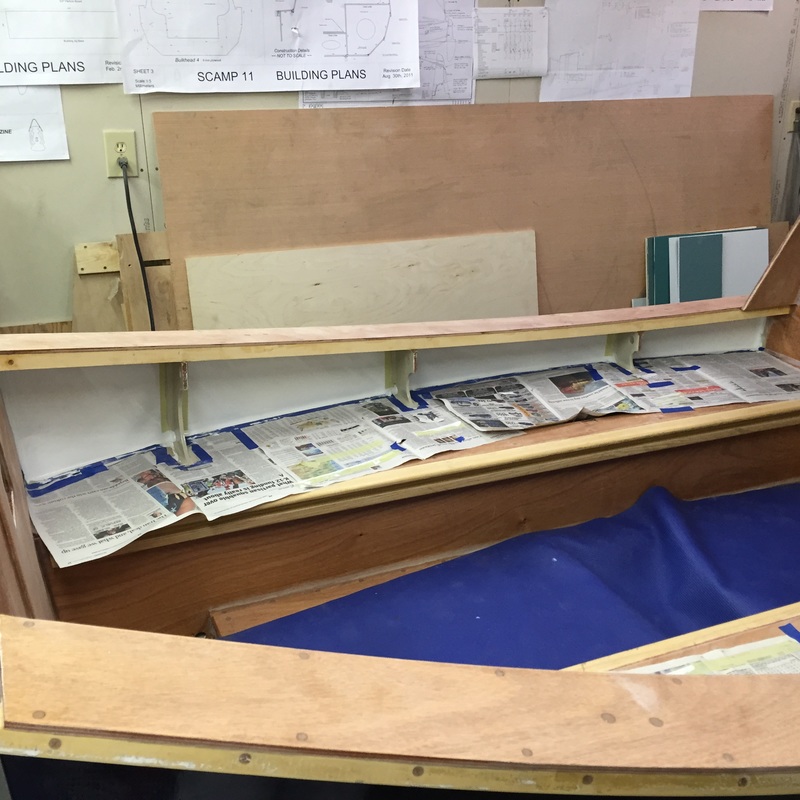
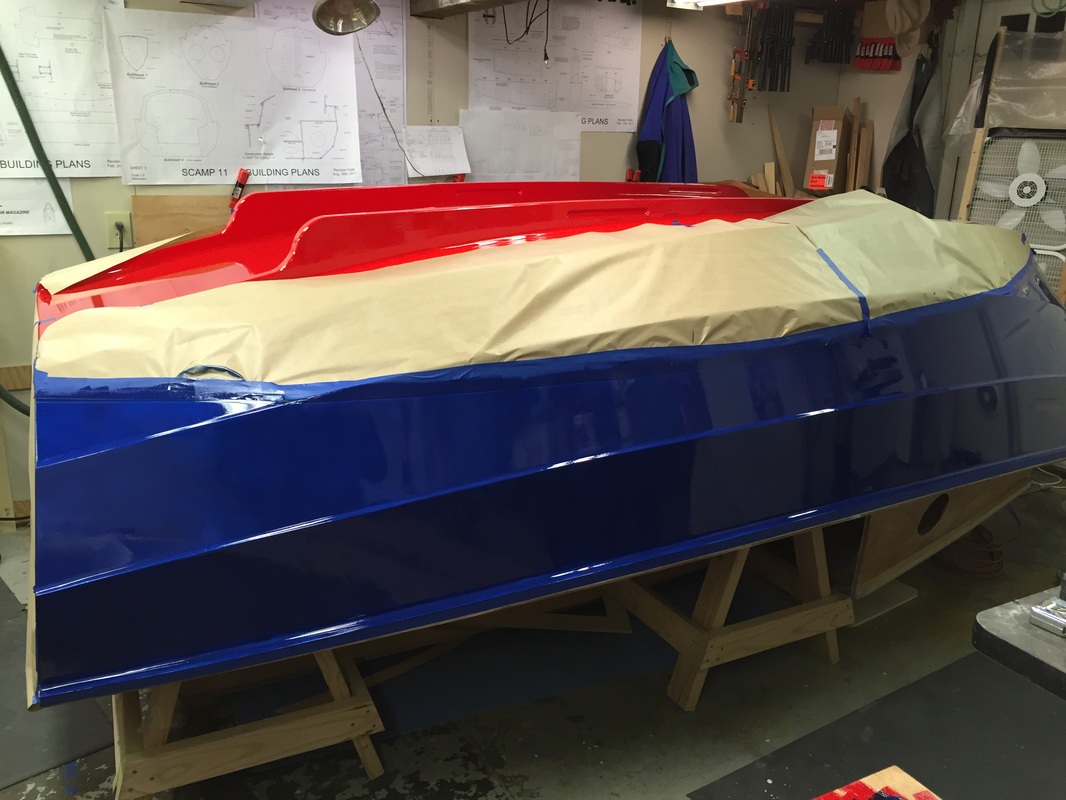
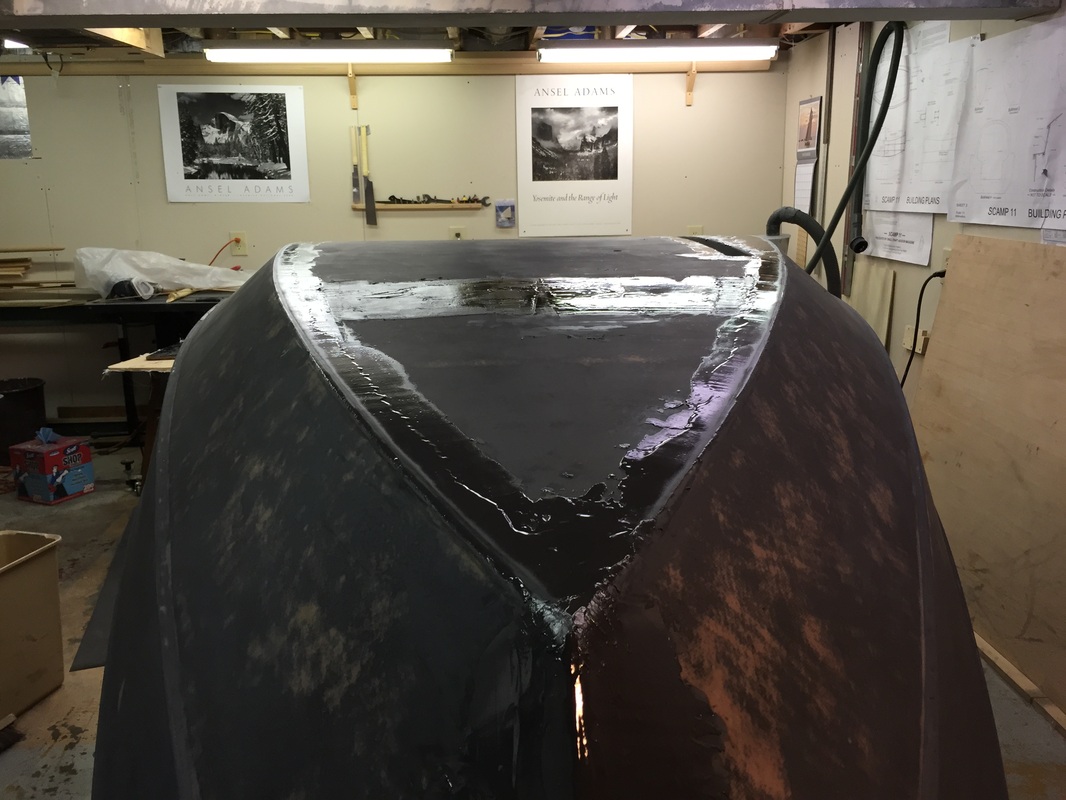
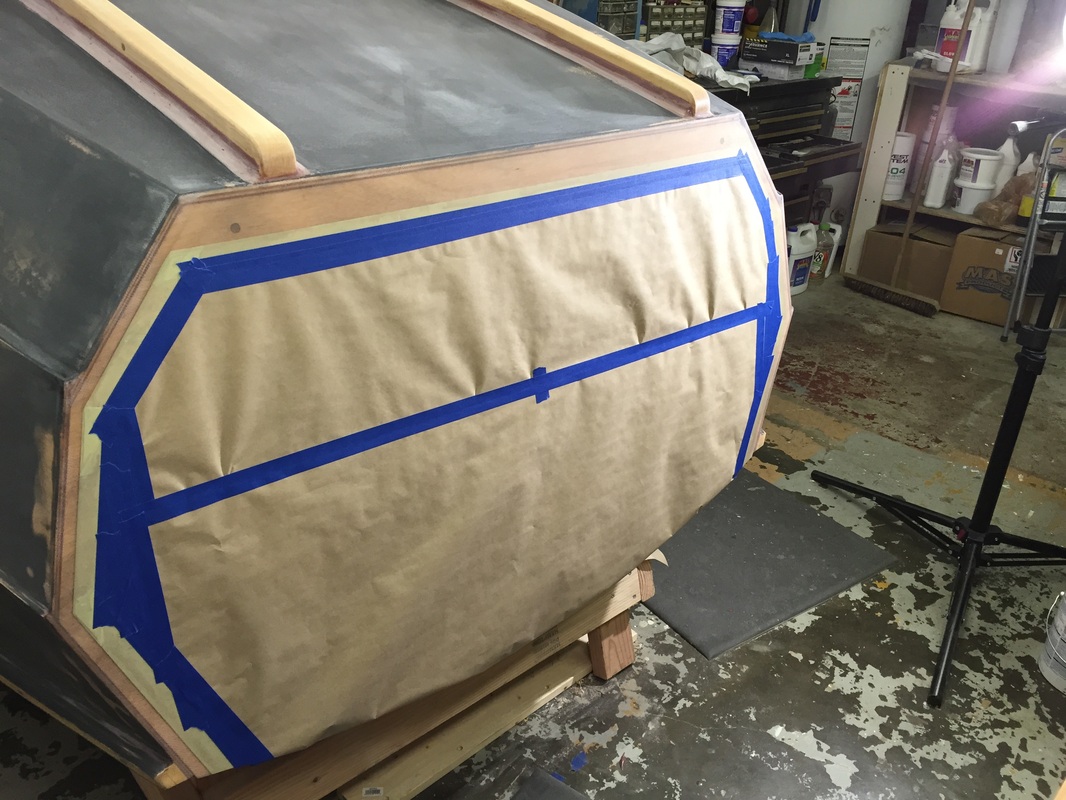
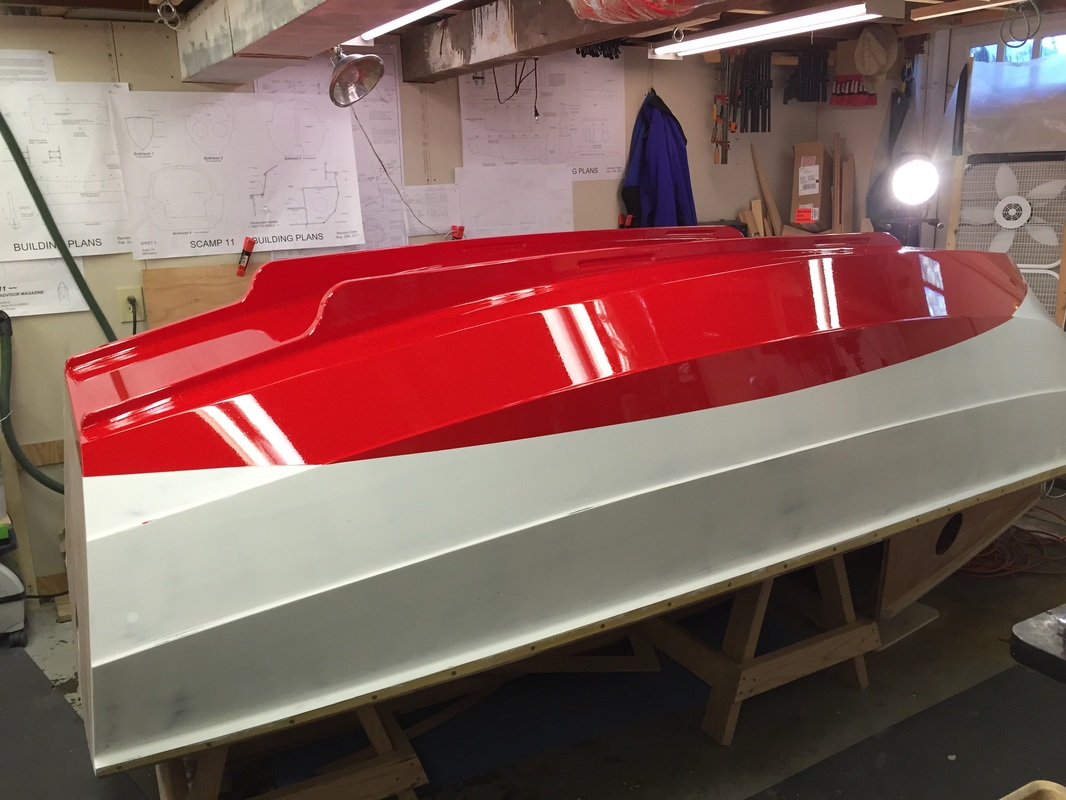
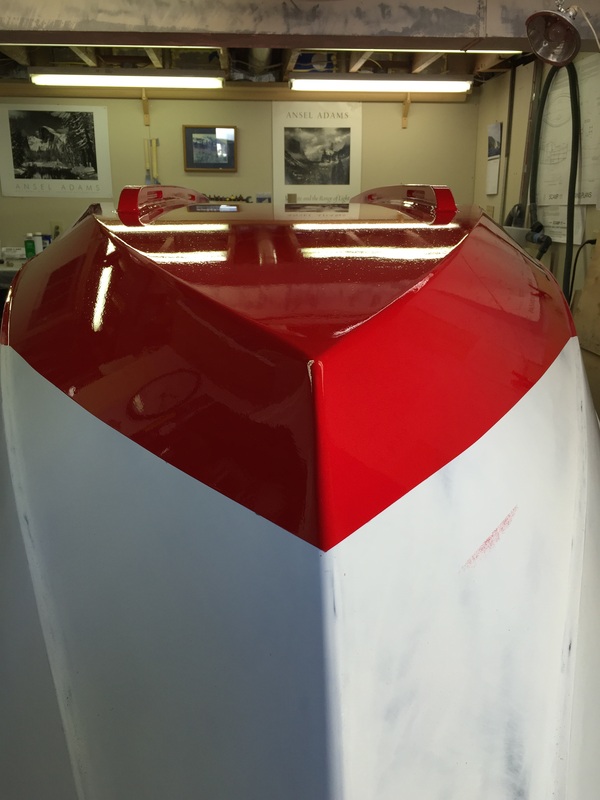
So, this is how I spent most of my July - sole, cabin top, decks, seat tops, transom cap, mast trunk, hatch covers. Each section required masking, and 3 coats of Interlux Brightside.

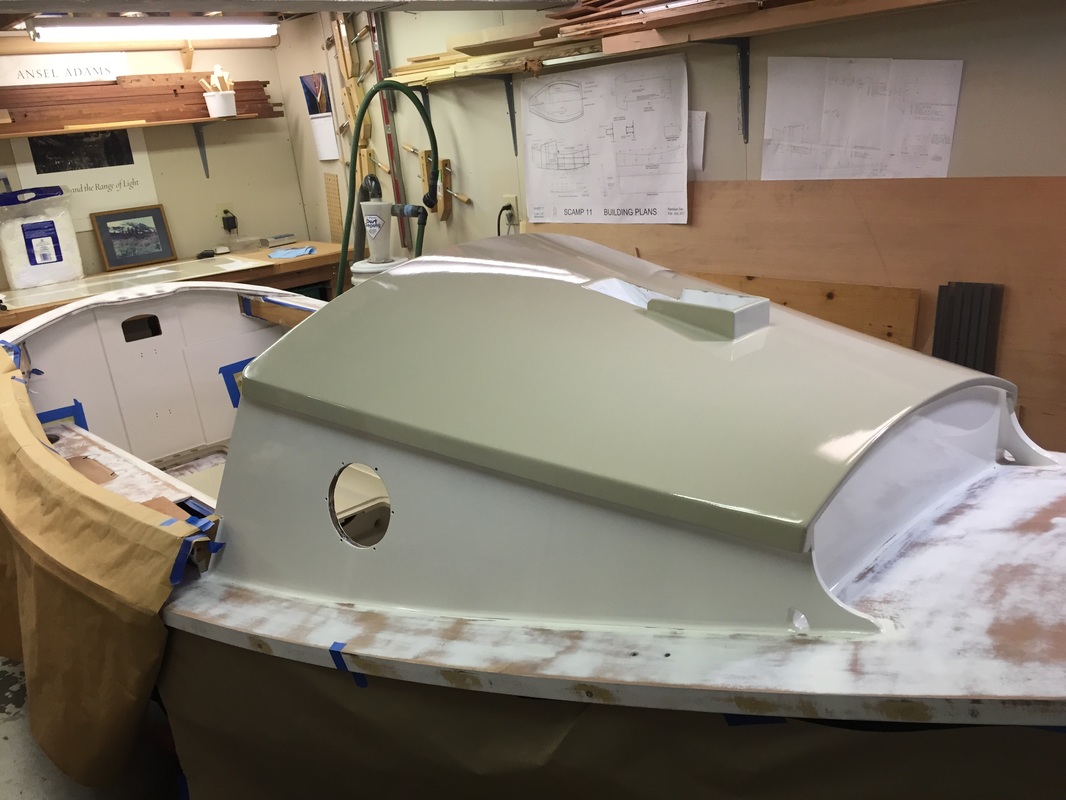
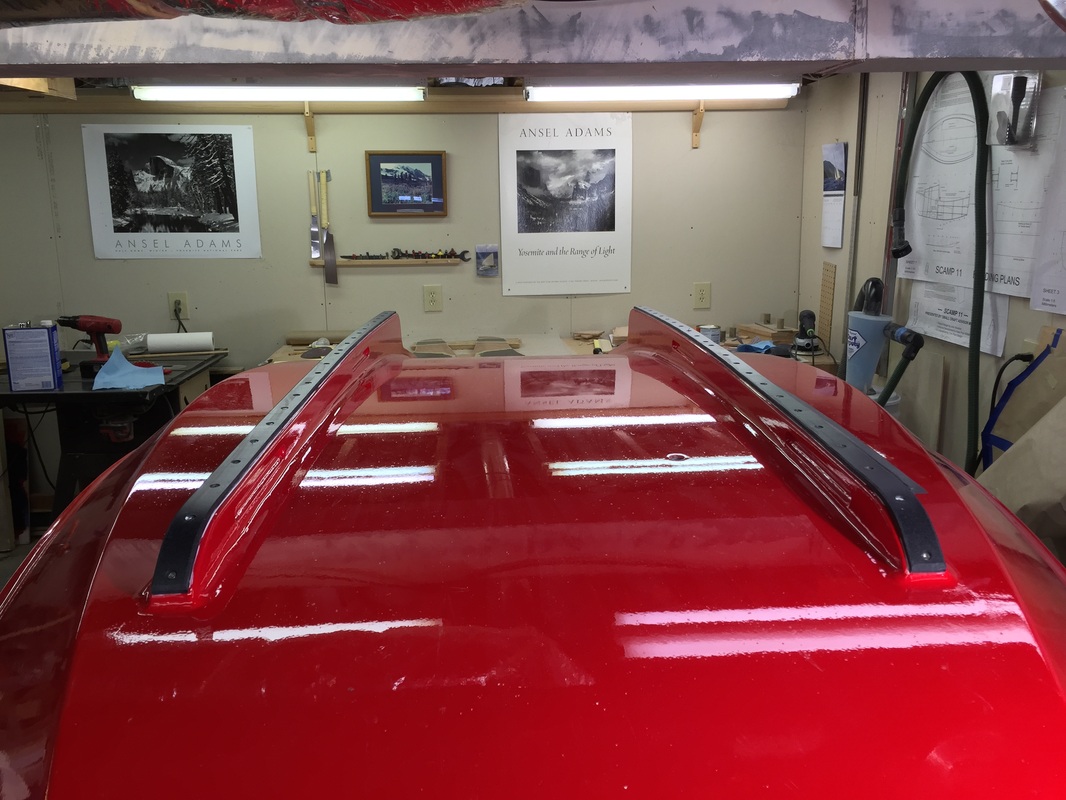
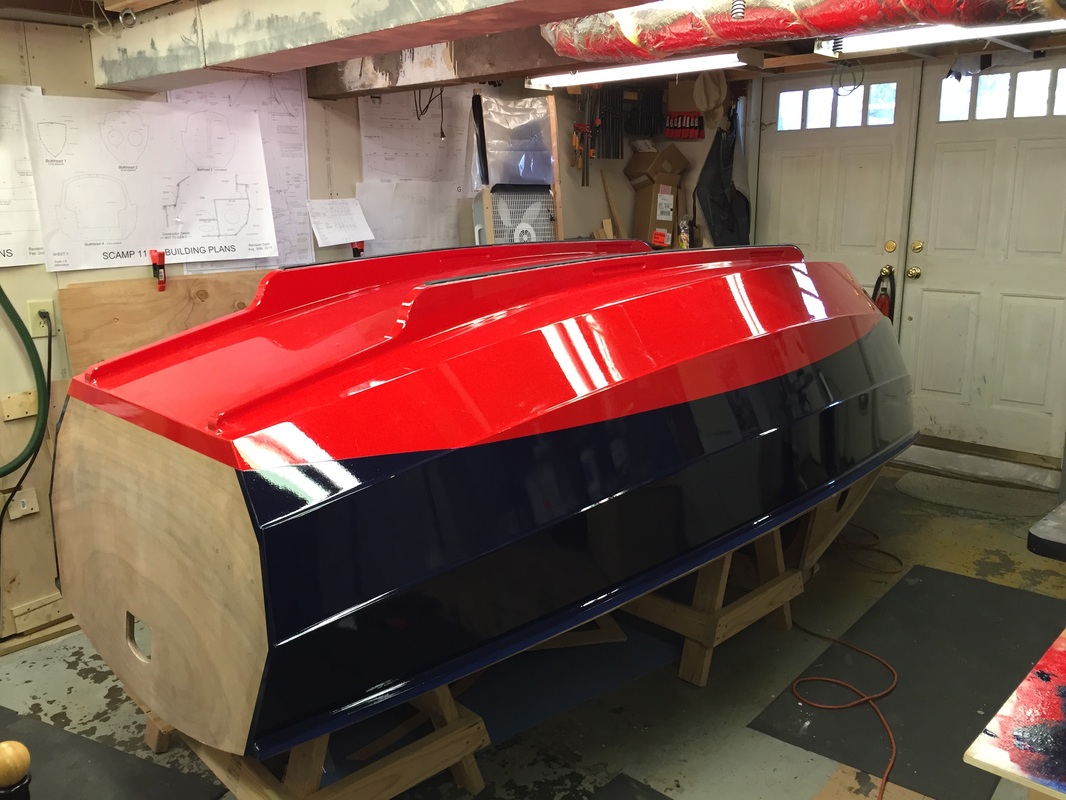
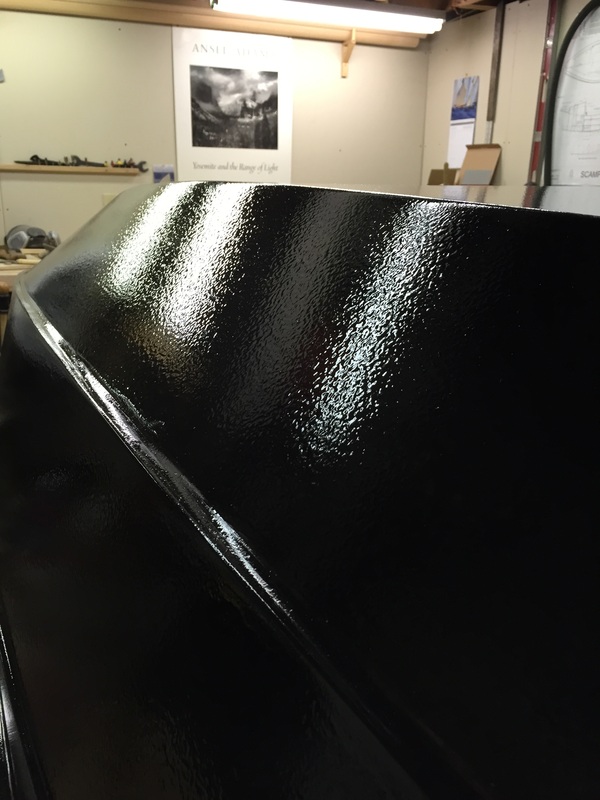
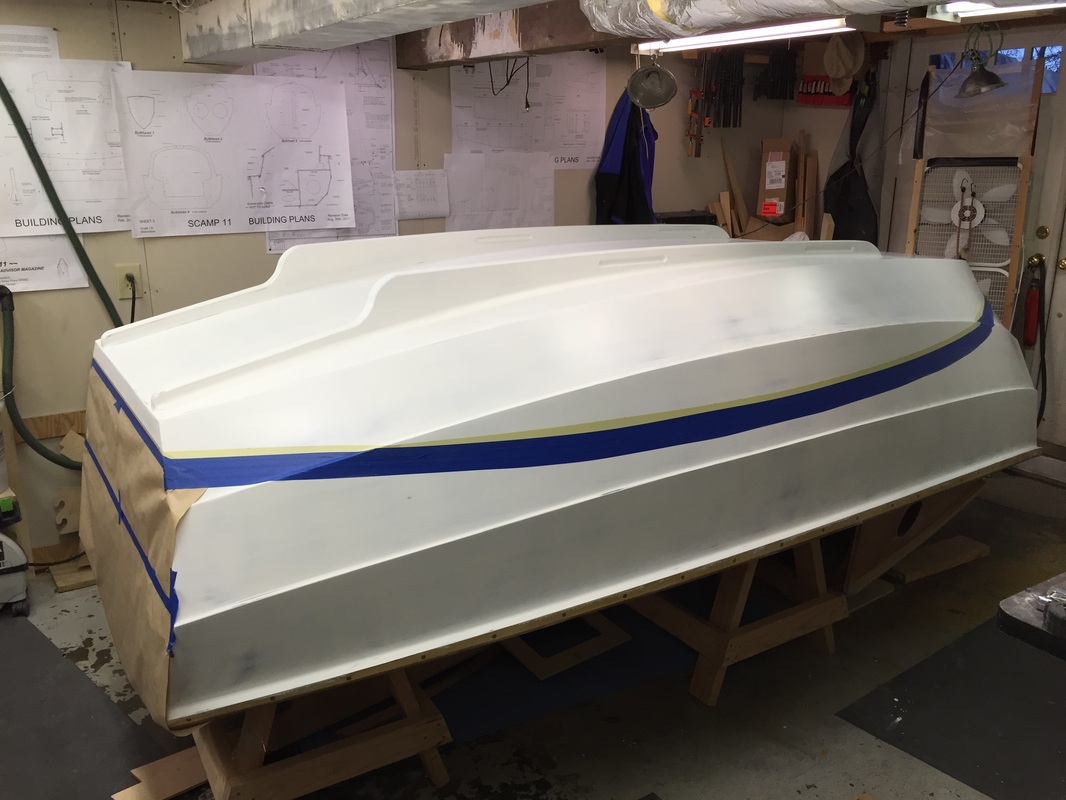
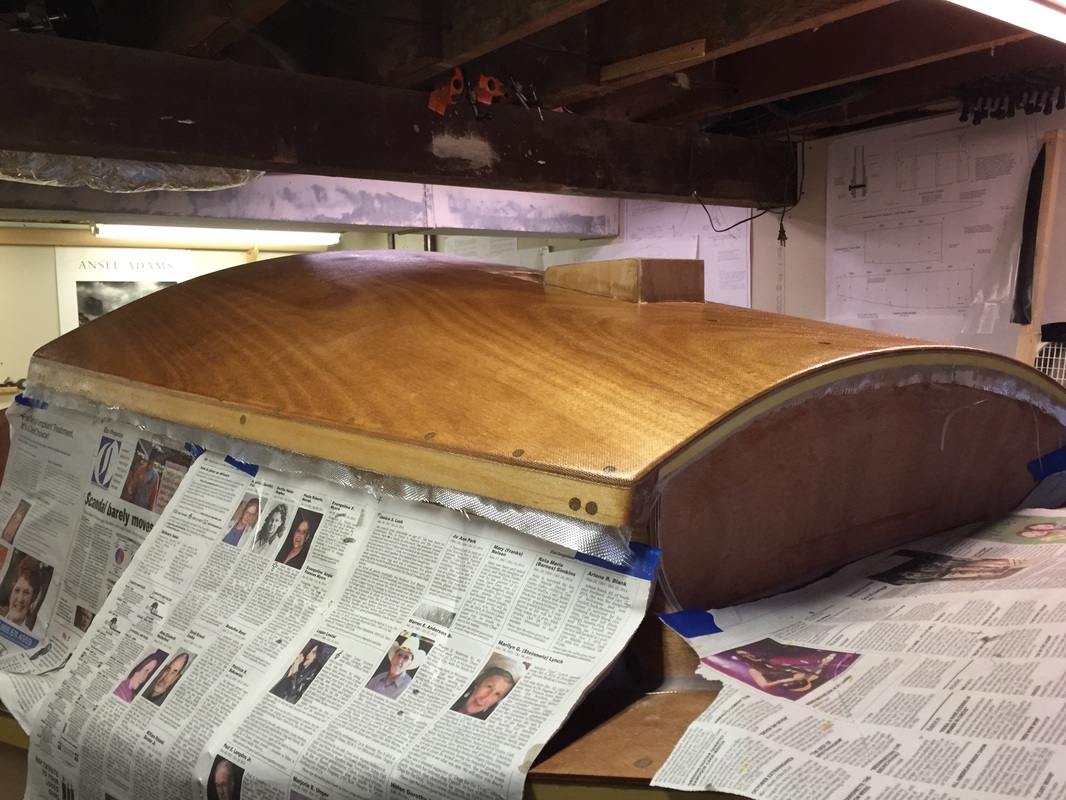
But finally, you get to stand back and aaahhhhhhhh - look at the finished painting.

Picture
Picture

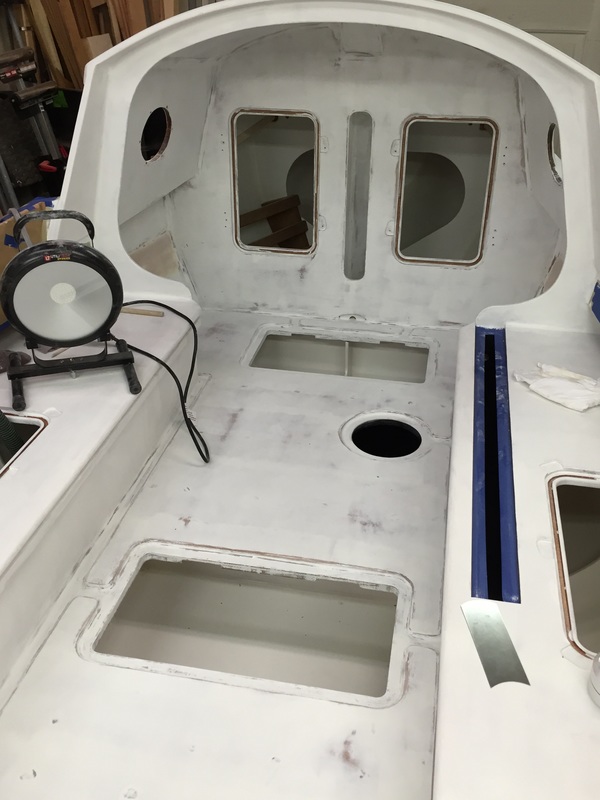
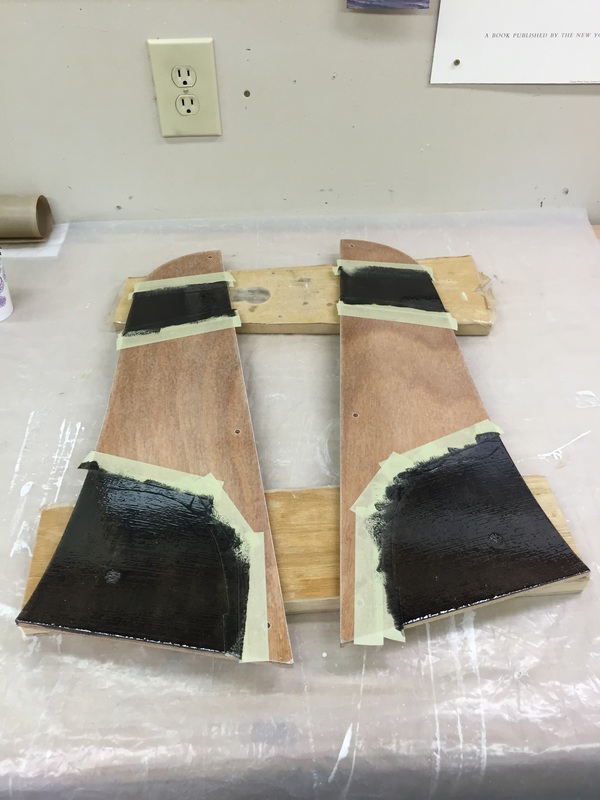
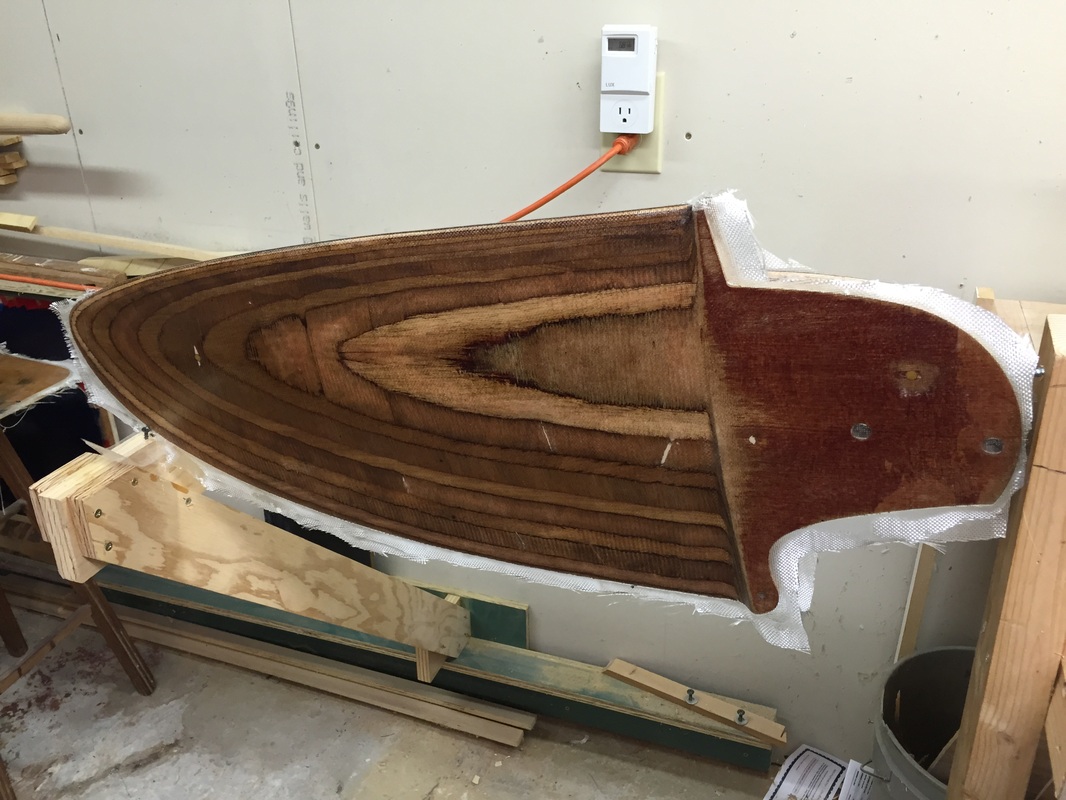
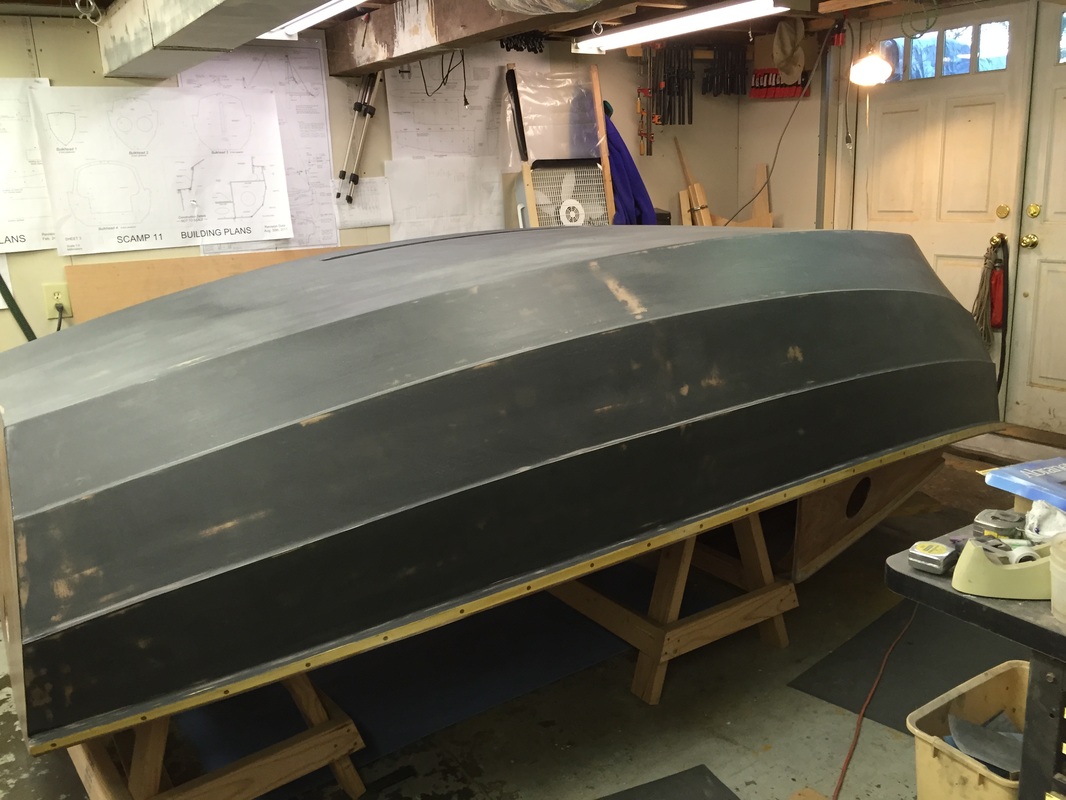
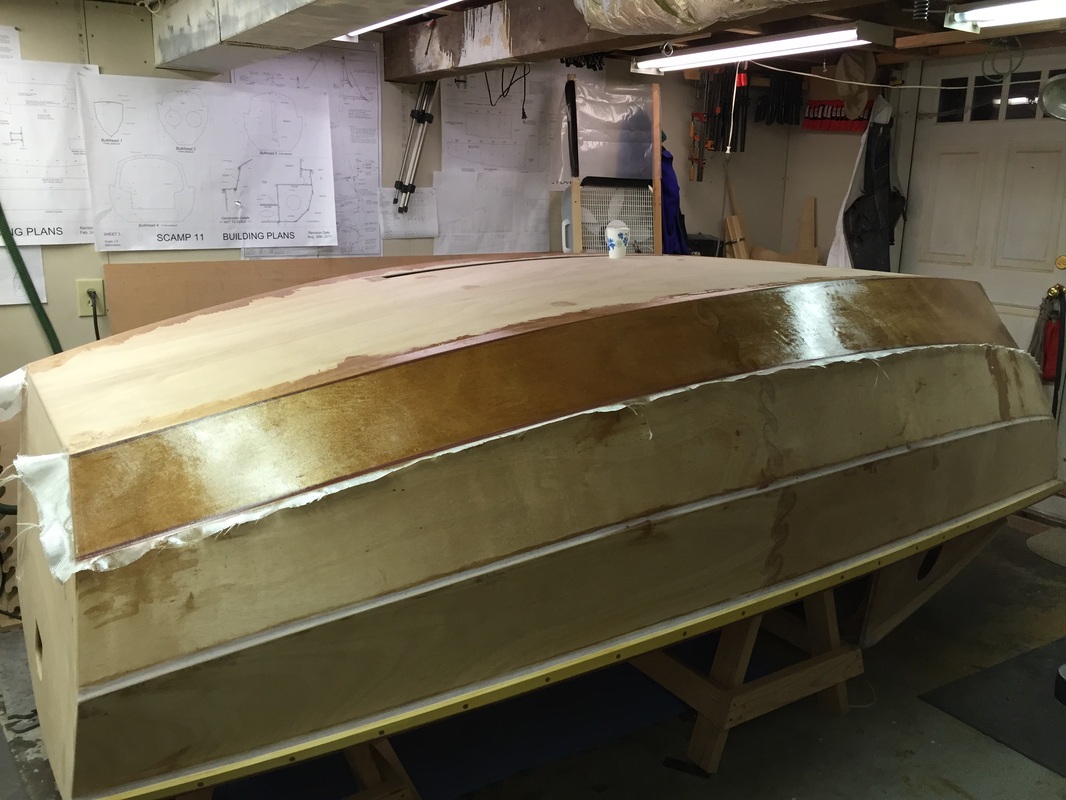
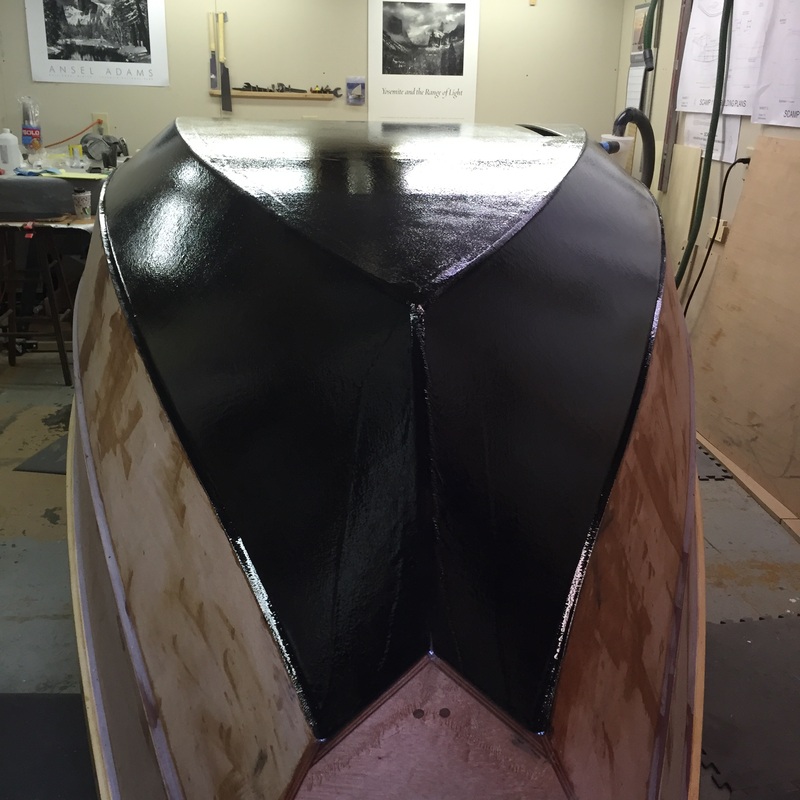
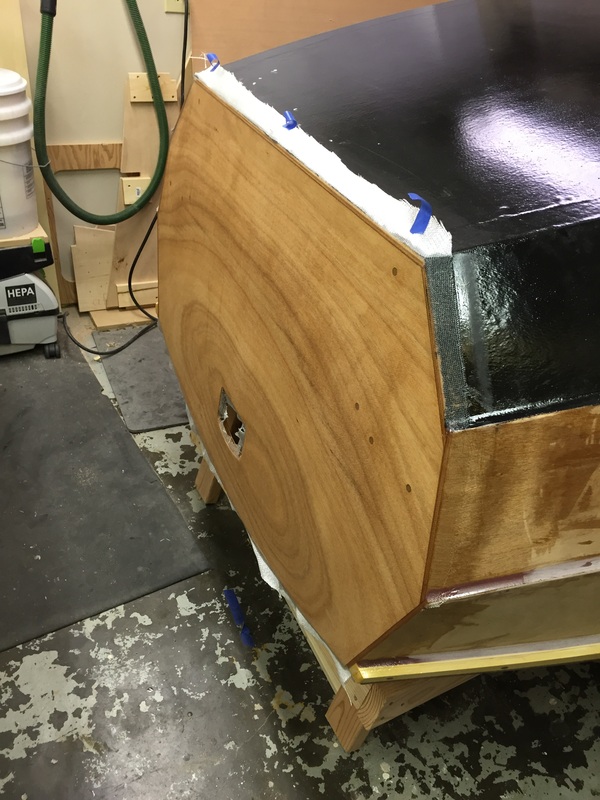
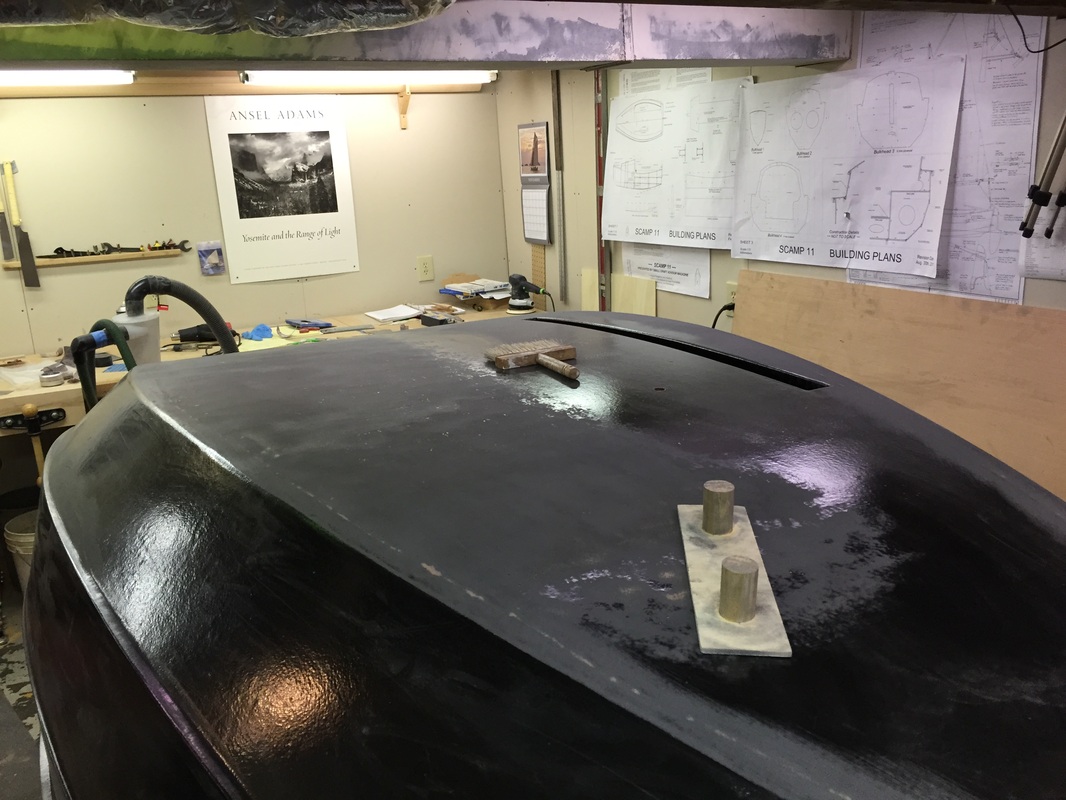
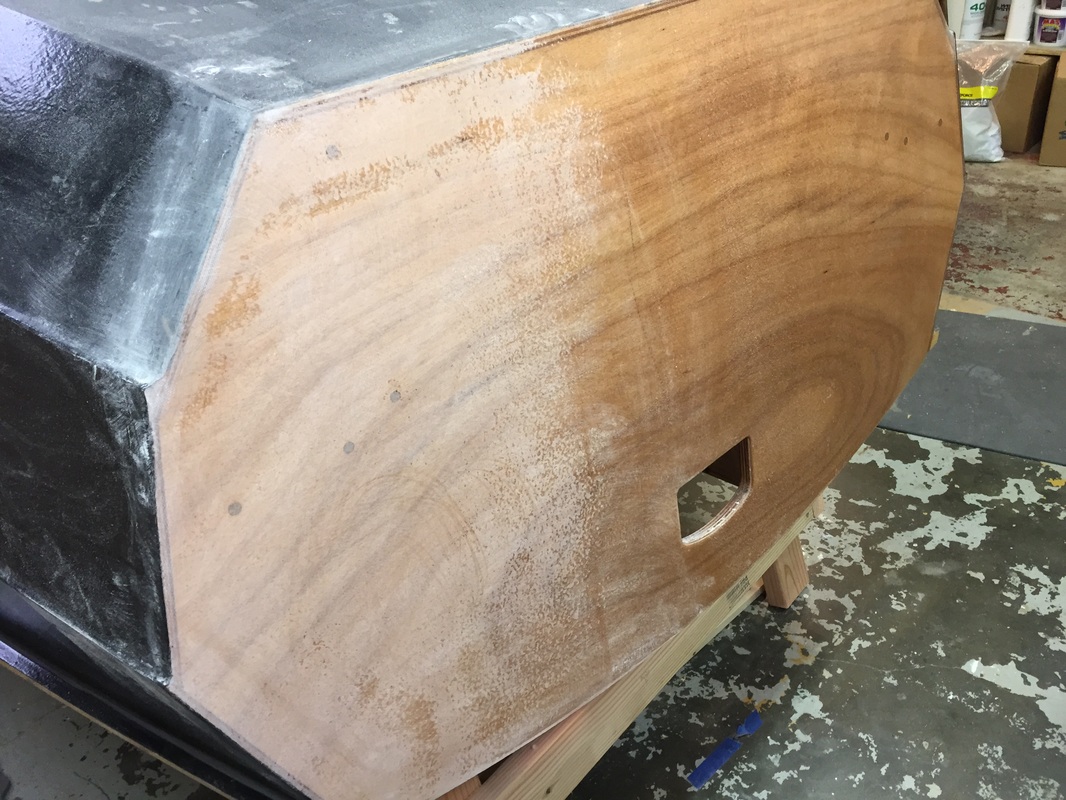
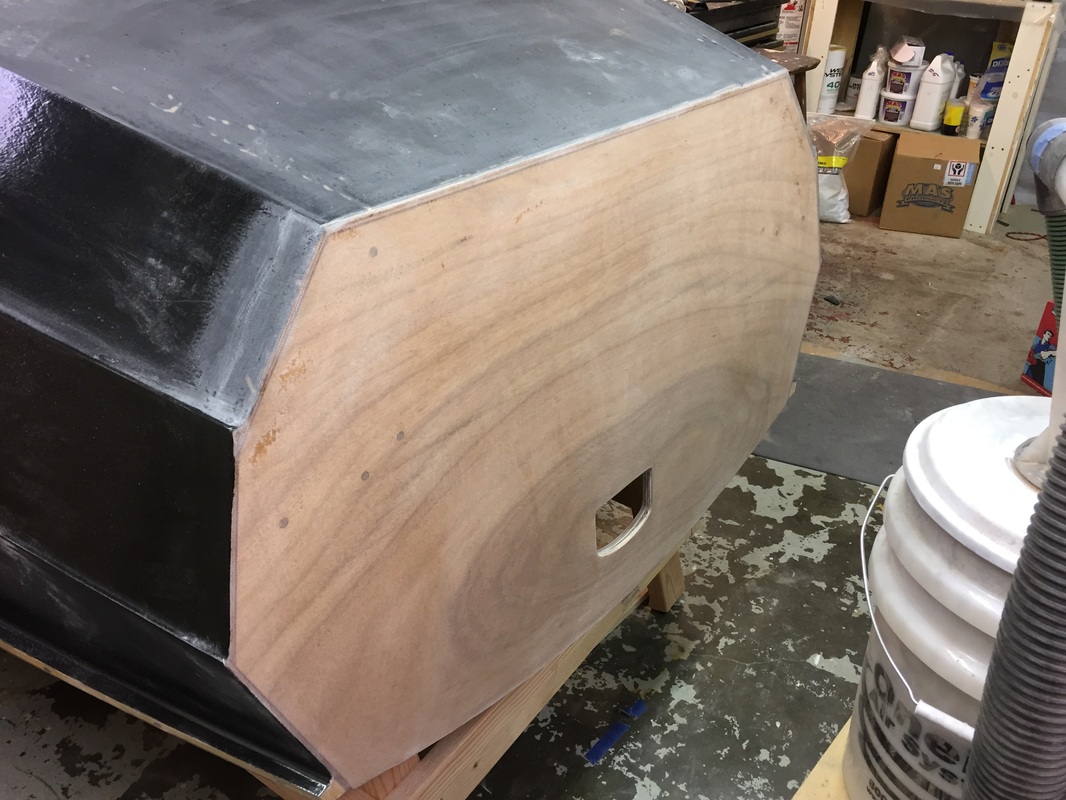
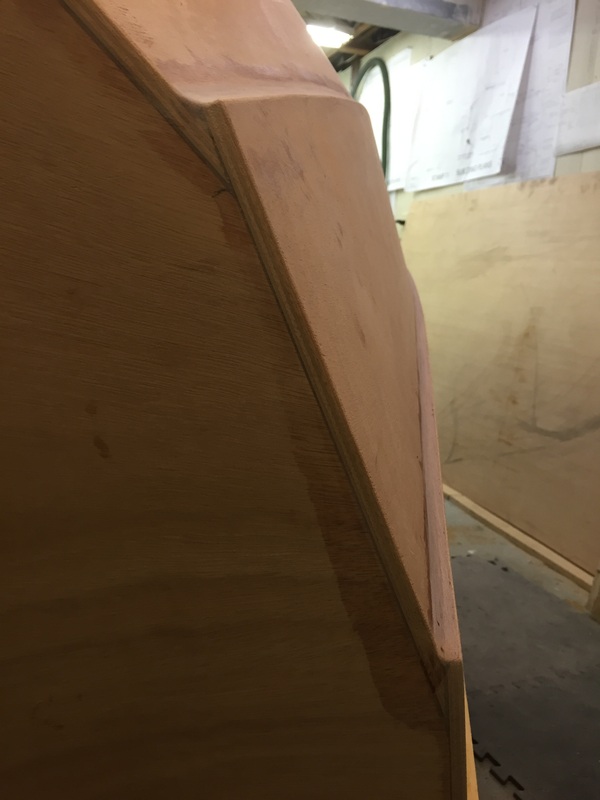
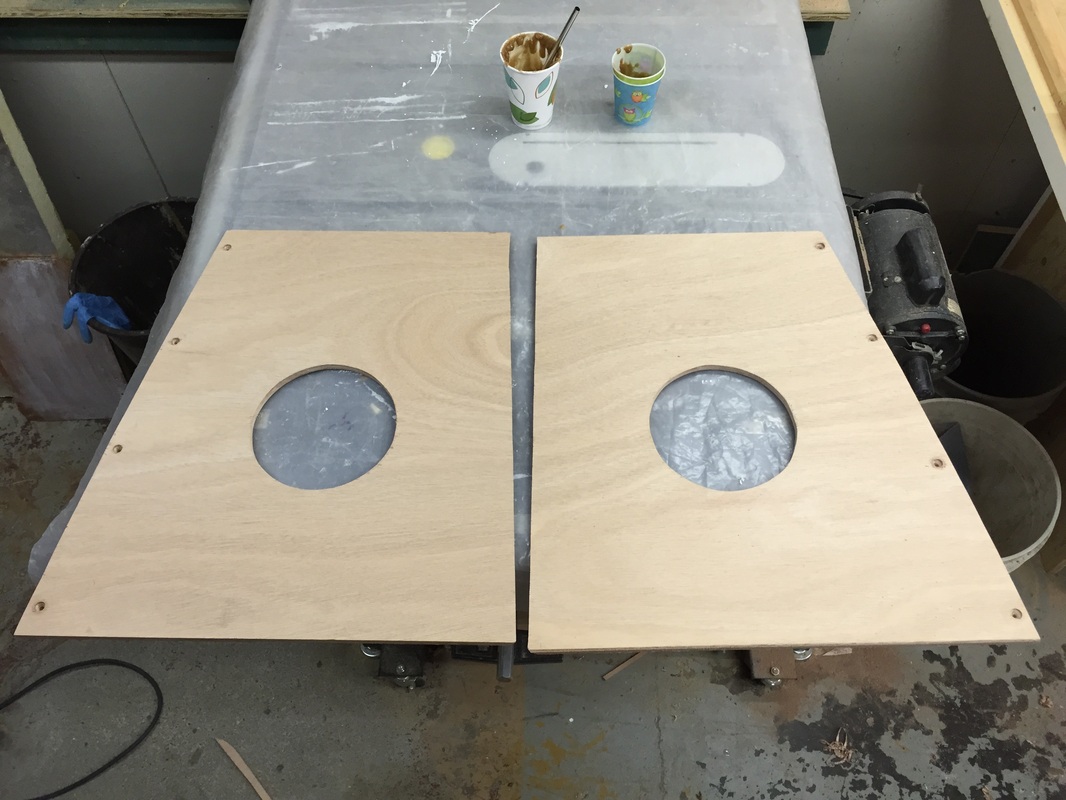
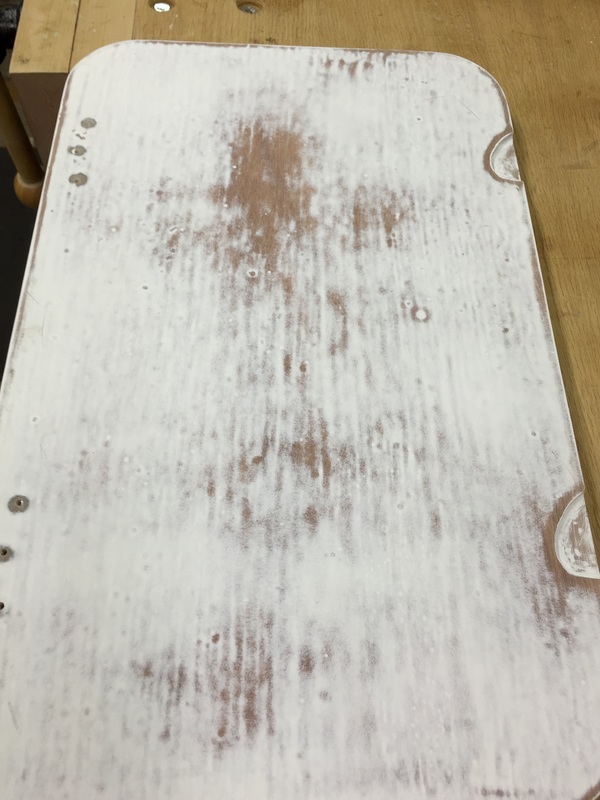
This shot shows what primer does for you. This is one of the hatch covers with one coat of Interlux Pre-Kote primer, after sanding. You can see from the color variations that the primer filled in a lot of variations in the underlying epoxy surface, which resulted in a much smoother surface for the paint.
Picture

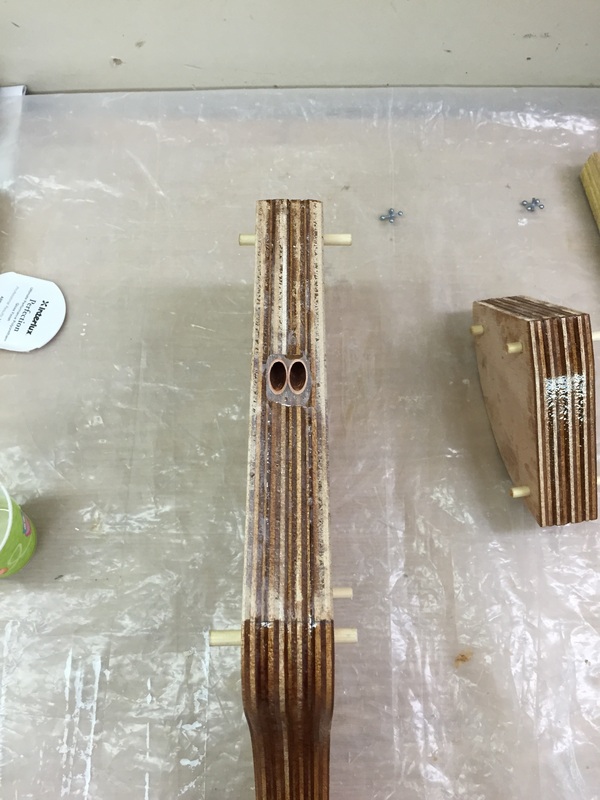
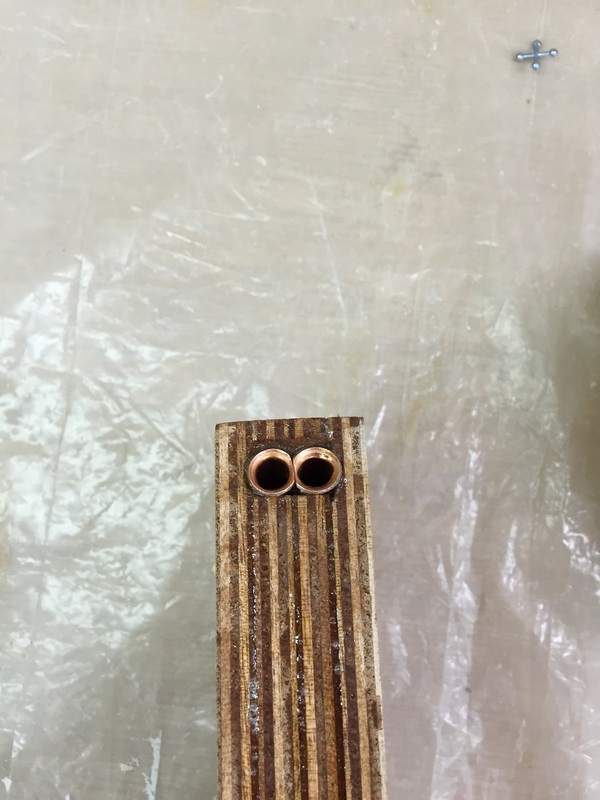
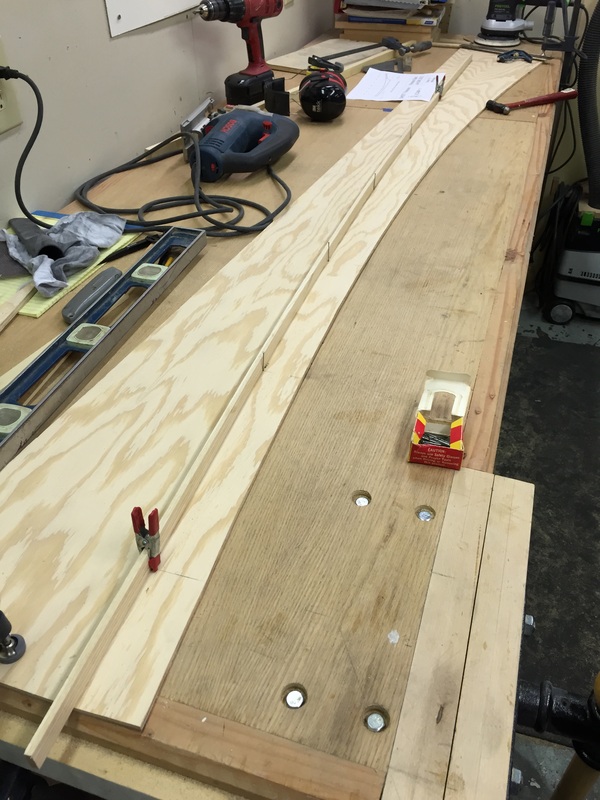
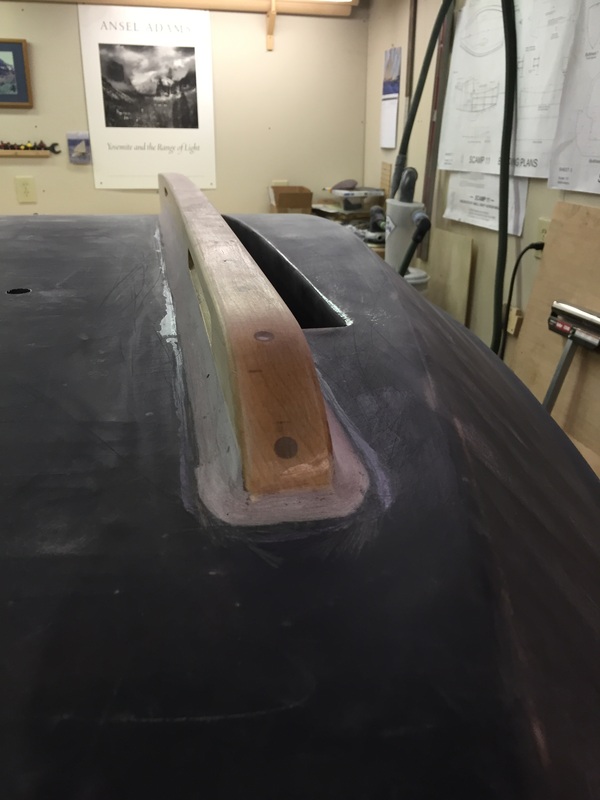
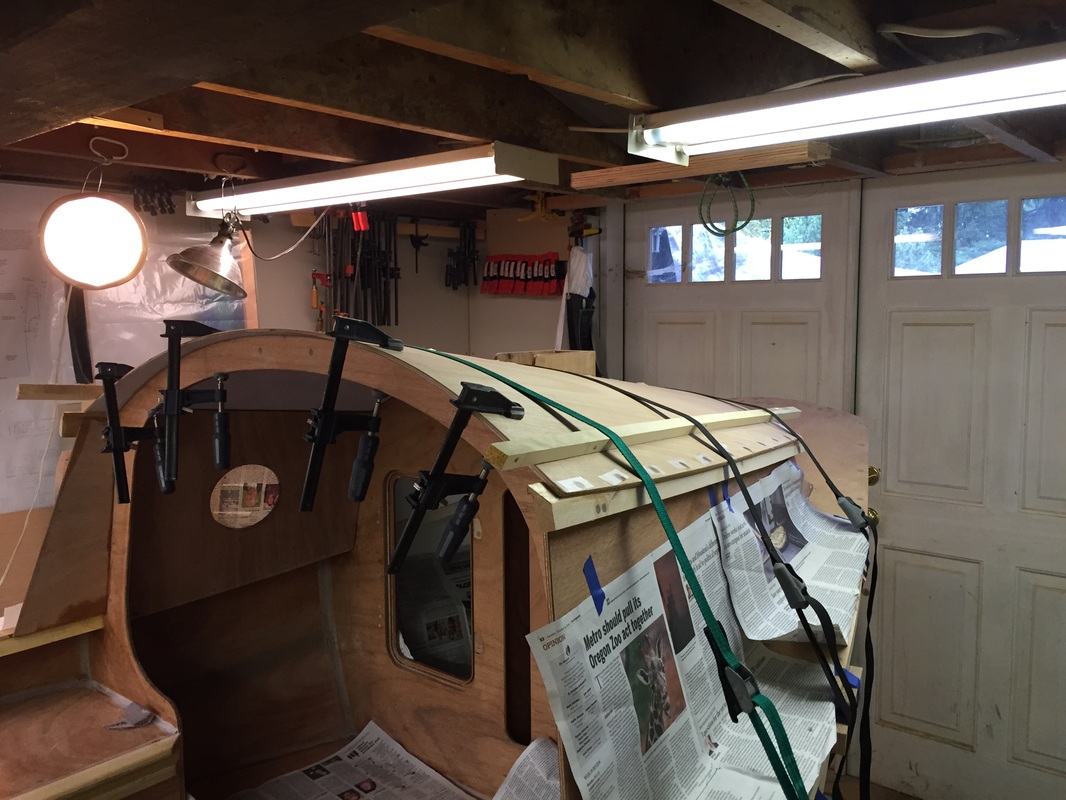
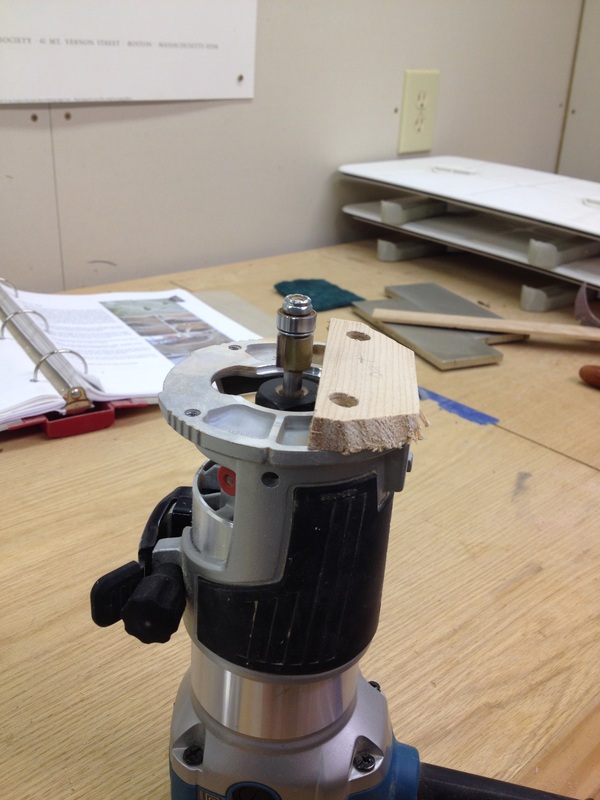
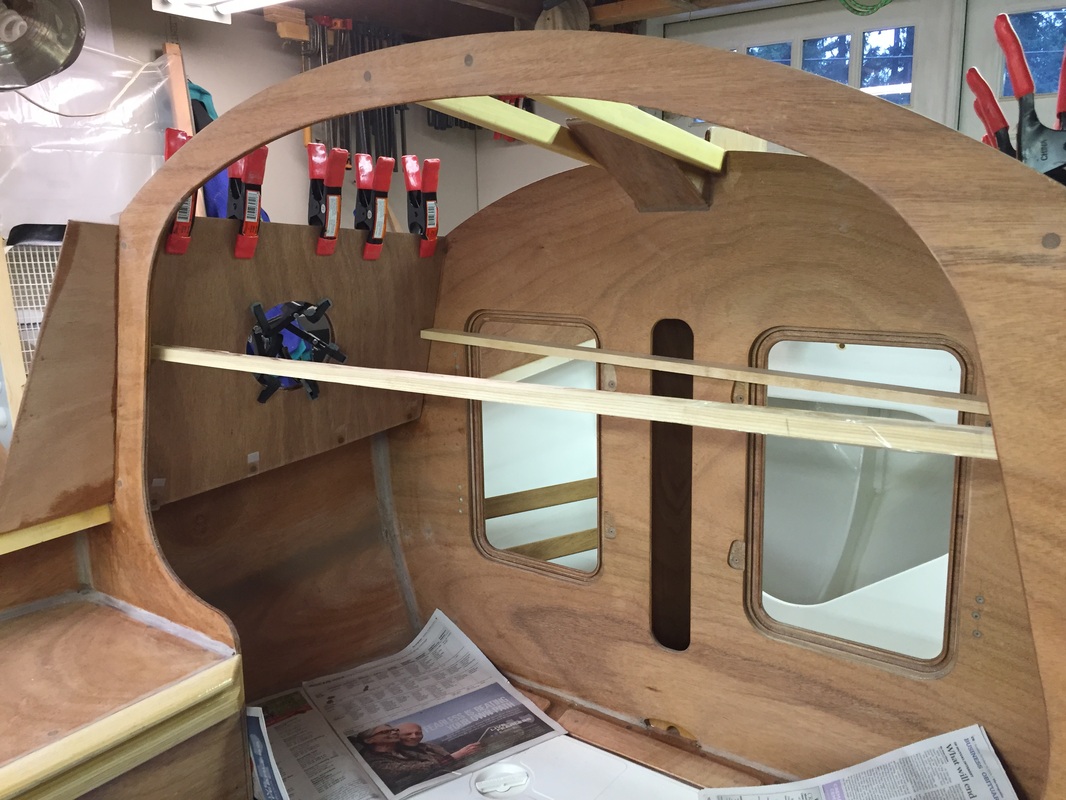
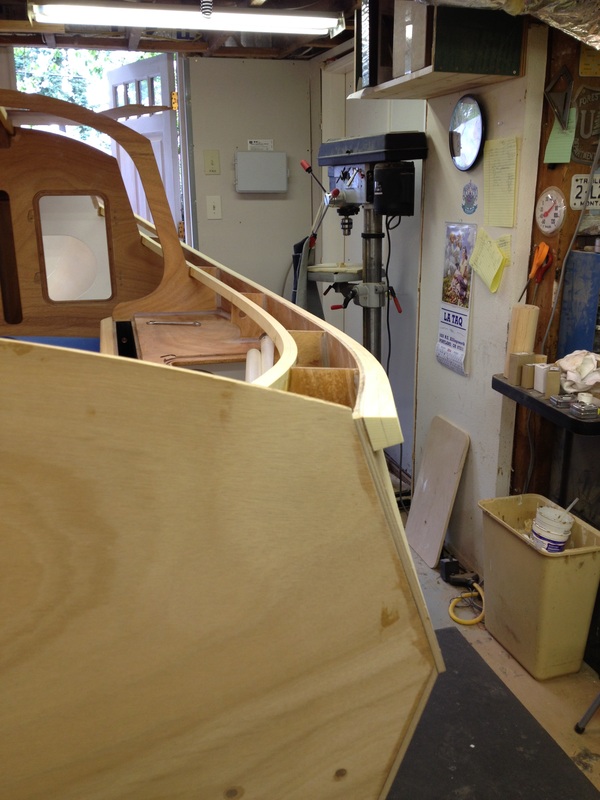
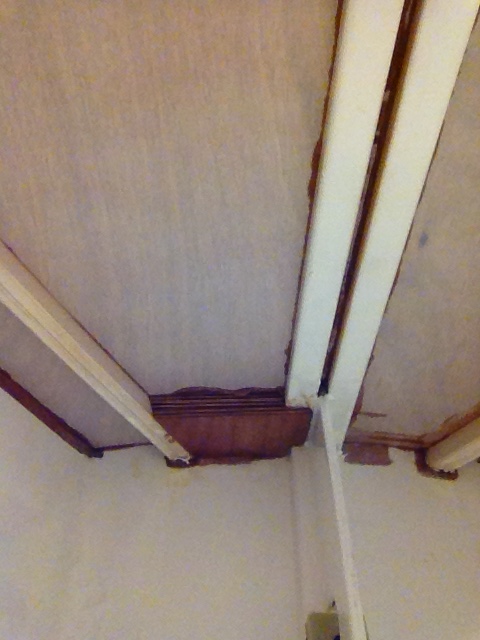
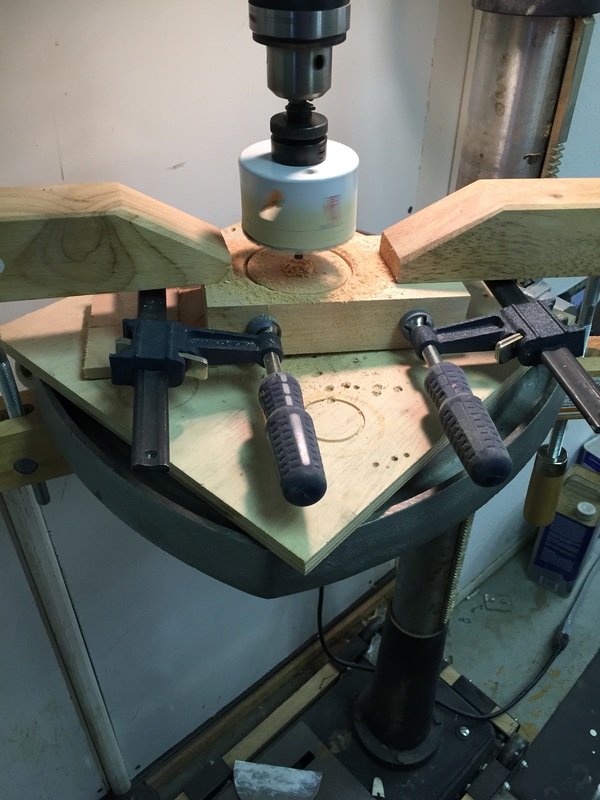
To add the upper support block to the mast, I got a chunk of spruce left over from building the mast, rough cut to size, and ripped it in half. The, I cut a hole using a hole saw on a drill press with the halves clamped together, and supported at a 2.5 degree angle. After some final shaping of the hole with rasps and files, it was ready to glue to the mast.

Although I did not epoxy finish the mast, I did put 3 coats on the support block and on the mast about an inch above and below the block. Epoxy on the block to make it more durable, and on the mast to protect from moisture that might sit at the joint.
Picture
Picture
Picture
Picture
Picture
Picture

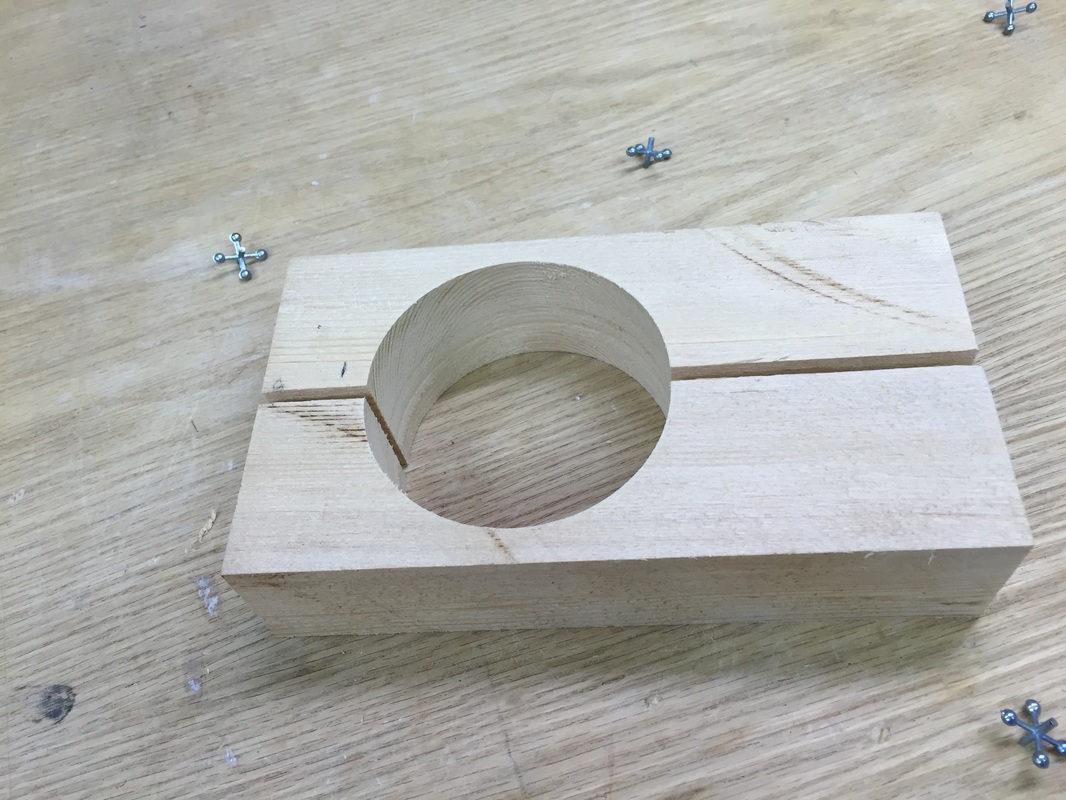
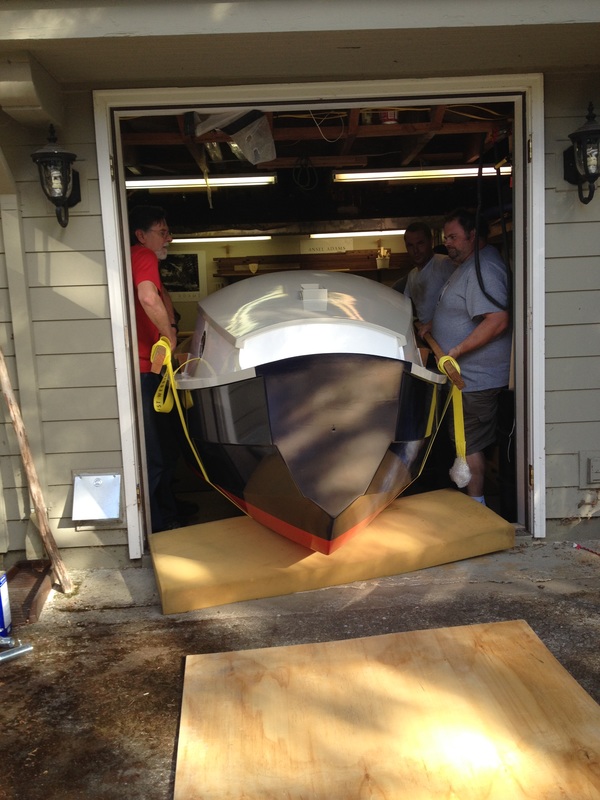
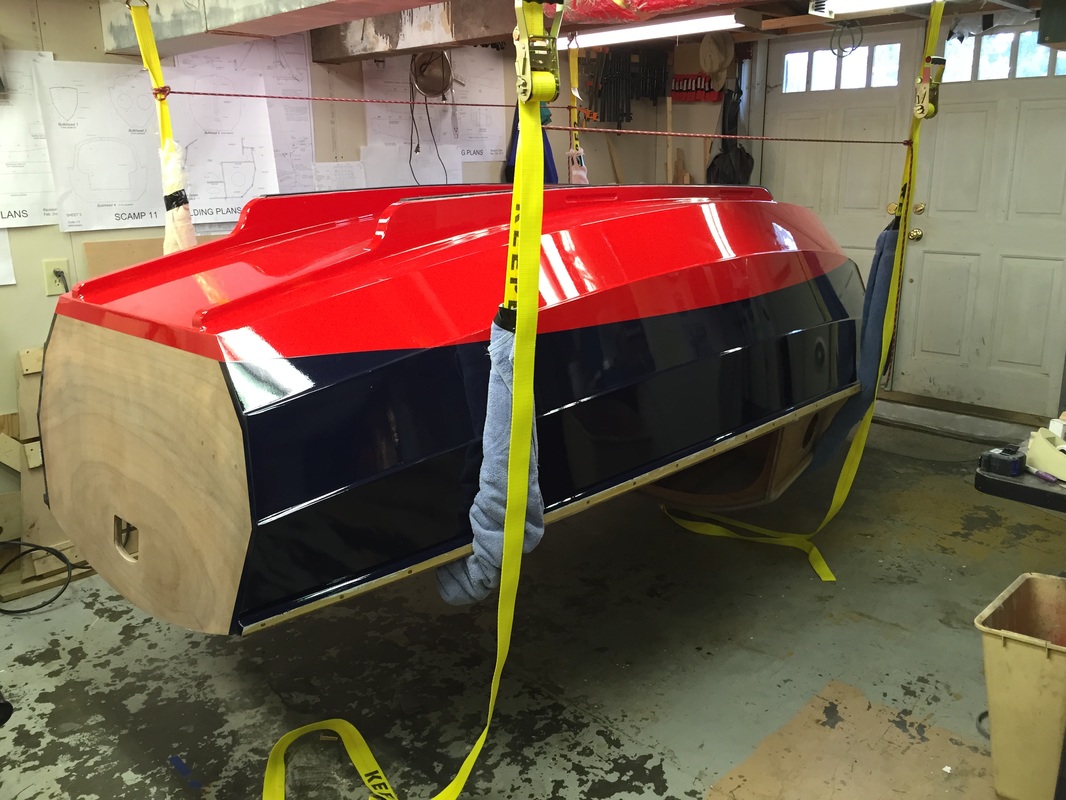
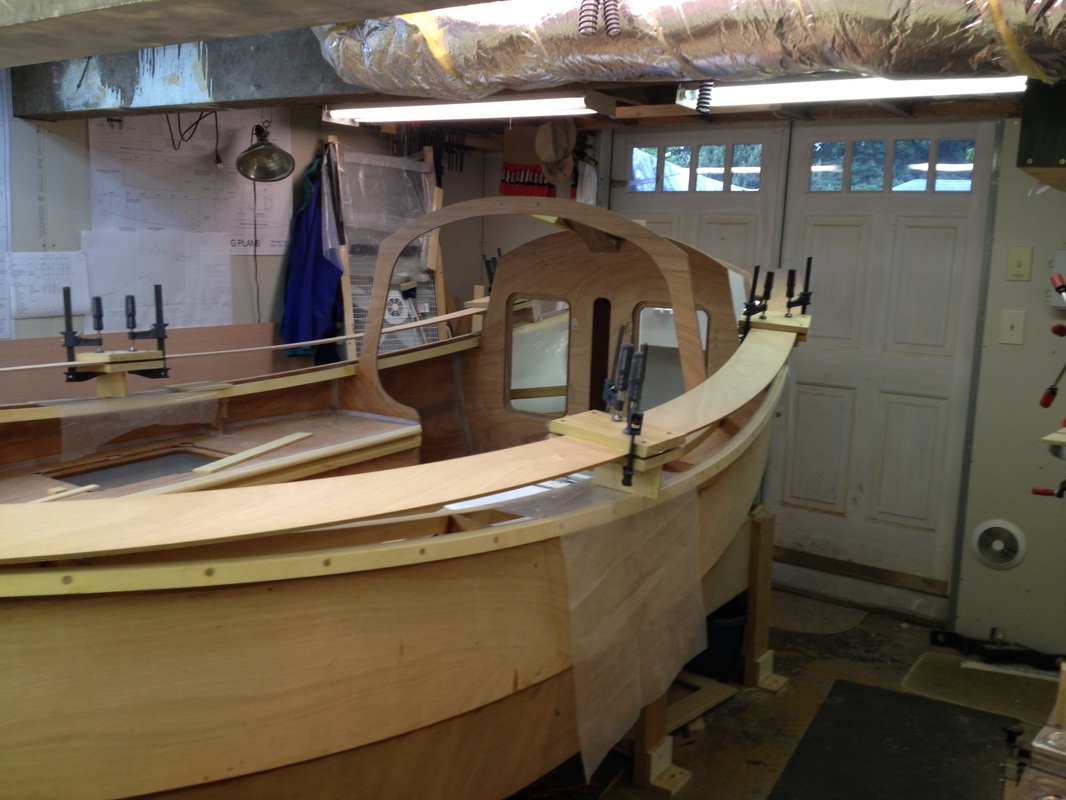
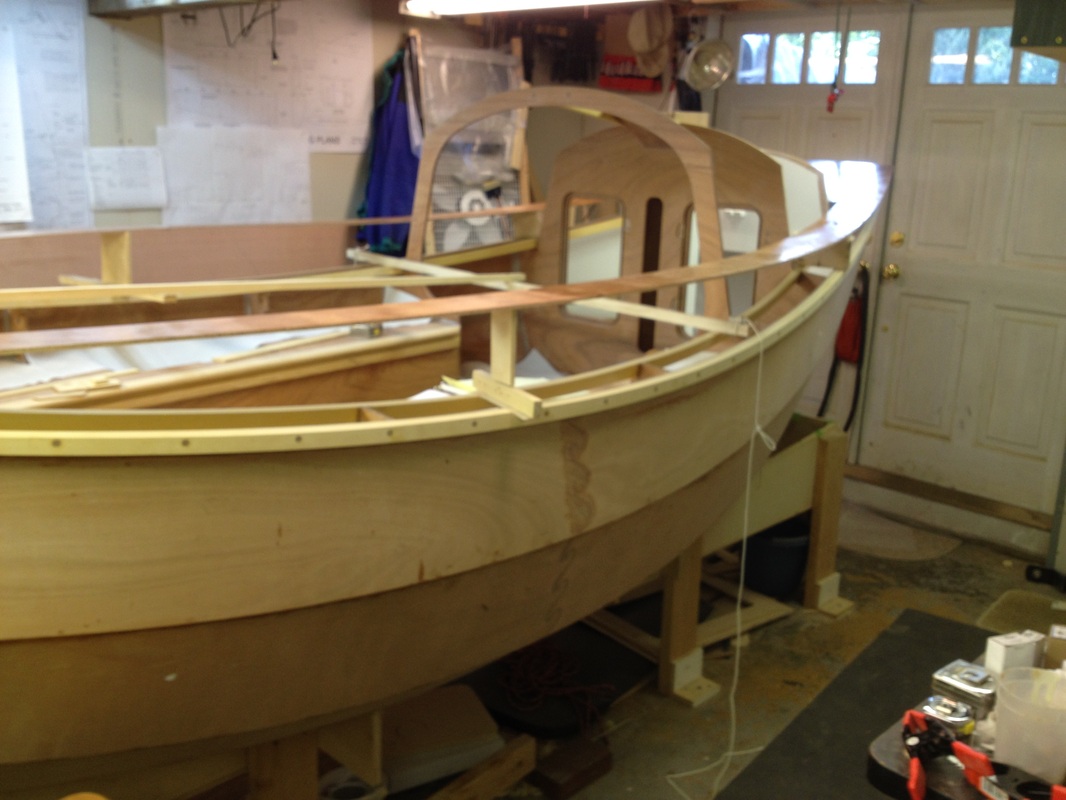
Finally, the day to bring her outside arrived. Neighbors were enlisted, stretching was done, and all appeared to be ready for the emergence of the cute little boat.

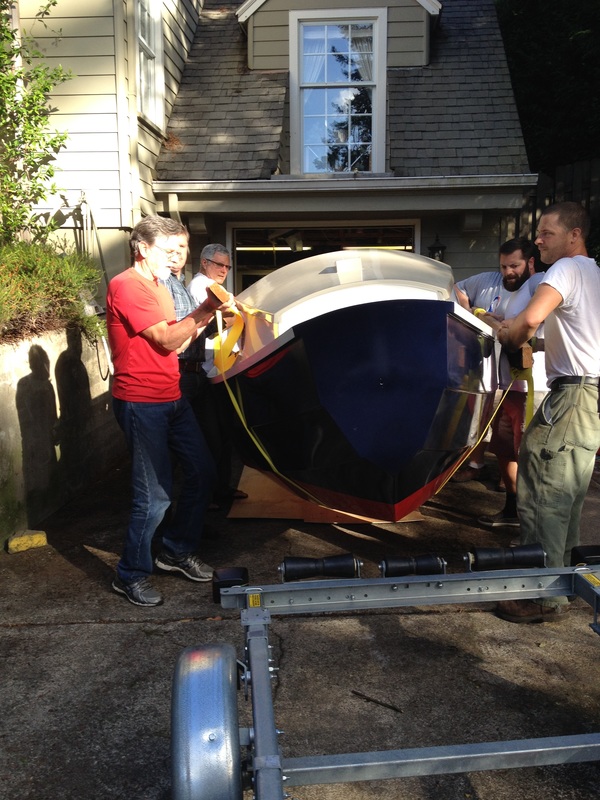
We used the same straps used to turn her, but this time fastened to two by fours at about the right height for lifting. With three burly guys on each side, and with the outside doors removed to gain a few more inches of needed clearance, we proceeded to inch her towards her trailer, waiting on the driveway outside. We had to stop a couple times to allow the front most hefters to run upstairs and out the front door to continue, as there wasn't room to squeeze by the hull in the doorway. Then, after a final OOMMPH, she was lifted up onto the trailer and rolled over to her own personal tarp garage. All went well, nobody hurt themselves, and most importantly, we didn't drop the boat!

Next up - rigging! The seemingly endless process of adding bits and bobs, and finally all the string with which we will control the sail, and other assorted parts.


Picture
Picture
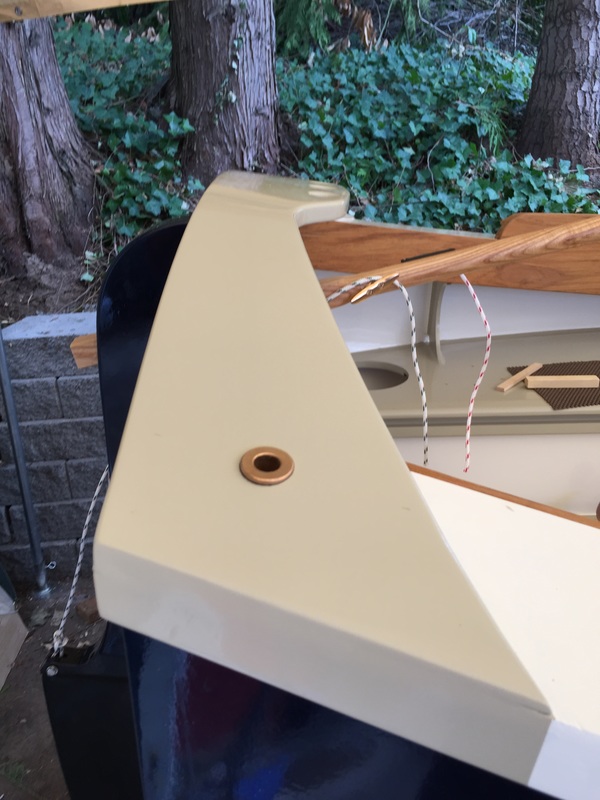
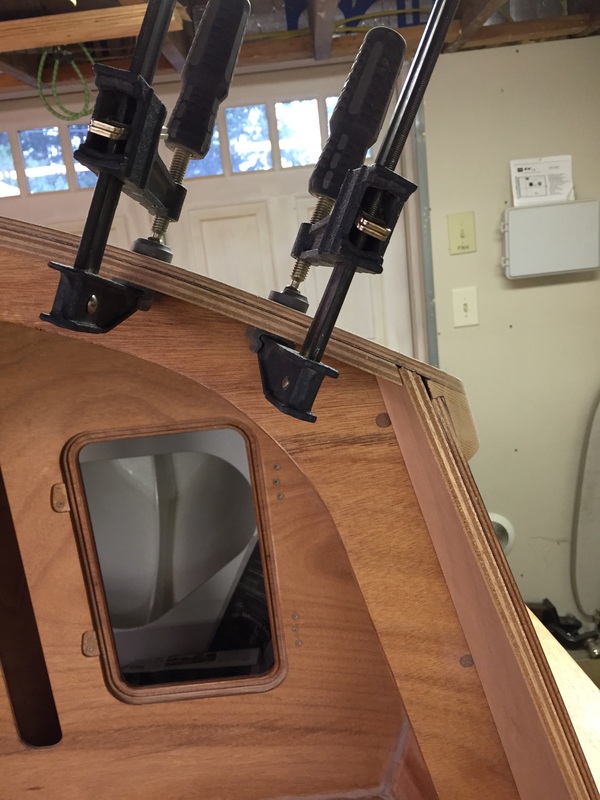
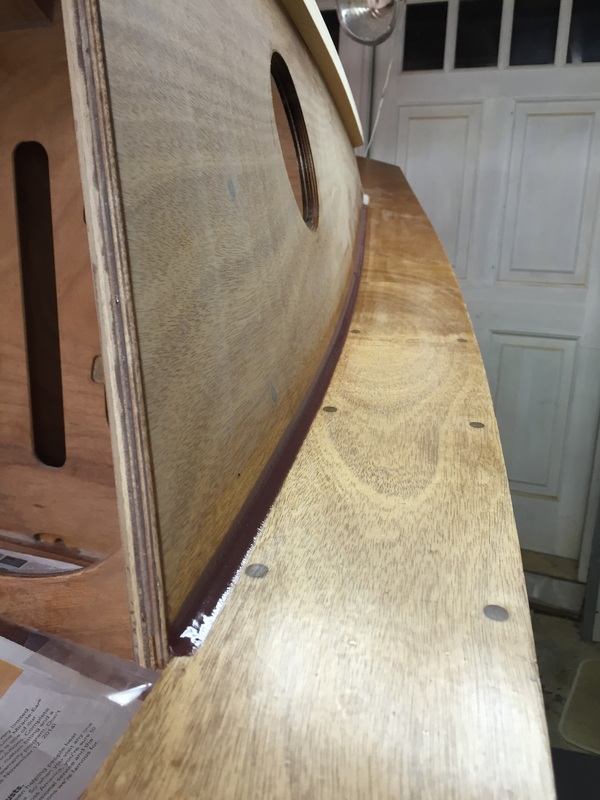
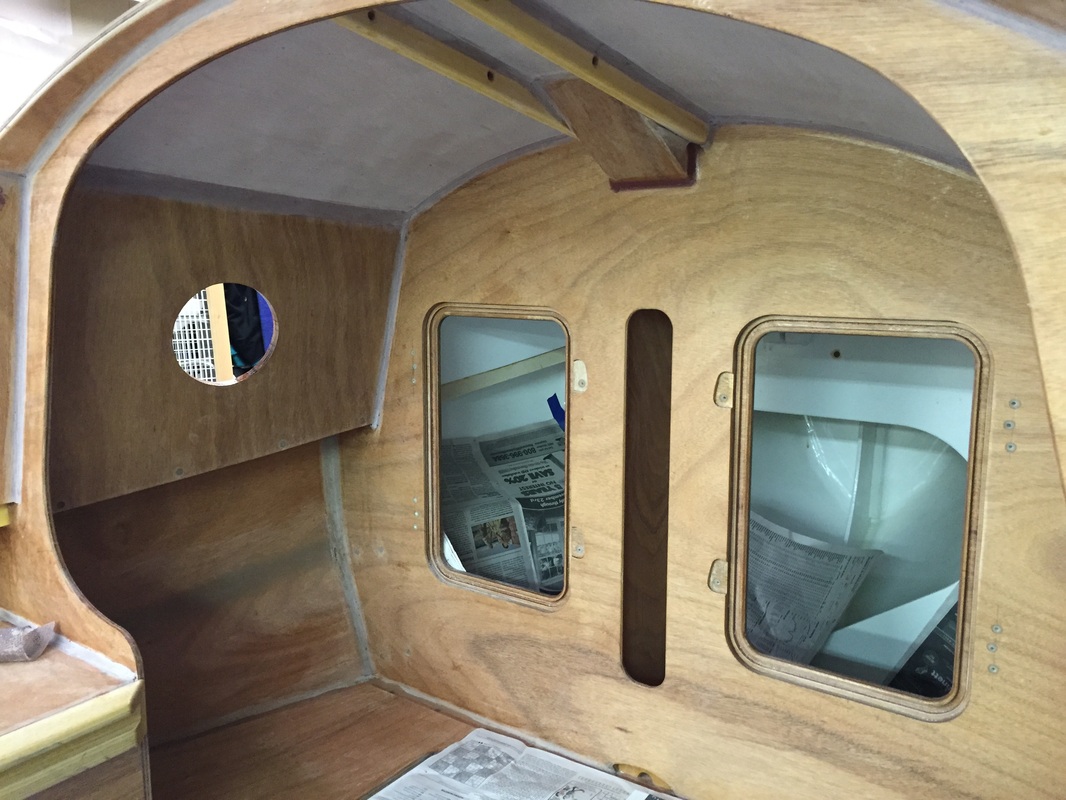
Deck cleats, port lights, and a brass chafe strip were added.

Picture
Picture

I added Kiwi-Grip non-skid paint to sections of the sole. After doing a practice session with the "paint" on a scrap piece of plywood, I thought I was ready. But, larger sections are harder to coat evenly, as time is pressing. And you need to pull the masking tape off right after applying the paint, and it is very easy to either 1) mess up an edge while pulling the tape or 2) get the wet paint from the tape on something that shouldn't get it. Suffice it to say, some cleanup was required afterwards. Overall, though, I am pleased with the result.


Picture
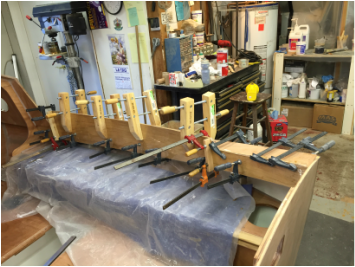
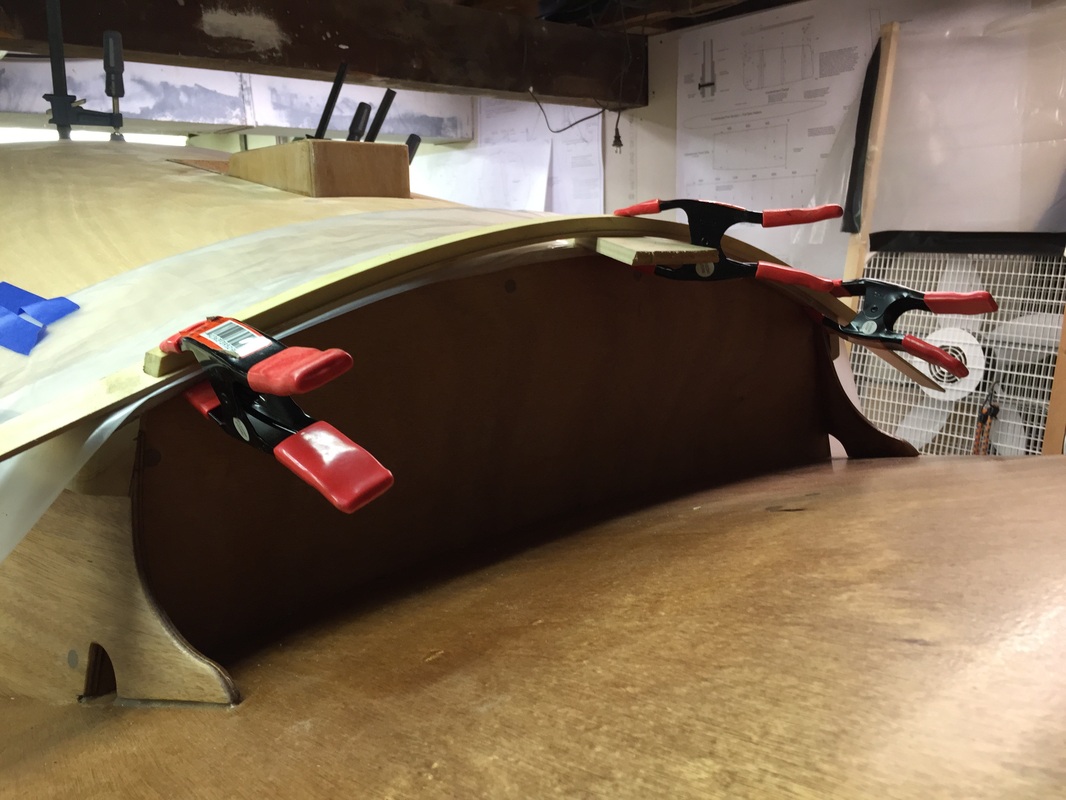
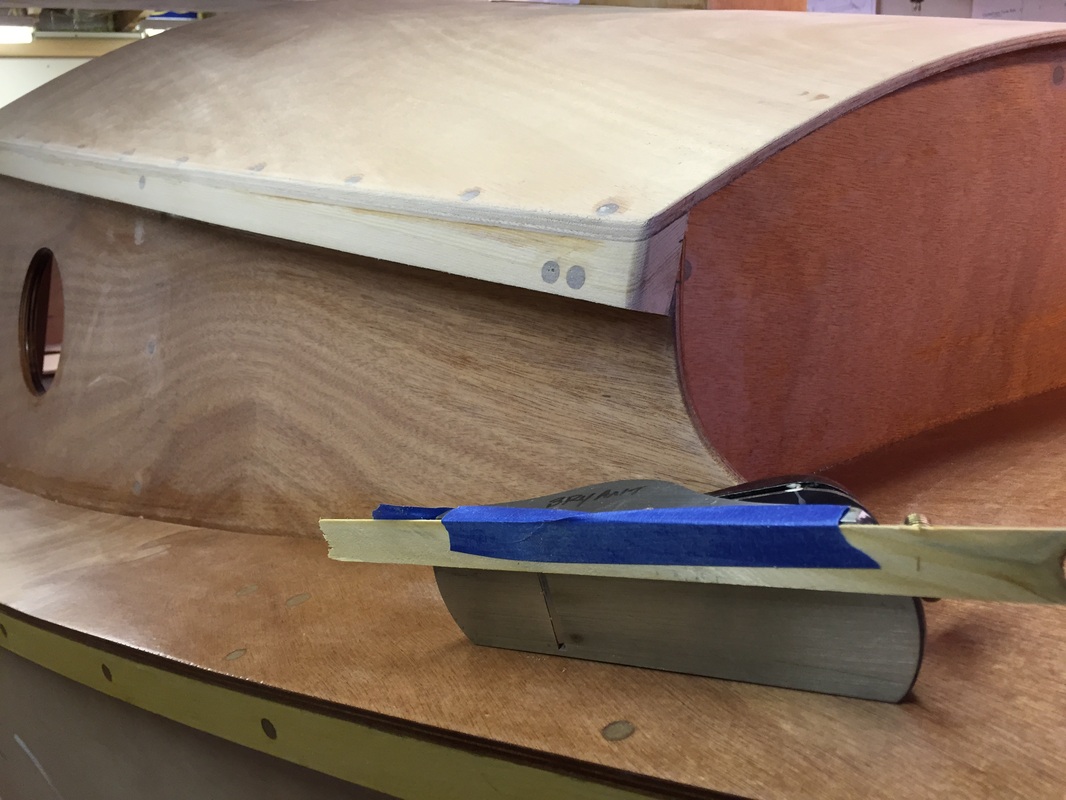
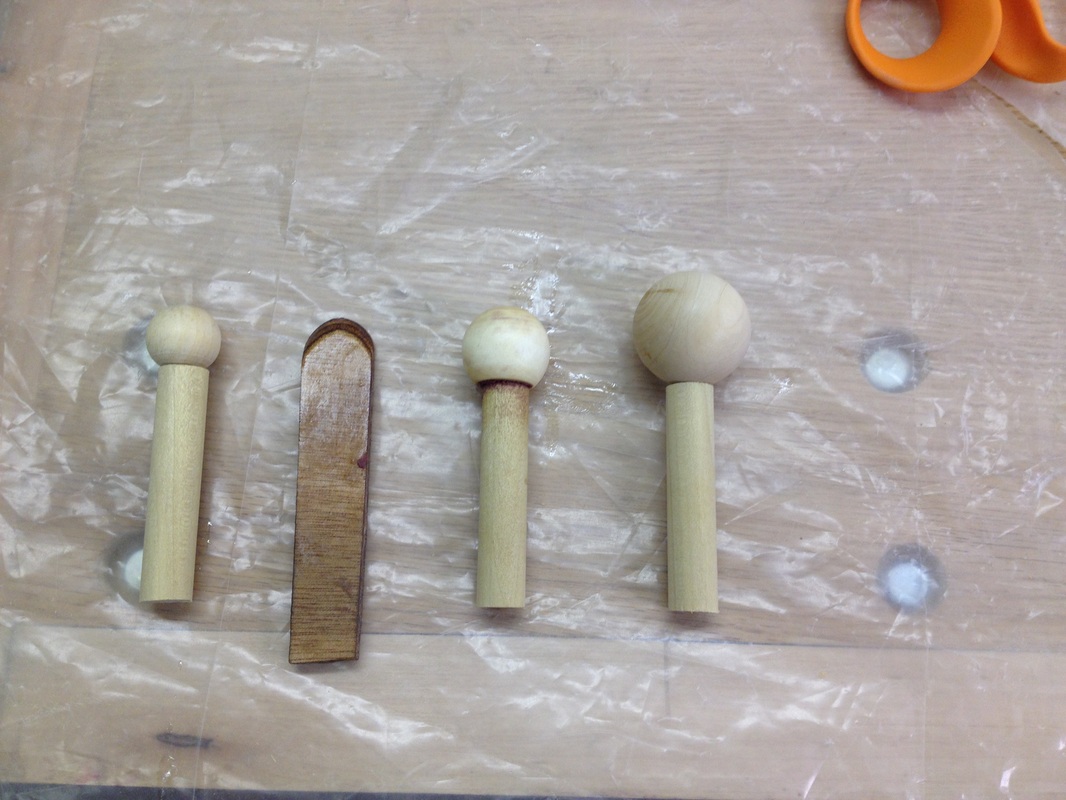
And then we proceeded to varnishing the spars. While each coat didn't take all that long to do, there were 10 of them, so it stretched on and on.

I supported each spar from its end with a nail driven into a too-small hole so I could rotate the spar while finishing. The nails are supported by a piece with a notch. The holes are filled with epoxy afterwards, and (will be) varnished.

Since I did the varnishing, I discovered that one can hot-coat varnish, and get perhaps two coats on per day. And better yet, without sanding between coats (glory be!). AND, you can roll and tip! I got this from a varnishing workshop at the recent Wooden Boat Festival at Port Townsend. Good info for the next varnishing project.
Picture

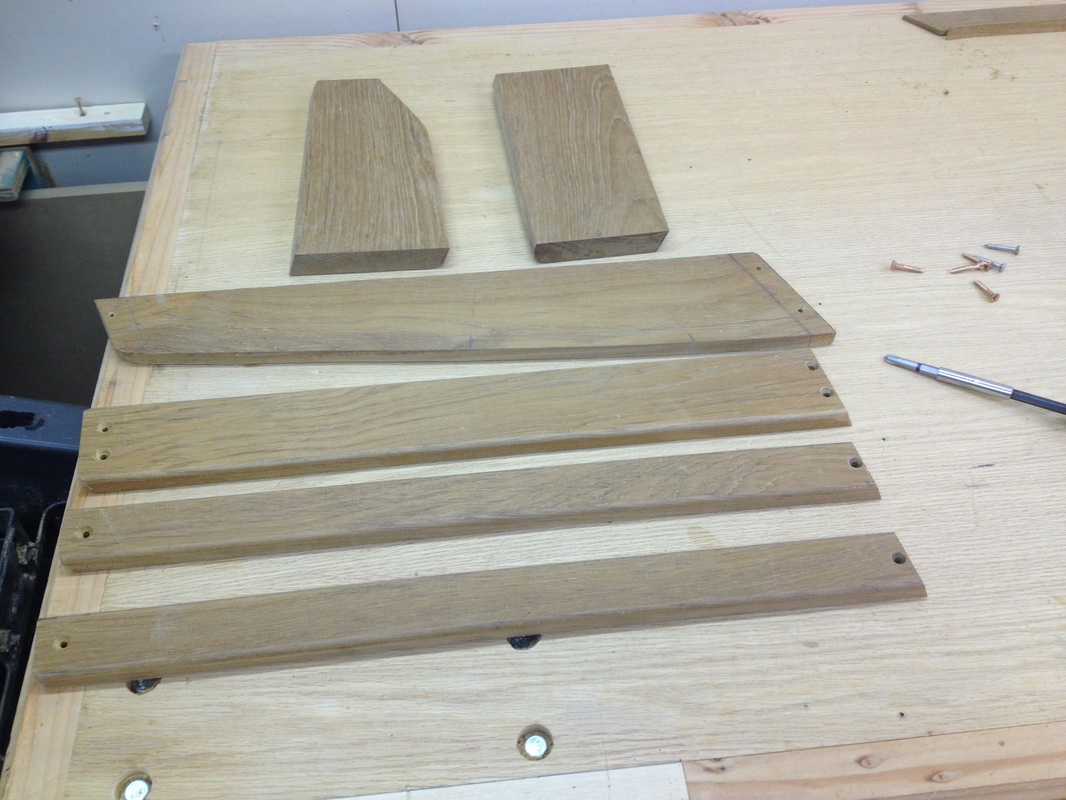
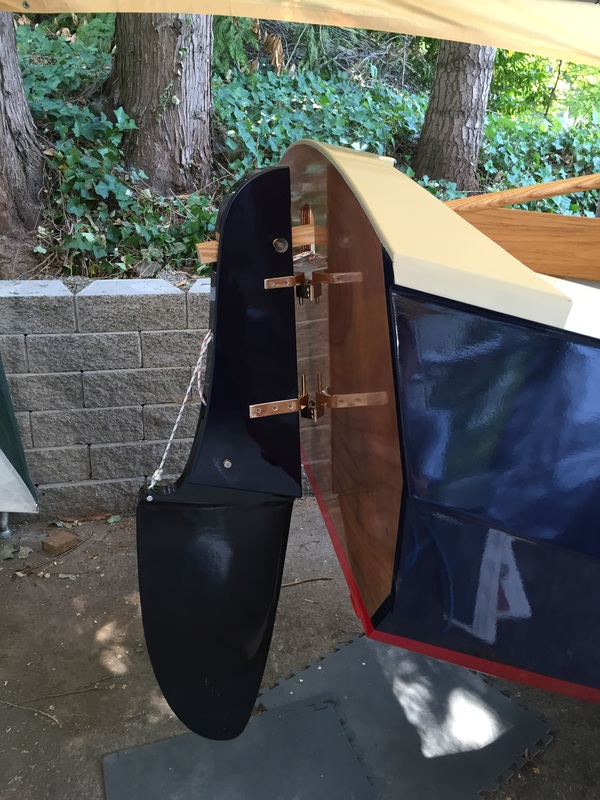
And the rudder gear was mounted to the rudder head and to the transom, up and downhauls mounted, and a tiller created.

The tiller is one of the projects deferred until winter, so I bought a post hole digger handle at the hardware store, glued a wedge to the aft end and drilled a hole for the fast pin. Voila - $12 tiller.

One change I have made to the rudder is to glue a scrap of yoga mat to the upper forward top edge of the blade, where it contacts the bottom of the rudder head. I found that the downhaul doesn't hold the rudder down firmly enough, and it clunk clunk clunks against the head in any chop. I may move the connection point of the downhaul forward on the top of the rudder this winter, but the yoga mat padding takes care of the problem for now.

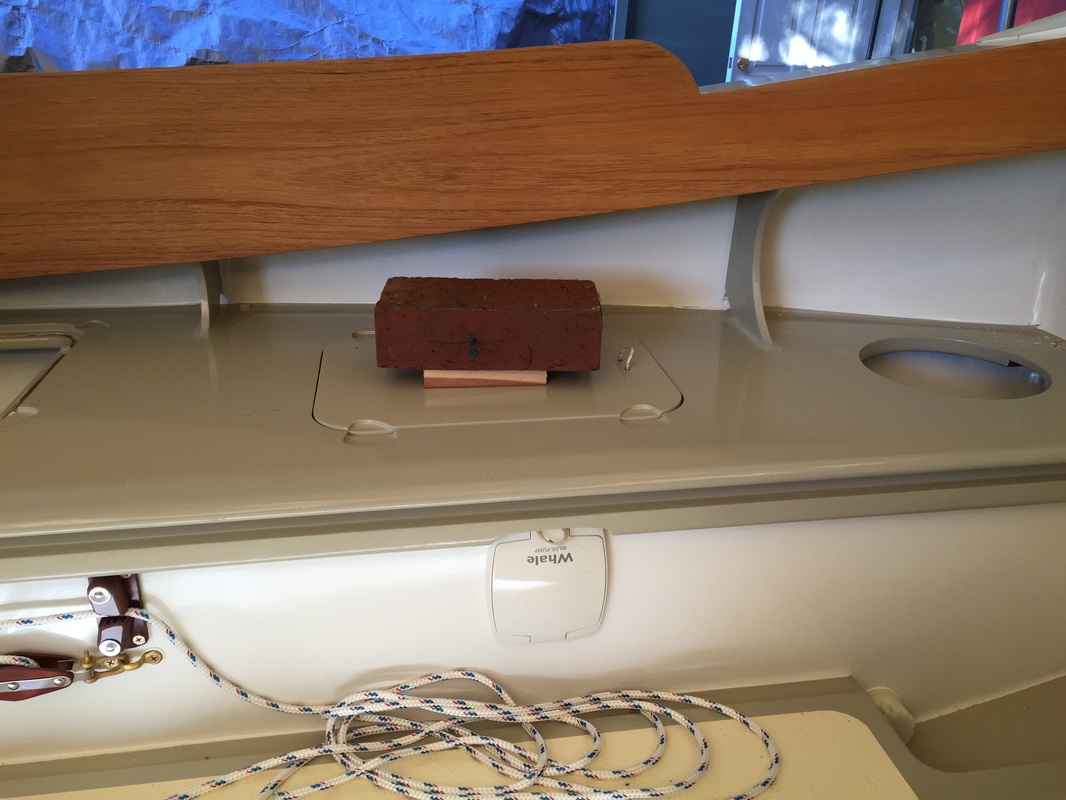
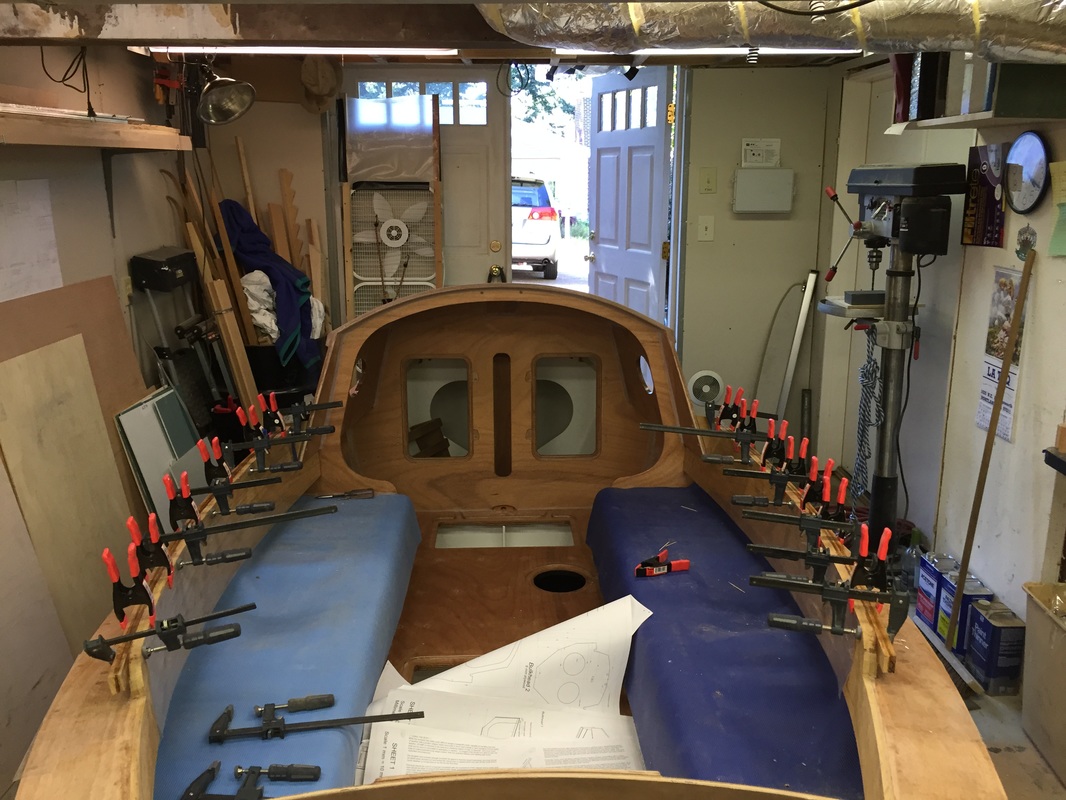
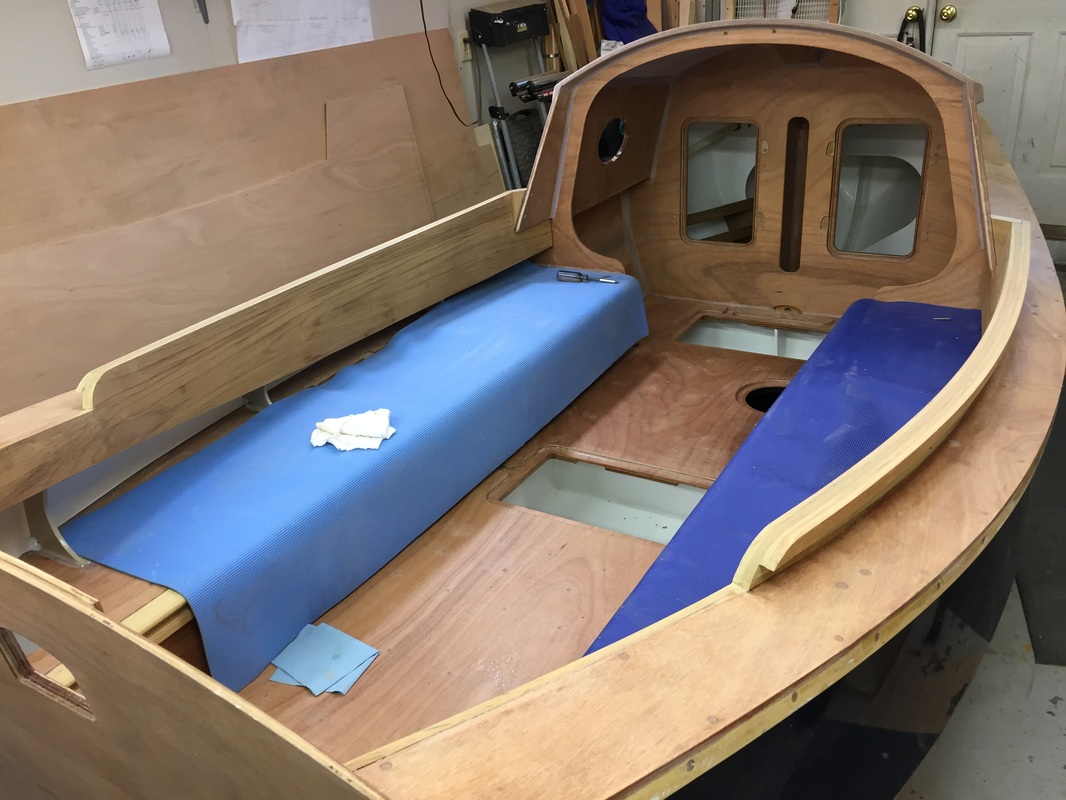
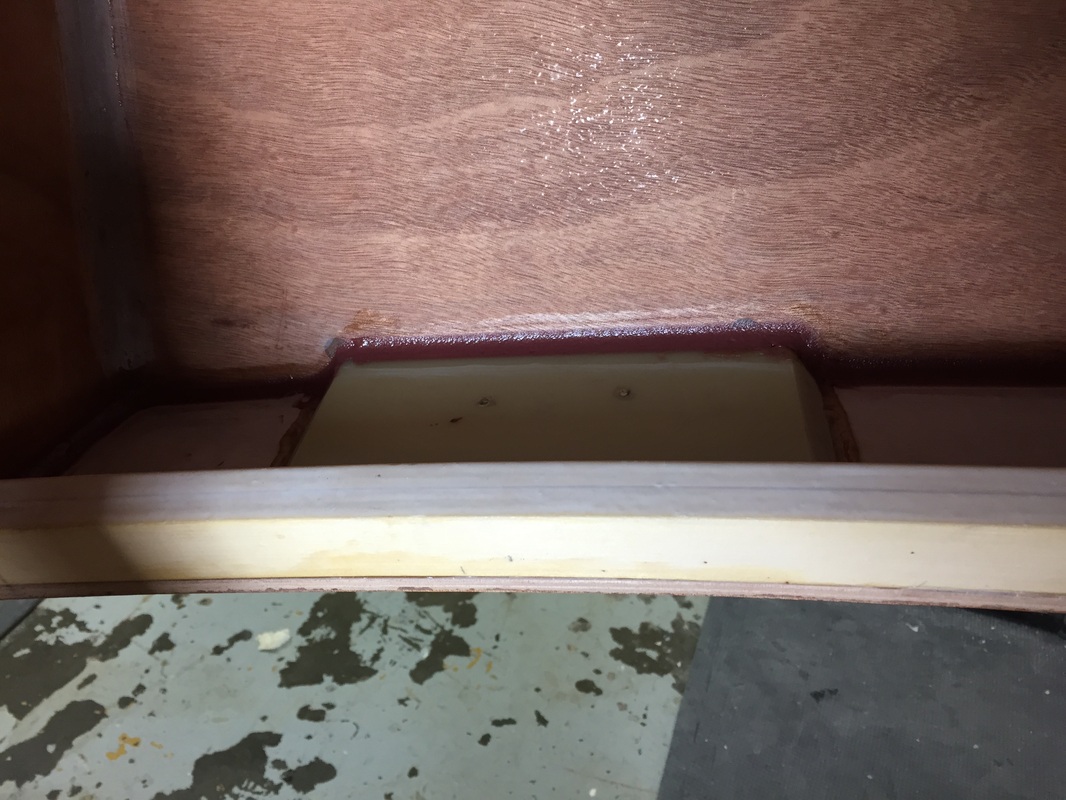
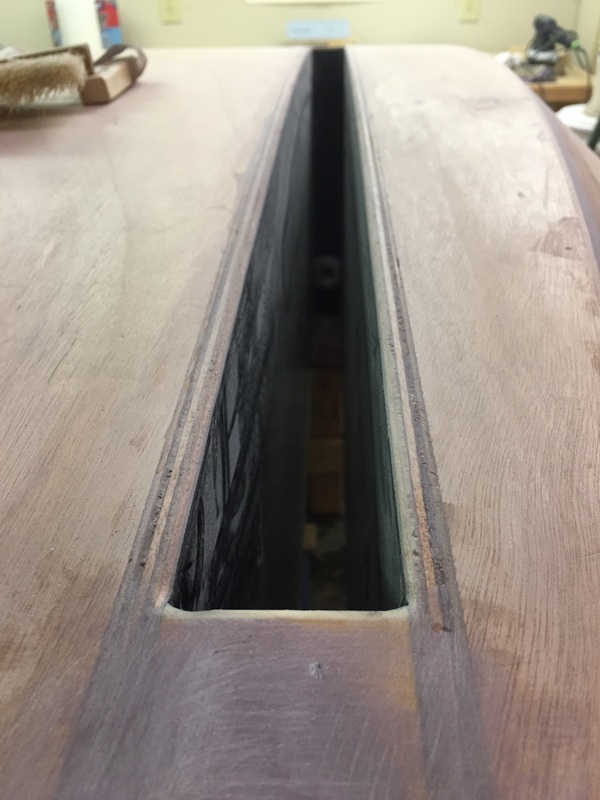
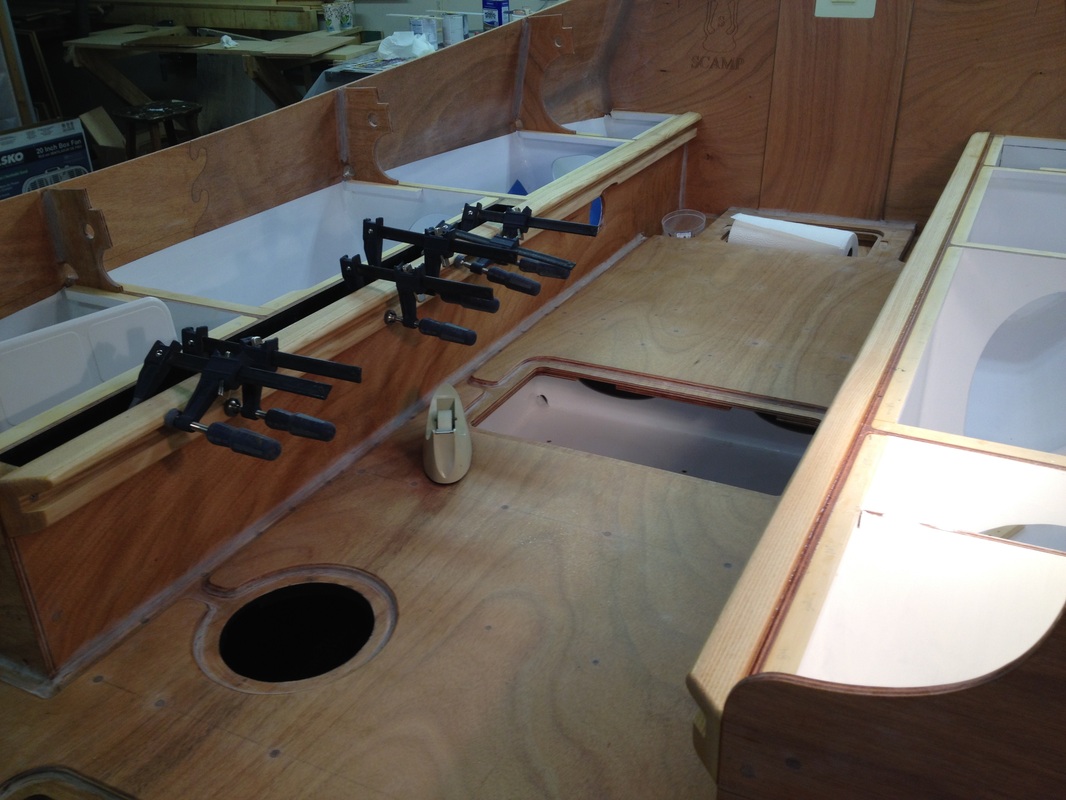
Time to install the centerboard. The CB pin is epoxied to this plywood cap, which is screwed to the side of the CB trunk. I have been concerned about the pin coming loose from the cap, working its way out, and the board coming adrift as a result. Probably unlikely, but I decided to glue a little preventer board onto the cap to eliminate that possibility. Turns out, it makes a nice handle when trying to install the pin.

My pin is installed from the outboard side of the trunk, via the seat top hatches. I put 1/16" nylon washers on either side of the board (held them on with scotch tape during install). The cap has an o-ring around the pin, and a neoprene washer outside that - the neoprene washer is to take up the gap between the cap and the trunk created by the o-ring, so that when tightening the screws, the cap is not torqued to one side stressing the joint to the pin. So far, I have seen no leaks from the pin.
Picture
Picture
Picture

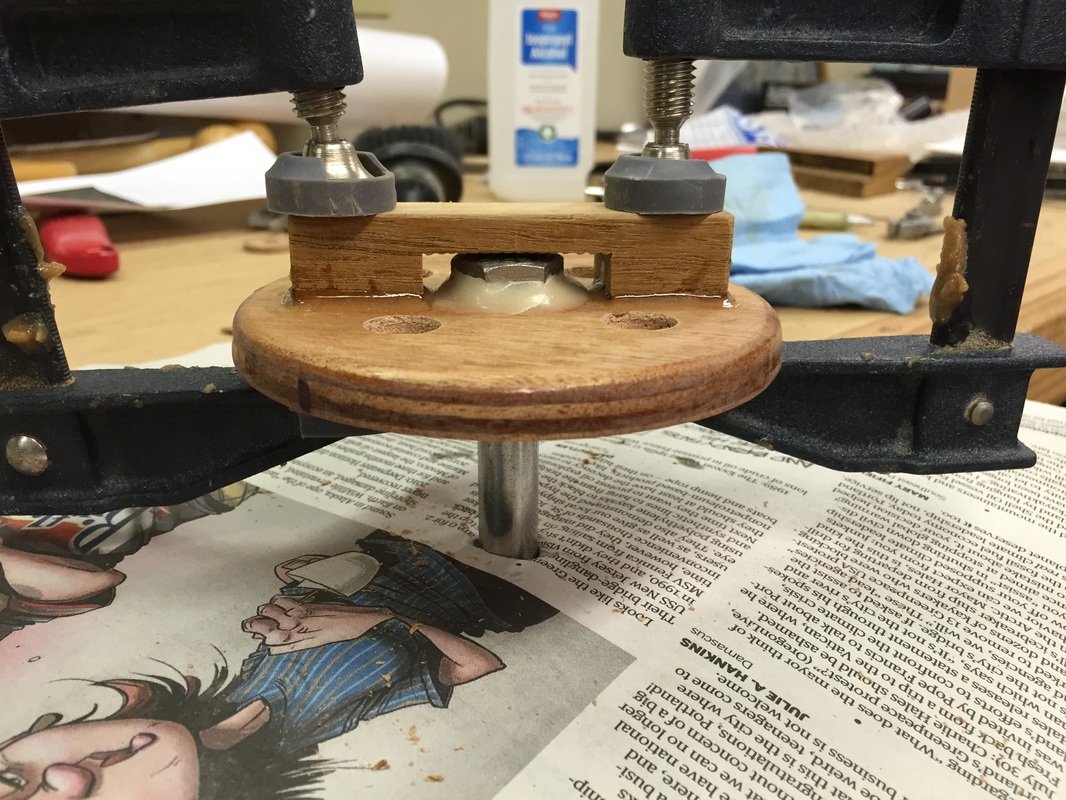
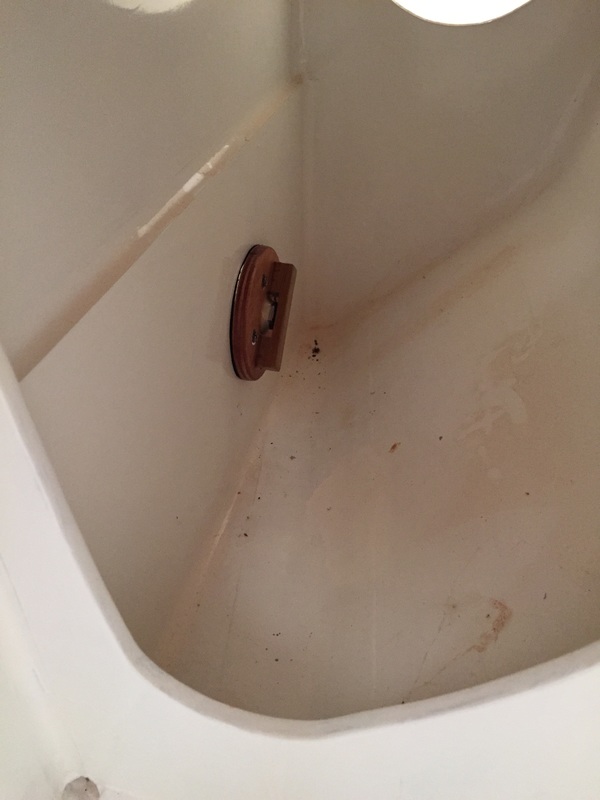
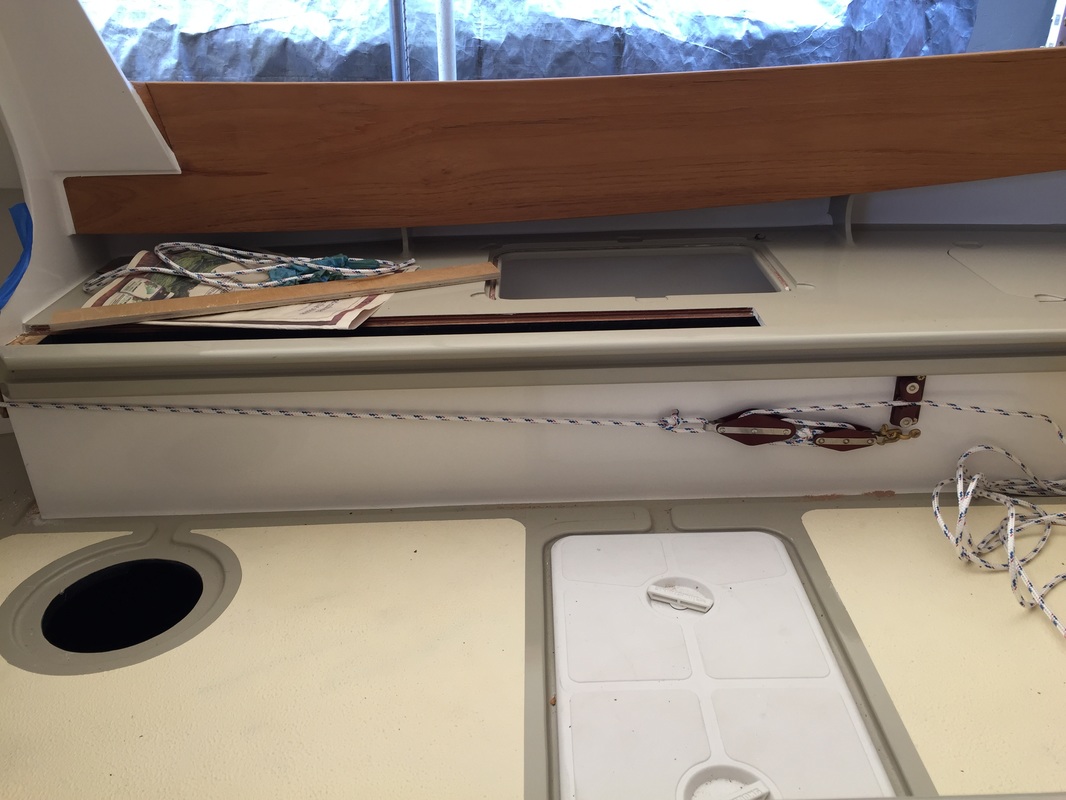
The centerboard uphaul was added. The turning block at the forward end of the trunk needed to be mounted on a block of wood, otherwise two of its screws would be into the edge of the seat longitudinal plywood.

Picture

Picture

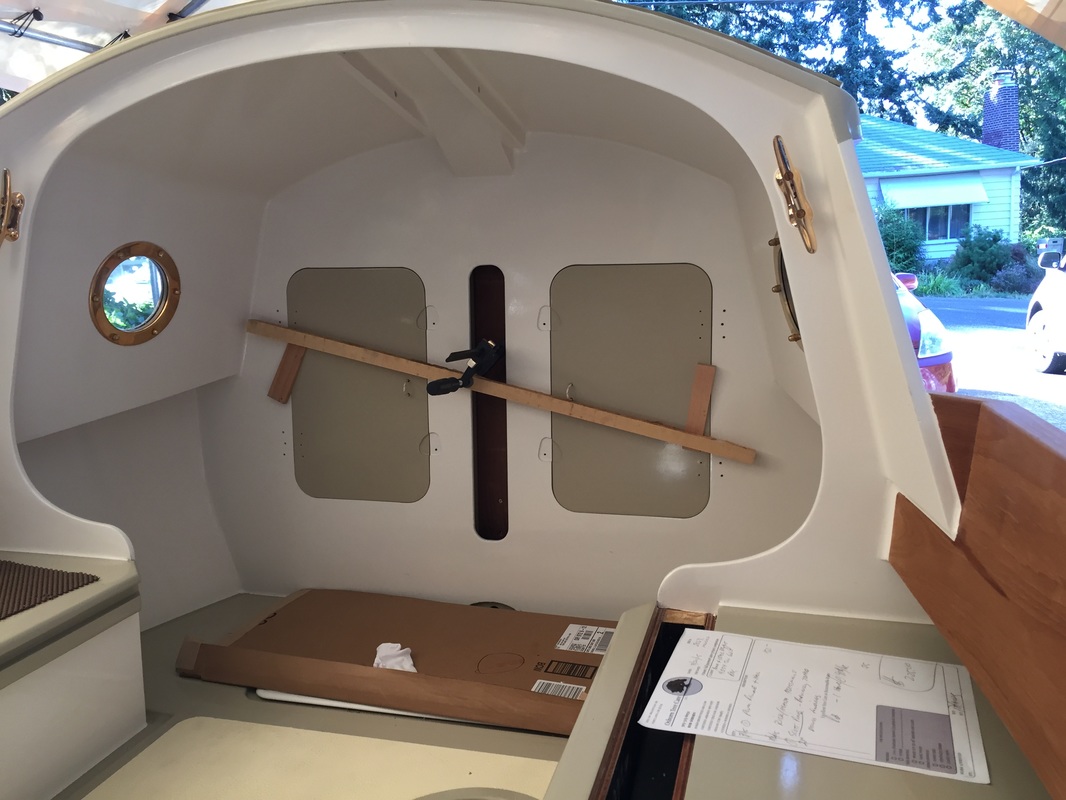
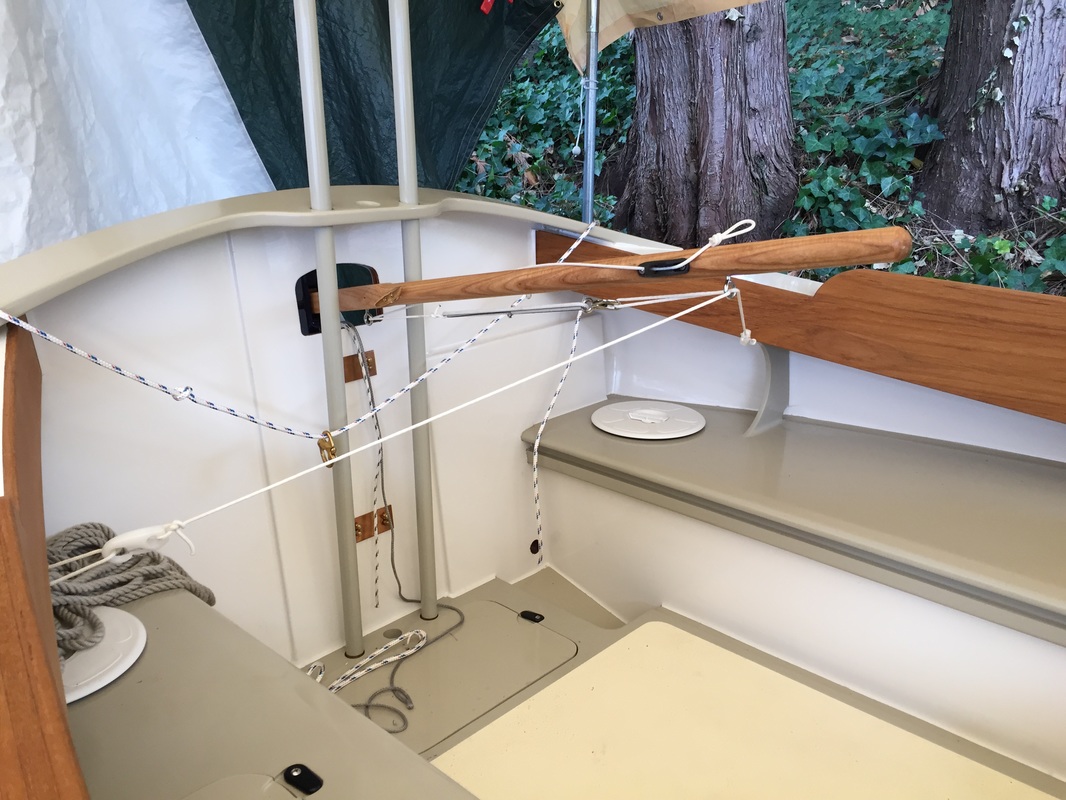
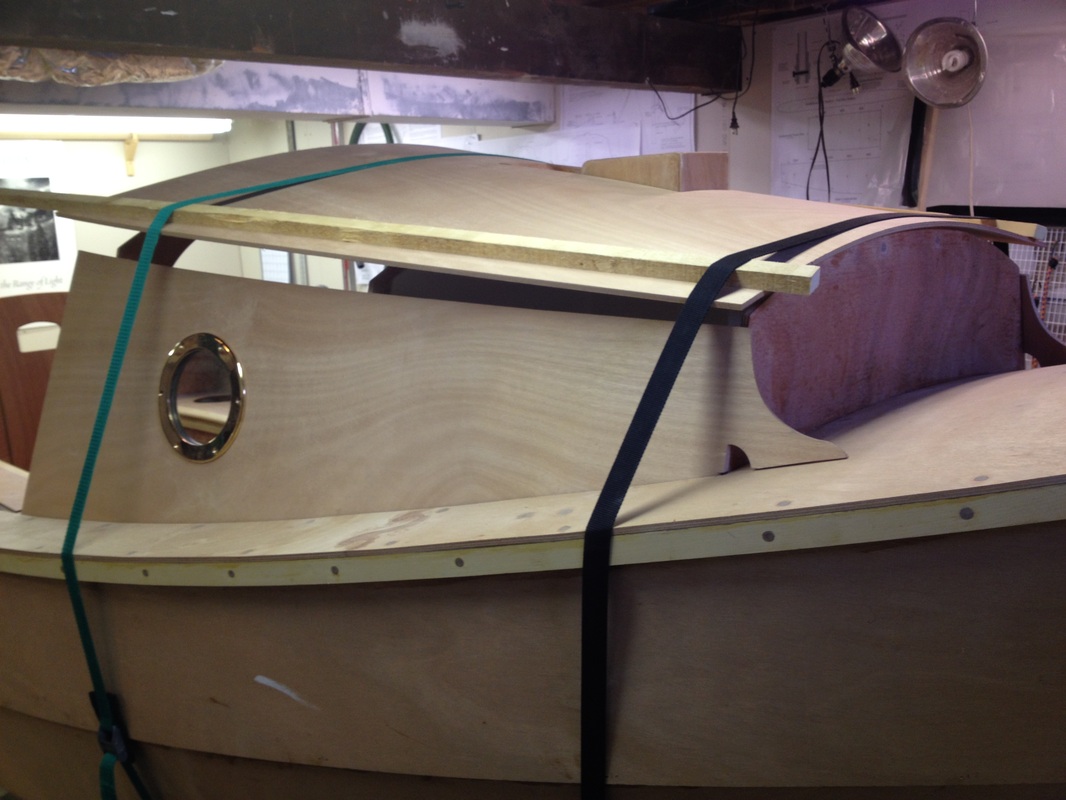
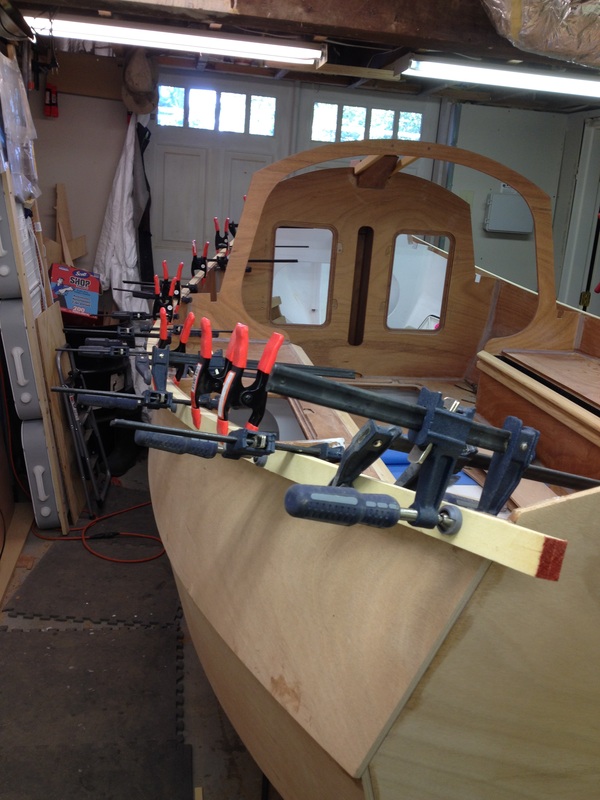
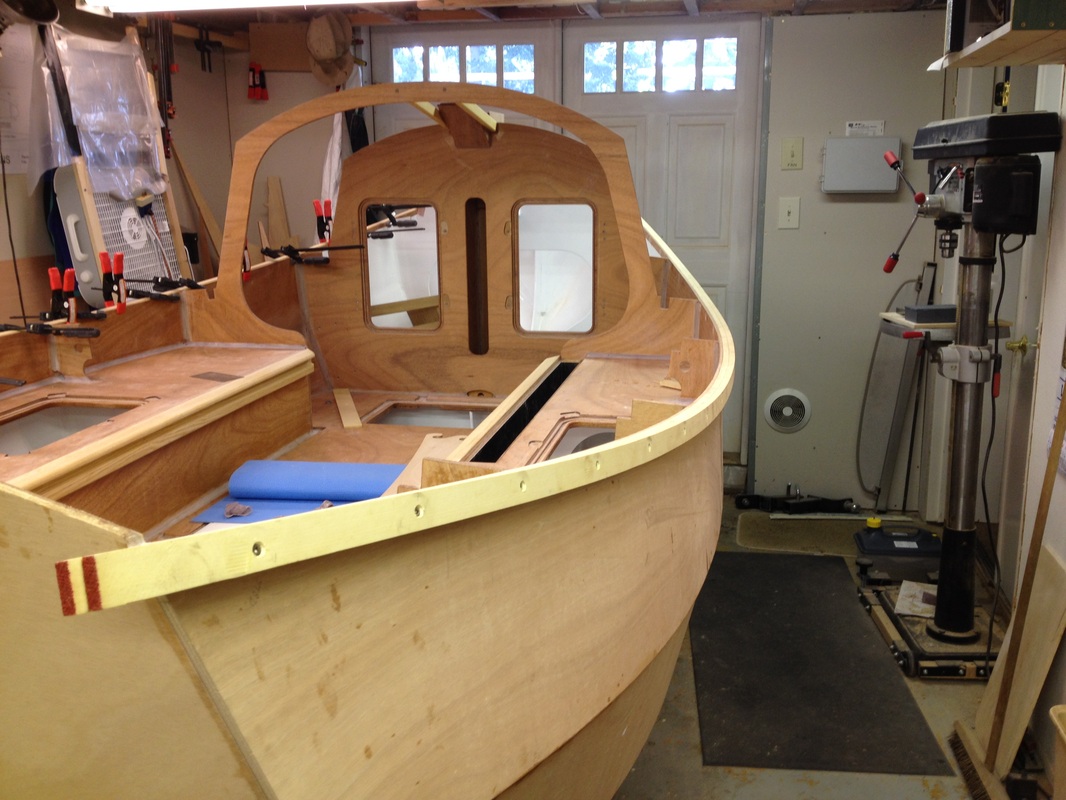
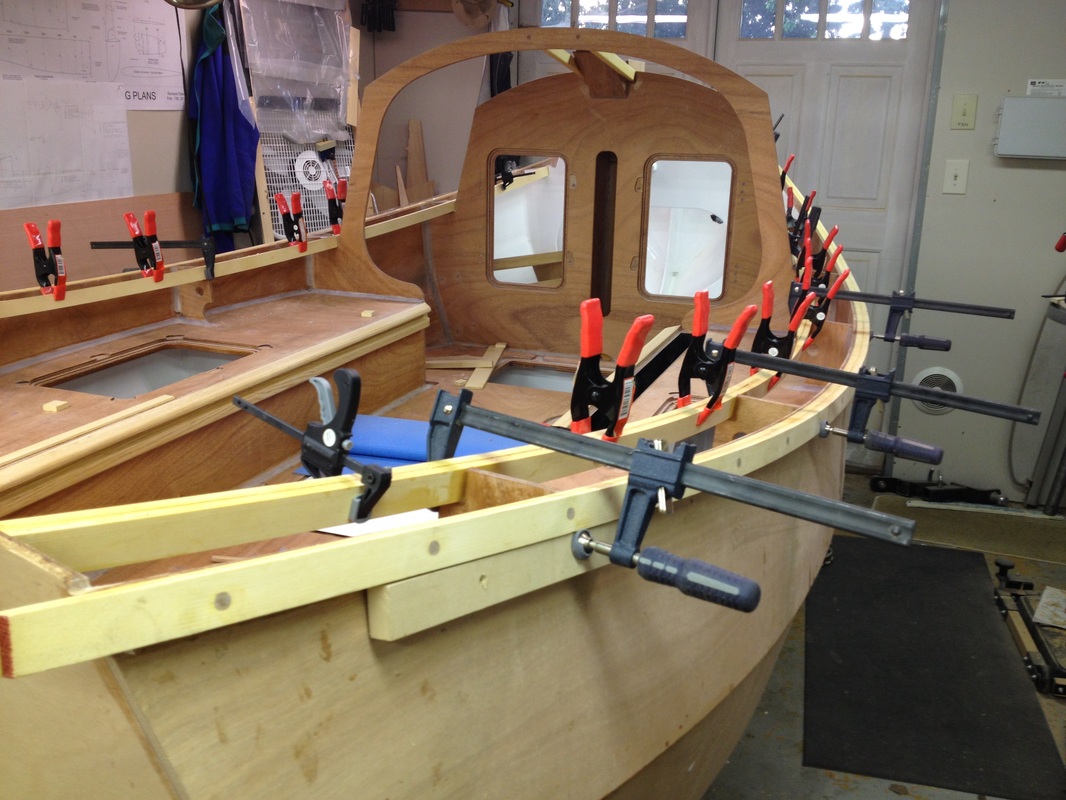
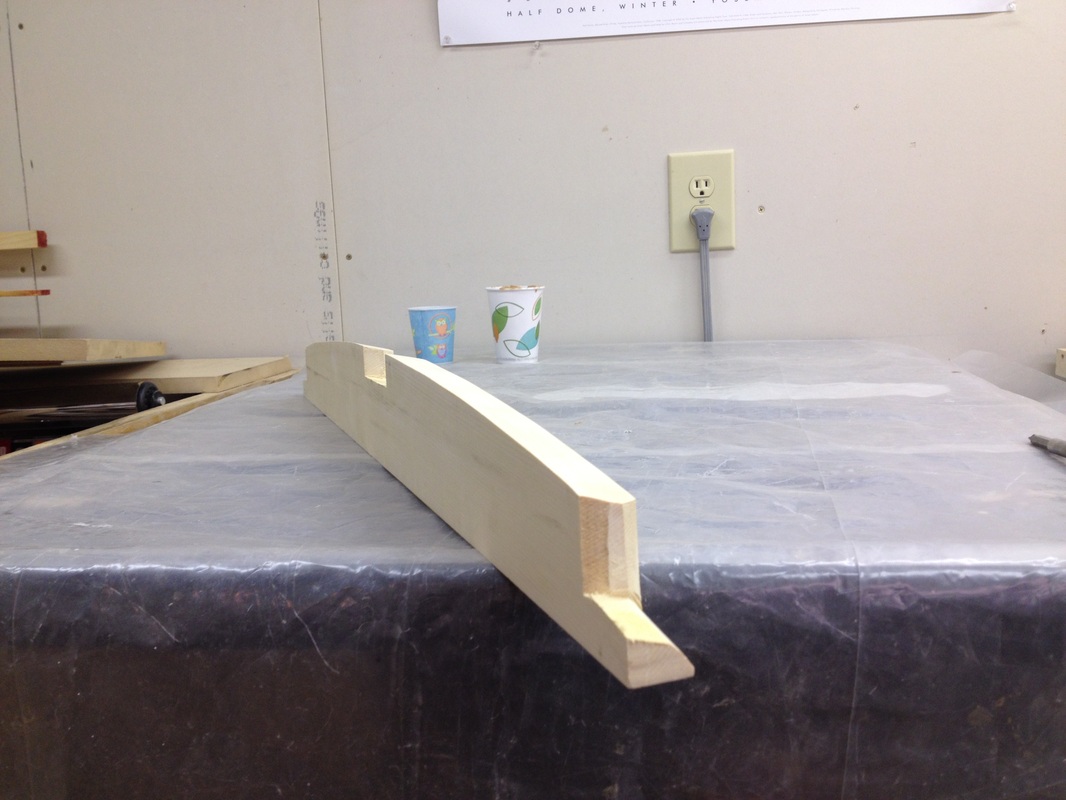
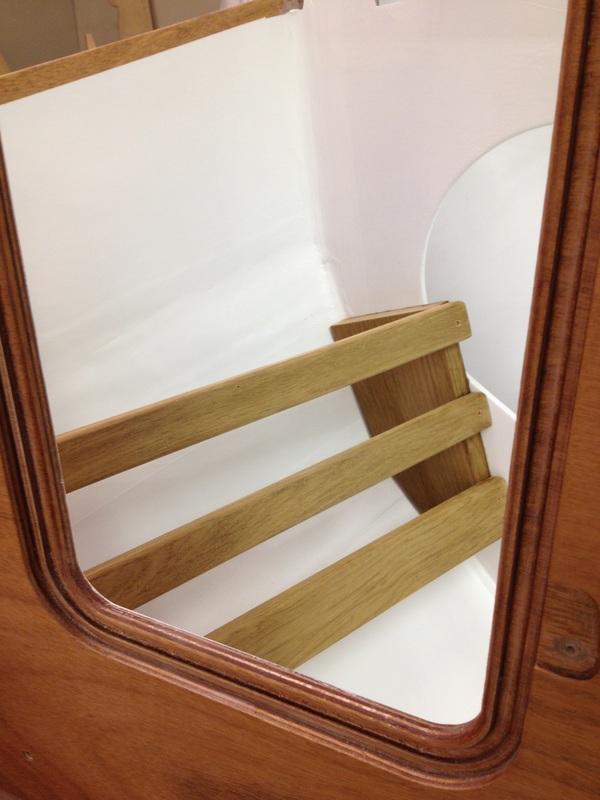
I made a forward rig support from some scrap 1x4, and used the mast cut-off on the bottom so that the support would fit into the mast support block at the bottom of the mast trunk.

The aft rig support is two aluminum tubes, with a teak wooden top piece. I have since added more yoga mat padding to the top edges of both supports. I'll probably replace that with leather sometime this winter.

Picture
Picture

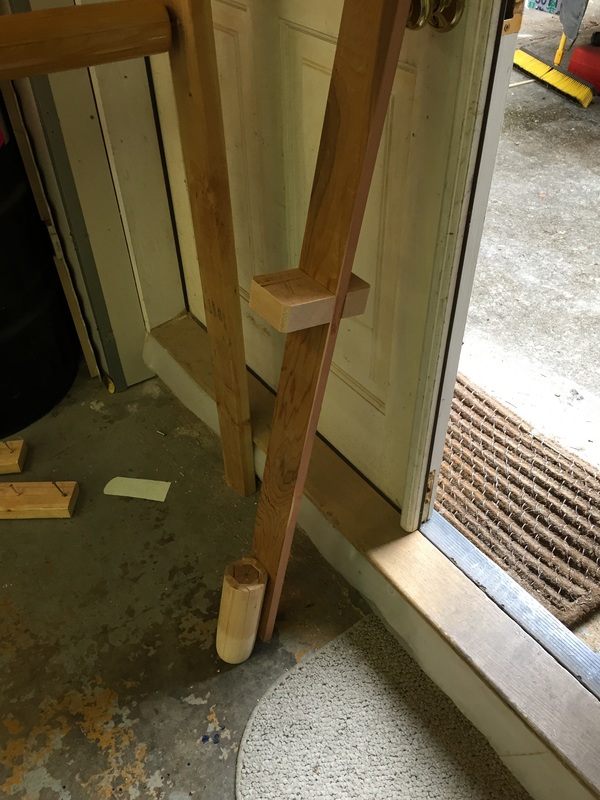
I borrowed Dan's (bcbimmer) idea of using bronze bushings in the traveler holes. This saved having to overdrill, fill with epoxy, drill out again.
Picture
Picture
Picture

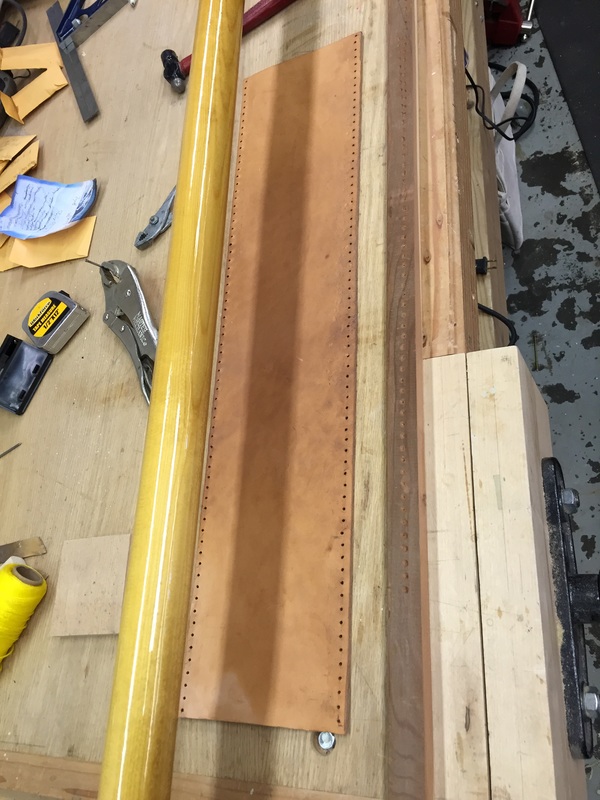
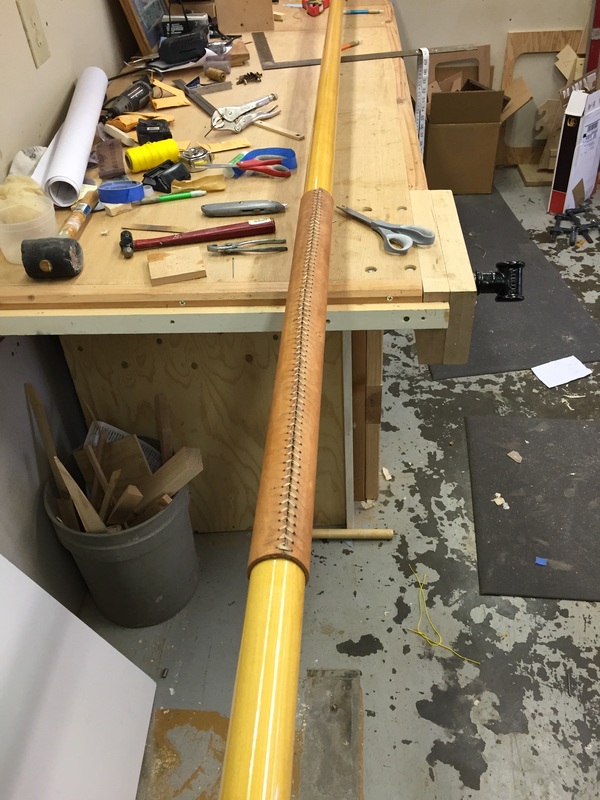
And, leather was applied to all three spars. This was not too difficult, though time consuming. I did discover that you don't need to soak the leather for any length of time at all in water before stitching. I just ran it under the tap, one side then the other. On the first leather I applied, to the mast, I soaked it for perhaps 10-15 minutes in a bucket, and it stretched out so much, it no longer fit. I had to trim the edge and re-cut the holes.

You can see on the yard here, which I did next, that I didn't pay enough attention to the alignment of the seam with the spar until about half way down, so the seam is not quite straight. Yeah, I know, but I like to sweat these kind of details. The boom came out better.

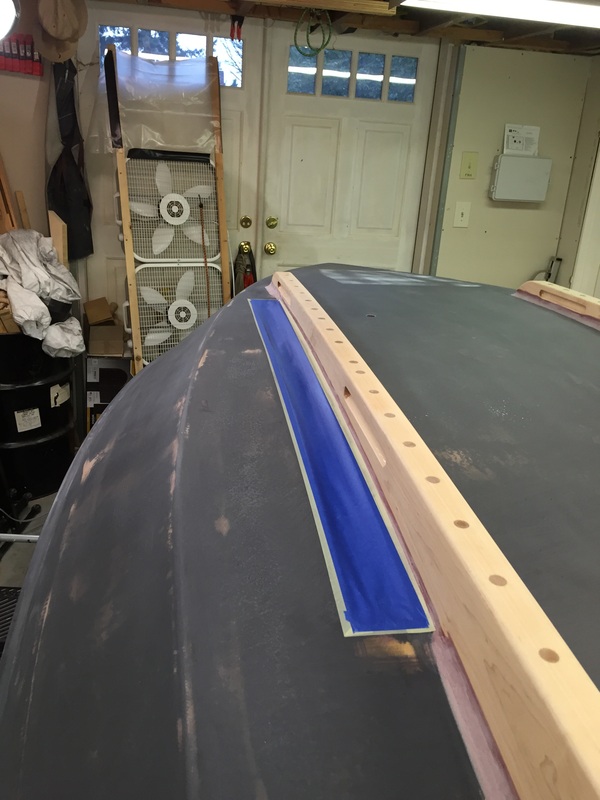
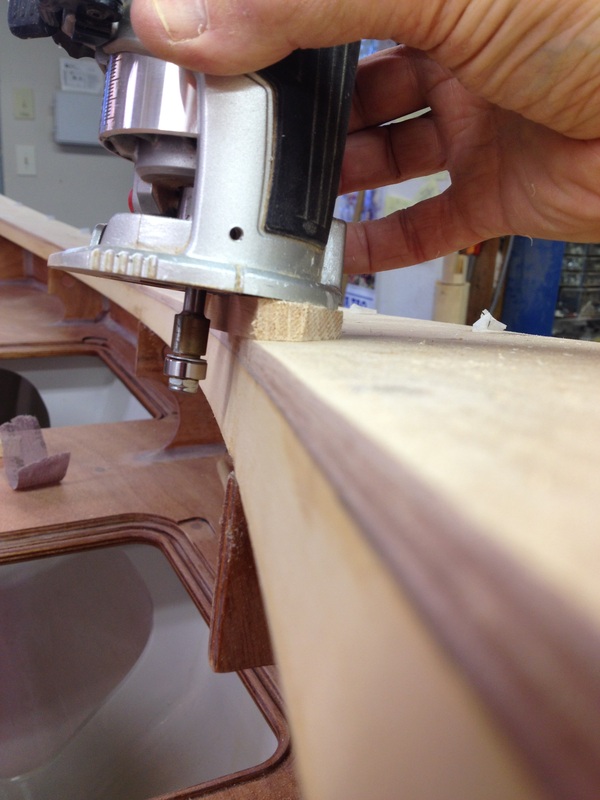
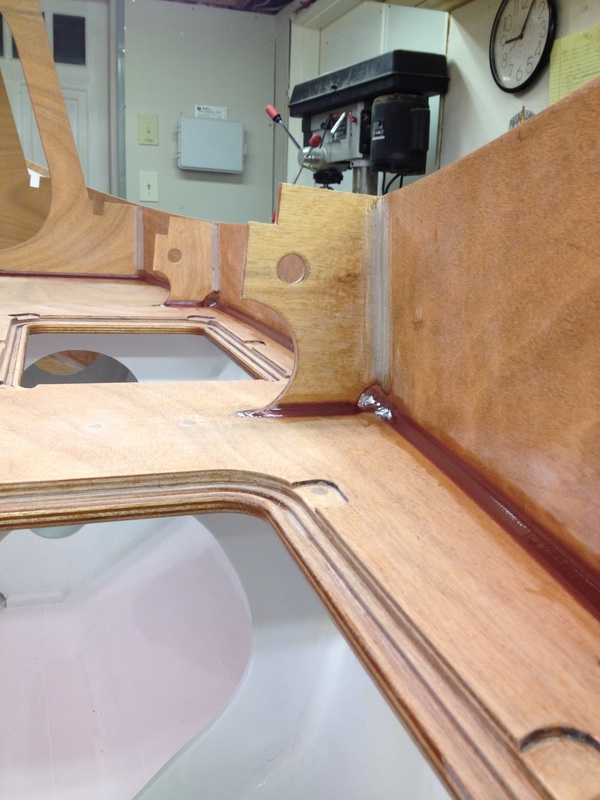
I added spacer blocks to the cabin-top cleats because, apparantly, the downhaul cam cleat is difficult to cleat into otherwise. The halyard cleat gets one too, just for symmetry.

I also put 9mm backing plates on the underside of the cabin top. These were all pre-painted, the cabin top paint was sanded off, and the blocks and backing plates epoxied down using the cleat fasteners as clamps.
Picture
Picture
Picture

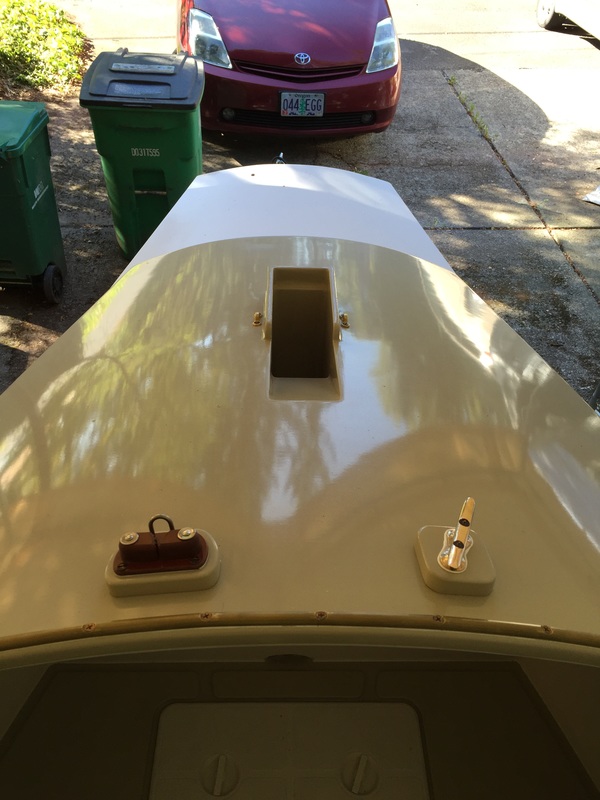
The hatch gaskets were added. Since there have been some reports of leakage from the PT Watercraft hatches, I made two changes. I used Sikaflex to bed the tubing instead of contact cement, and on the seat top hatches, I used 9/32" tubing (instead of the 1/4" tubing that came with the kit). I had to add two plastic washers under each hatch dog on the seat tops (instead of one), because the hatches sit a bit proud of the seats, and you have to push down on them to engage the dogs. I haven't really tested the water tightness of these yet.

I have since had a demonstration of the sealing of the BH3 hatches though (which got the standard 1/4" tubing). I trailered ANNIE B to a mountain lake recently, and when we got there, I had a devil of a time opening the BH3 hatches. I can't explain it, because we had ascended in altitude, so it may have been more of a temperature difference thing, but the suction holding the hatch doors closed was impressive.

Picture

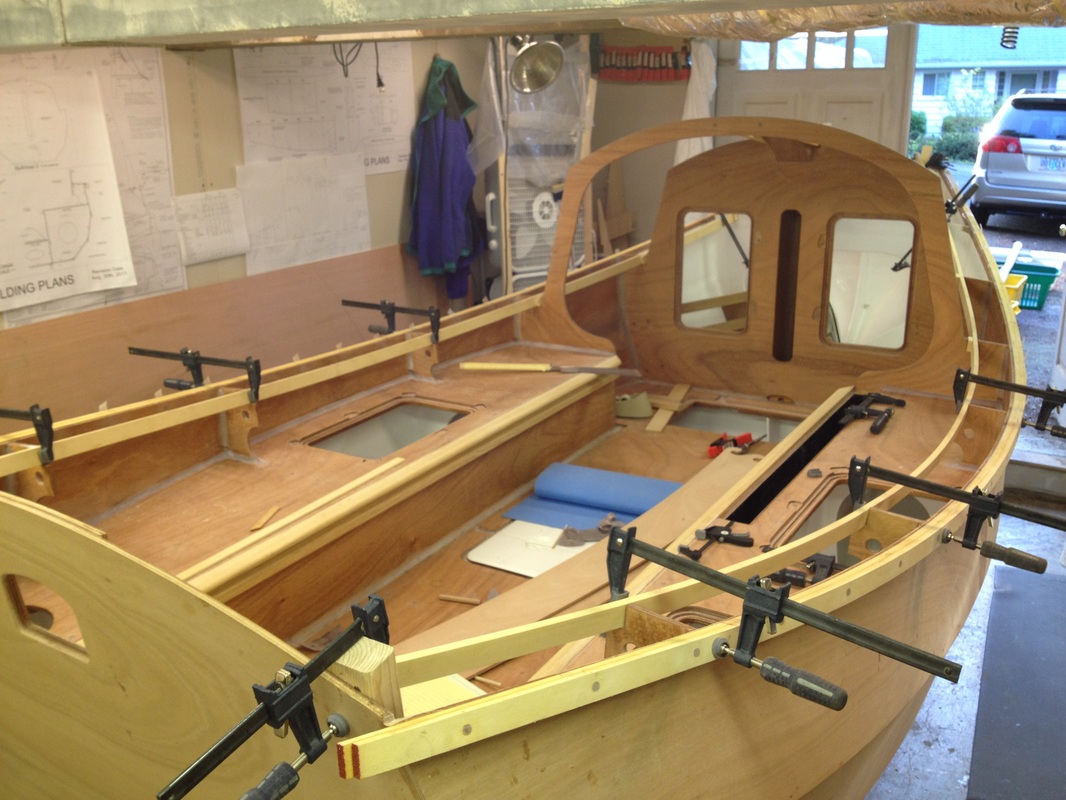
And the first time raising the sail, and sorting out all the lines.

Since I initially rigged the sail, I have made a few changes. I started with cute little bronze cleats for the reefing lines, and eye straps instead of cheek blocks for the leech reef lines. I have since replaced the little cleats with 4" plastic cleats (that I happen to have laying around), and cheek blocks for the eye straps. The eye straps had too much friction for pulling in the leech reefing lines, and the cleats were just too small.

I am using a lazy jack arrangement that Keith Nasman created for Zephyr. There is one continuous line from the aft side of the masthead, under a wooden "thumb cleat" on the boom - the line has a clip in it so I can remove it for trailering. And one line from the forward masthead, down the port side of the sail, under the boom, and up to a cleat on the aft side of the mast just above where you see the boom in this picture.


And the setup of the rig proceeds. At left, here is the first cut, with the sail and spars mostly setup (I thought) and sitting on their trailering supports.


Picture
Picture

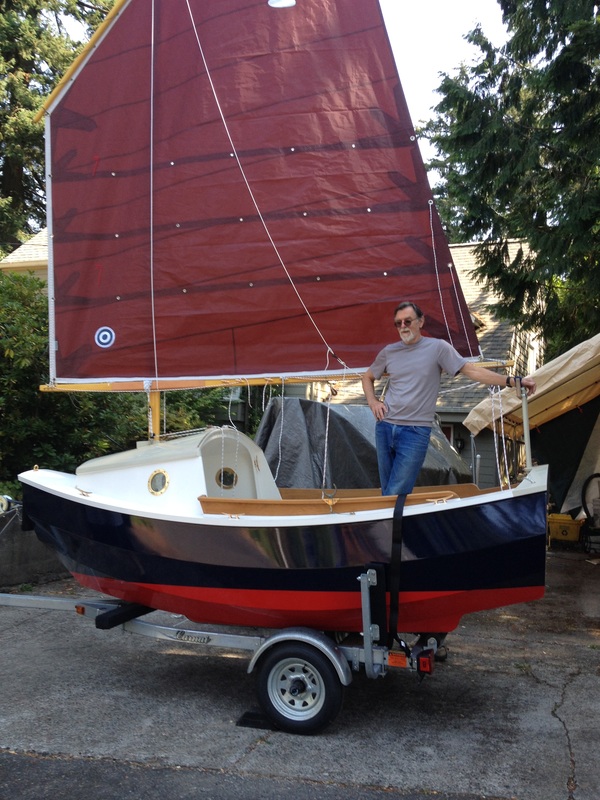
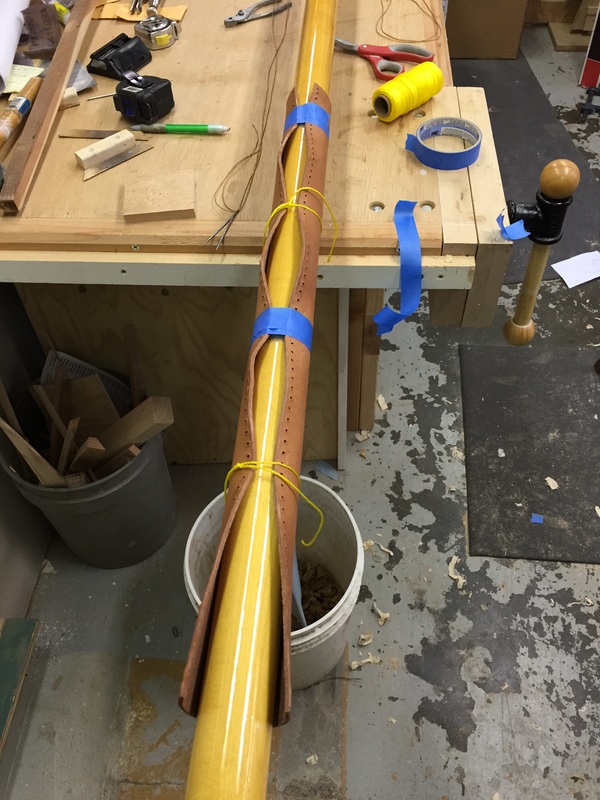
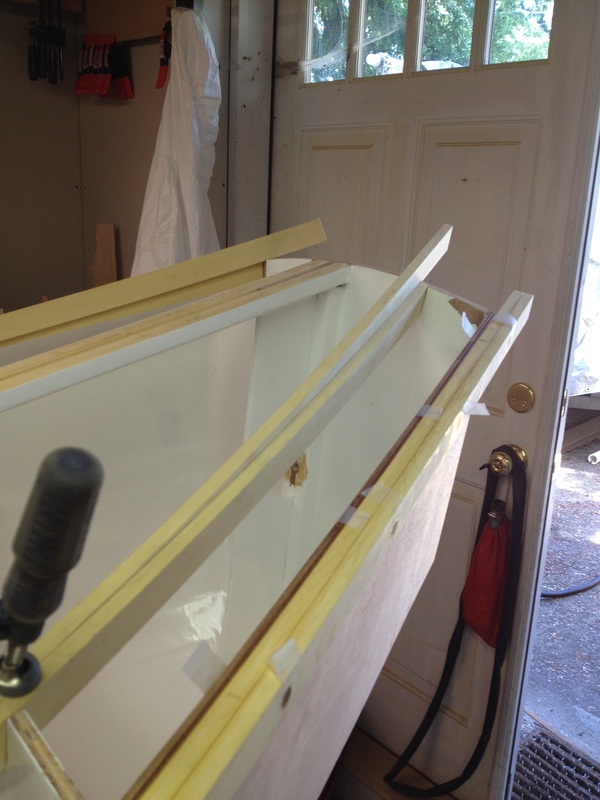
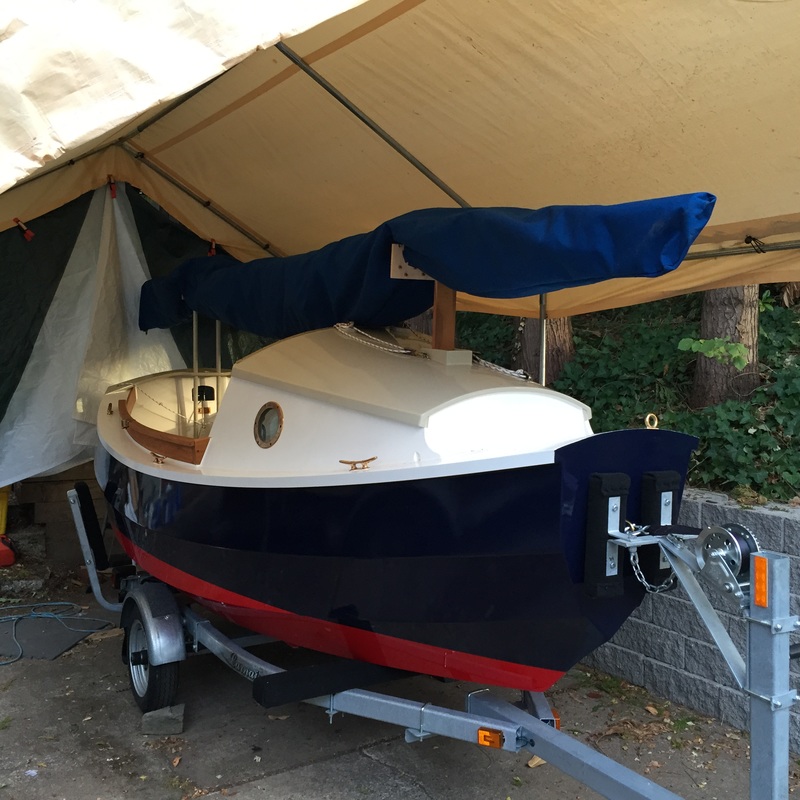
I sewed a sunbrella spar bag to protect the rig during trailering. All three spars and the sail fit inside. It is closed forward, and there is a 10 foot zipper from the aft end. I found I need to put a couple straps around the whole package, one at each end, to cut down on fabric flappage at freeway speeds. Otherwise, it worked quite well on a recent longish trip.

Thanks to Keith Nasman for the loan of his awesome Sailrite machine for this project. My 1950's era Singer just wasn't up to the task.
Picture

SCAMP is very responsive to the helm, and so some sort of tiller tamer is desirable, I find. I have used this particular design on 3 boats now - it is inexpensive, and works well. Called a helm impeder (design created by a Brit, don't you know), there is a bungy cord in the middle under the tiller, and a cleated adjustment line on the starboard side of the tiller, with which you can easily adjust the amount of tension.
Picture

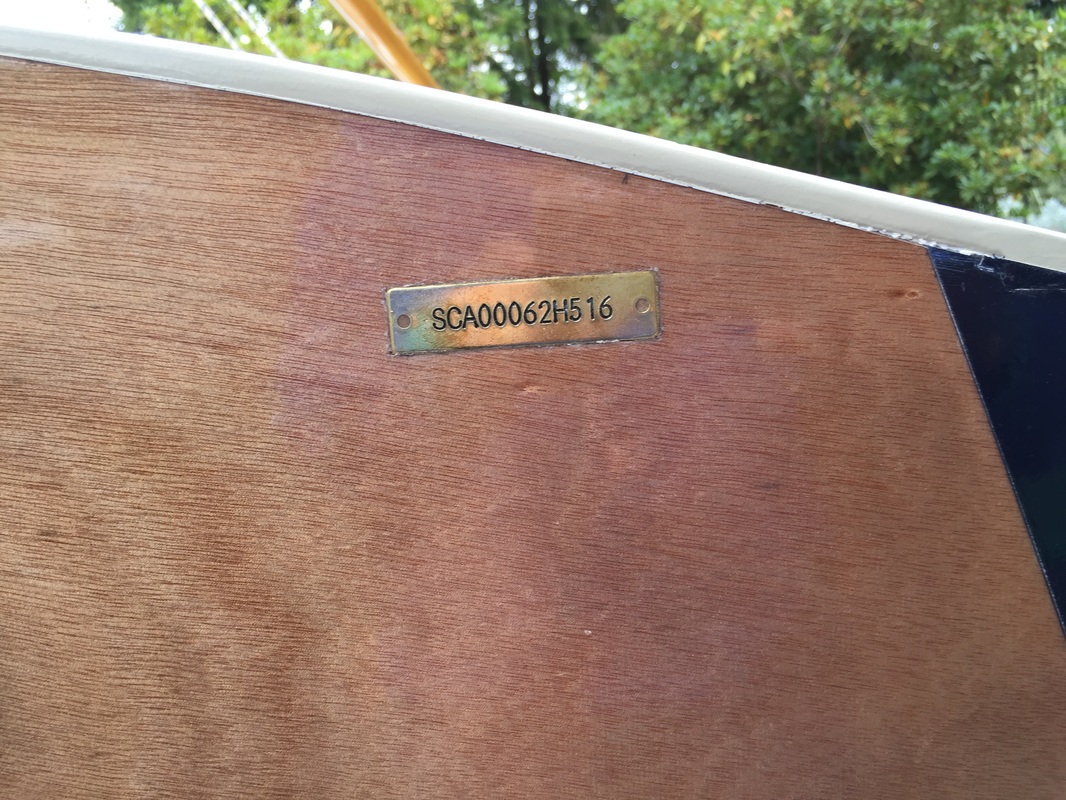
HIN plates get installed. I routed a little recess for the transom one, so that it sits flush. Epoxied in, damage would definately be done to remove it. The hidden one is, well, hidden and similarly difficult to remove. And suffice to say, it was a royal PITB to install it at this point in the build.

So, lets see... Sail rig seems to be ready, trailer - check, rudder - check, centerboard - check, weather - check. So, I think it may be time to get her wet!

On a fairly calm (as it turned out) Thursday late morning (8/27/15), friends and family gathered at Willamette Park in Portland to see if the cute little boat would float, and even more improbably, sail. Much practiced setting up of the sail was performed yet again, without incident.

Picture
Picture

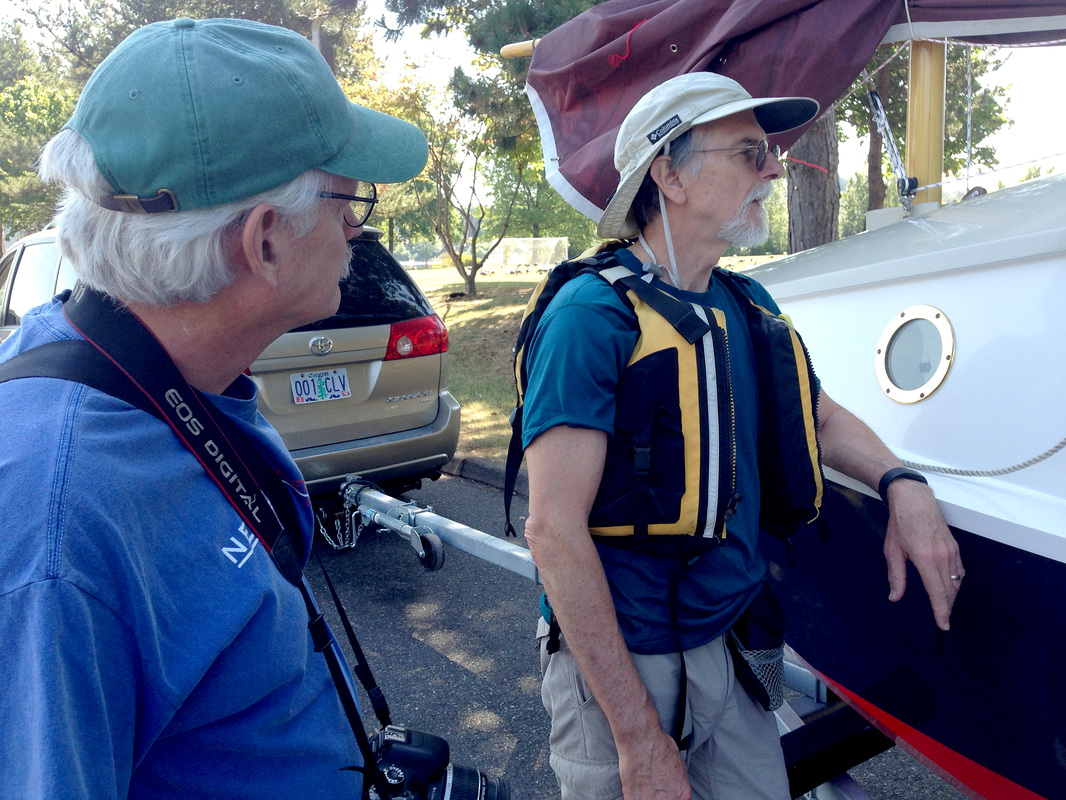
Discussions ensued whilst waiting for a few stragglers. Time was spent thanking passers-by for their kind comments on a) the beautiful boat and/or b) the cute little boat.
Picture

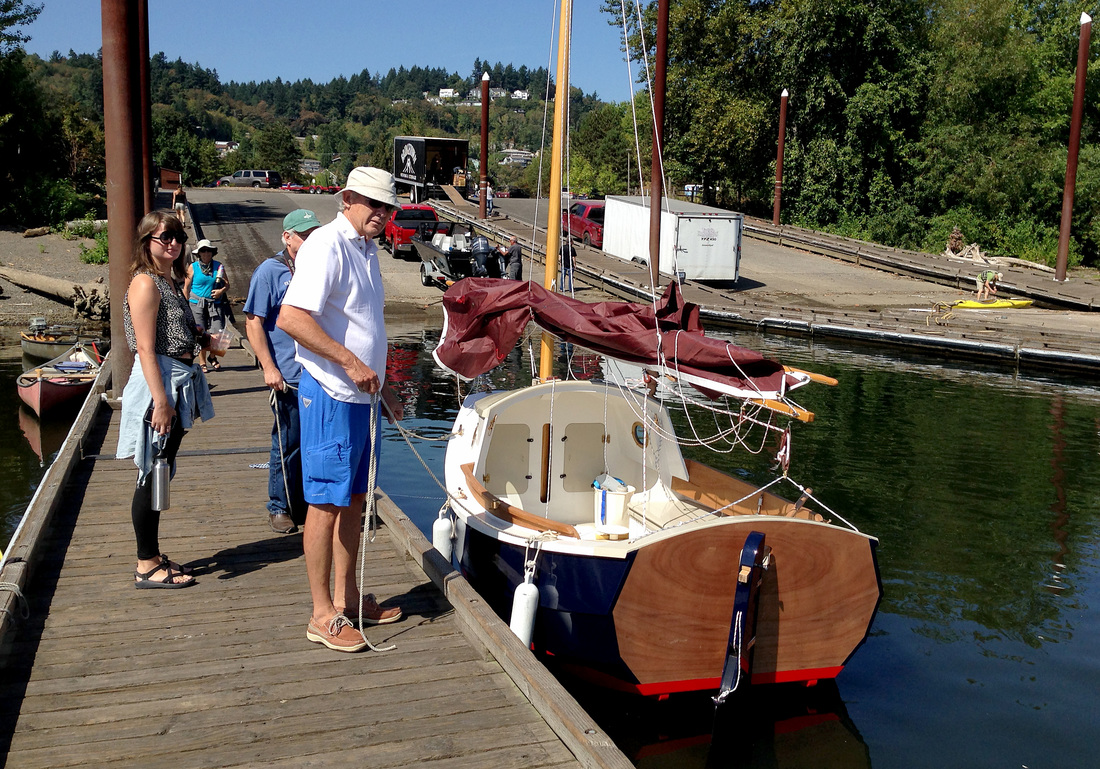
And, finally after 2 1/2 years in the making, she finally is afloat! The owner/builder could be seen checking various hidden places for water where it wasn't supposed to be, and for places where it should be. All was well, so the group assembled for the christening ceremony without fear of a sinking mid-christen.
Picture

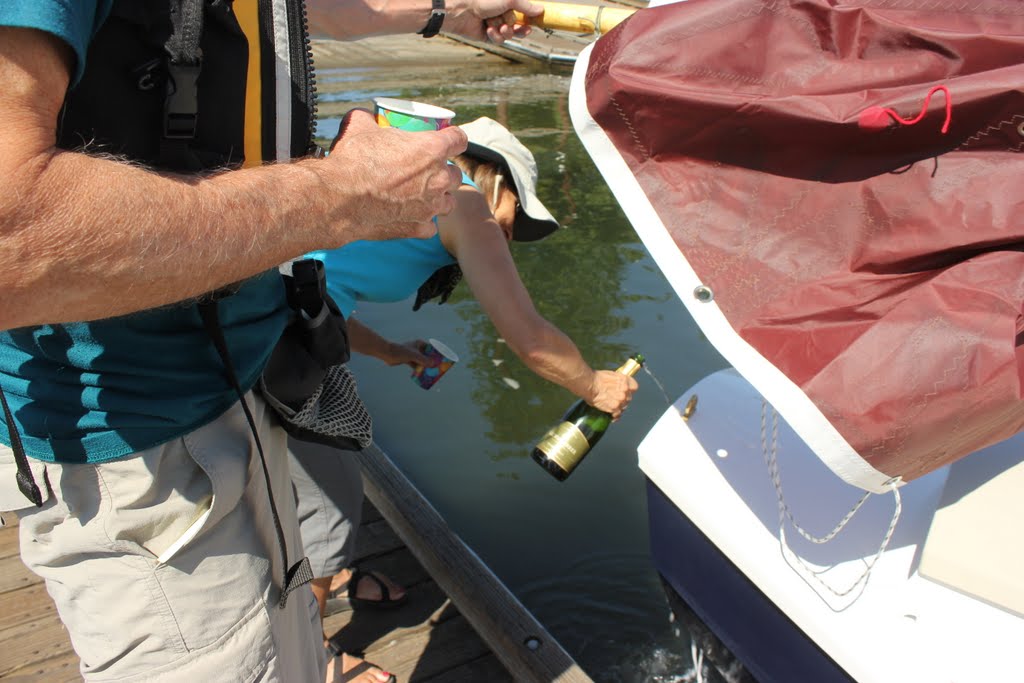
The appropriate beverage was used for a toast to the new boat, and its' ability to keep its skipper and crew safe, and always bring them back to port. And some was poured on her bows, and some offered up to Neptune.
Picture

And, she was launched into a 0-3 knot breeze. This shot was taken by Keith Nasman, who works not too far from the park, and who happened to notice a familiar sail and hull profile while on his lunch break. We pulled in and chatted a bit, while he admired the newly launched and not yet banged up boat.

After taking a few more folks out for rides, the wind died and we got to try rowing ANNIE B. Turns out, I had neglected to install the sleeves and stops on the two part oars I got from Gig Harbor Boatworks, so rowing was a bit more difficult than it otherwise would be.

But at that point, I also resolved that I will be building my own spruce oars this winter. Those blue, heavy river rafting oars just aren't the right thing for a SCAMP.

Some of the above launch day pictures were taken by Richard Blakeslee - thanks Richard!
7 Comments

Painting

7/2/2015

1 Comment

 
Picture
OK, OK - its not painting, but I took an opportunity while waiting for primer to dry (cure?) to put 3 coats of epoxy with graphite on the rudder blade. I decided I will not paint it, and avoid having to re-paint when it inevitably strikes the ground.

Still need to coat the top edge...
Picture
Picture

And speaking of primer, here is one coat of Interlux Pre-Kote at left, after a first round of sanding. I started looking closer at the surface, and reading a bit more, and I realized that primer is not primarily to help the paint stick to the epoxy. Noooo, it is primarily to fill in the imperfections in the lumpy epoxy finish on the plywood. So, after some more sanding, we get something more like at right. You can see, that I sanded a good bit of the primer off (and I even did a bit more after this pix was taken), but the resulting surface is MUCH smoother than before the primer. So, if you are trying to decide whether primer is a good idea or not, this is something to consider.

And here is the current state of painting. I have finished 3 coats off-white Interlux Brightsides on the inside of the transom and the seat longitudinals, and the inside of the cabin (the latter was not fun to paint!), and have two coats on the cabin sides and front. That will be the last of the white, and then I will move on to beige.

My shop has a temp hovering around high 60's but mostly low to mid 70's lately with our heat wave, and I have found that 5% thinner works pretty well, but paint starts getting sticky after about 30 minutes. So, if I anticipate a section taking longer that that, I mix the full batch with thinner then pour 1/2 in another container which is covered until it is needed (had to do this with the inside of the cabin, which took about an hour to paint, not including the hatch details).
Picture
1 Comment

Getting ready for final paint

5/25/2015

0 Comments

 
Picture
Well, this is the long overdue post, but between trying to make progress and the on-going kitchen remodel, time has been short for documentation.

Unfortunately, I didn't get any shots of turning her over, but here is the before picture. 4 friends helped lift and turn, to avoid rubbing the straps against the not-yet-quite-cured topsides and bottom paint.

All went well with no surprises. She is sitting on her skegs, on a sheet of plywood. It sure is nice to see her from this perspective again, and to be able to climb in and out of the cockpit much more easily than when she was on the building jig.
Picture


It will be very hard to paint the back of the top plank after the coamings are installed, so I did this before.
Picture
I am installing teak coamings, in two layers. The first layer being glued in place above, and the 2nd layer at right. The pieces are 10mm thick, and probably could have been bent without steaming, but it was much easier to steam the first piece. So, I built a steam box, and let it sit clamped in place for 24+ hours before gluing in place.

I covered the good side with packing tape, to avoid getting epoxy fingerprints. It is cut a little large, and will be trimmed down later.


Picture
Picture
Picture

At left, the coaming trim pieces (again, two layers of 10mm thick teak) are being glued in place. And at right, trimming of all 4 layers has been completed (save some end shaping). I used a top bearing router bit, using the original plywood coaming from the kit as a guide for the first pass, then subsequent passes registered on the previous cut. I cut and installed turn-in blocks from teak as well. These are screwed and glued to the coaming and the cabin sides.


Picture

Here, the transom cap is being glued in place (or actually, I think this is a pic of the dry fit). In addition to the clamps, I put 3 screws into the gunwale at each end of the cap.

You can see that I have shamelessly stolen an idea from Simeon Baldwins NODDY - extending the cap to provide support for a mast crutch. Holes will be cut after the doubler is glued in.
Picture

Here you can see the coaming turn-in piece a little better. And the coaming to deck fillet. I don't normally mask off for filleting, but in this case I want to limit epoxy on the teak to just the fillet area.

And here again is another stolen idea - this time from Dale Simonson, who wrapped a dowel in packing tape to act as a dam for filling the transom cap/deck joint with thickened epoxy.
Picture
Picture

Fitting the pintles and gudgeons to the rudder head. Thanks go to Dave (woodnmetalguy) for the idea to use a rod to aid alignment - though I had to buy a piece of steel rod, didn't have an arrow shaft laying around. But, this really helped.

I used the same rod to align the rudder gear on the transom. I also had to file the back of both parts to align the hole with the back of the part. which were not quite parallel as delivered.


Picture
Above is the first of the two transom doublers, for an outboard mount. I won't be installing an outboard initially, but I wanted to allow for it.

At right is the 2nd doubler piece being glued in place.

You can also see the epoxy filled over-drilled holes for the rudder gear, which I later drilled out. Yes, I got to carefully align and drill the 8 holes for the rudder gear on the transom not once, but twice.


Picture
Picture

I have now, I think, finished applying epoxy and wood pieces to the hull, so it is time to start painting.

While I wait for the latest epoxy to cure, I decided it is time to start applying the multiple layers of varnish to the transom. Here she is after 4 coats (so far) of Interlux Perfection Plus.
0 Comments

And more paint

3/23/2015

2 Comments

 
Picture
On to the topsides paint!

After waiting a few days to make sure the red paint was sufficiently cured to withstand masking tape, I marked the waterline. I used previously marked spots on the edge of the stern transom and the forward edge of the garboard planks, tweaked the level of the boat with a shim, and then used a laser level to mark the line. I used 3M fine line tape, which really leaves a nice clean line.

Here, I have applied two coats of Interlux Perfection Royal Blue. Hmm, it is not quite the dark blue I had envisioned - it is so hard to tell just what you are getting from those teeny weeny little paint chips. So, I ordered a quart of a darker blue (Mauritius Blue), and sanded down the Royal Blue to get a smooth surface to start with (lets  see, how many times have I sanded the planks - not counting, dont want to know....)

Picture
Meanwhile, while waiting for the new paint to arrive, I figured I could get going on the rudder assembly. Started by applying fiberglass to the insides of the sides of the head assembly - I covered the entire piece rather than just the areas around the rudder pivet and the tiller, because I wanted to increase the spacing between the cheeks just a bit.

I applied 3 coats of graphite epoxy to the wear areas - I also won't have to try to paint in these areas after the head is assembled.

Picture
Picture
I decided to add copper tubing for the uphaul and downhaul lines, as others have done. I mostly copied what Dave Ender did in this build, though I don't have a spacer between the tubes.

And here is the assembled head assembly. I put a few screws into the sides to augment the epoxy and to get some clamping force in the middle - not sure they are really needed. And I did not hit the tubing with a screw - thanks for the heads up Dan!

After filling the screw holes and a couple more coats of epoxy, the head assembly will be ready for paint.

Below, you can see the rudder foil getting its fiberglass. I have finished the first fill coat, and plan to put dynel on the leading edge next.

Picture
Picture

Skeg runners going on. I cut them from UHMW plastic, and screwed them down into 4200 caulk. The holes in the skegs were overdrilled and filled with thickened epoxy before the paint went on.

To get the UHMW to bend around the forward edge of the skeg, I heated it in boiling water for 5 minutes, then clamped it over a form that had the correct profile. and let it sit overnight. Then, gave it a bit more heat just before screwing it down.


Picture
Picture

After 3 coats of Mauritius Blue (for a total of 3 coats of primer, 2 coats of Royal Blue, 3 coats of Mauritius Blue), I am *just* starting to get the hang of painting with Perfection. Maybe. It is interesting stuff - the darker colors don't flow out as well as the lighter colors, and need more attention to the correct amount of thinner to balance between getting a good flow out, and not running.

In another week or so, I will figure the paint has hardened up enough to turn her back over.
2 Comments

Fairing, more sanding, paint!

2/25/2015

3 Comments

 
Picture
After much sanding to get a smooth surface, I turned to fairing. I used West 410 low density filler, plus some graphite for the fairing compound. This worked well, and was pretty easy to sand. Here, the lump where the garboard glass lapped onto the bottom is being faired, as well as the lapping of the garboard glass at the stem.
Picture
After sanding the fairing compound, the plan was to put on one more coat of graphite epoxy, one coat of clear epoxy, and then paint.

However, the coat of graphite epoxy, as you can see, had extreme orange peal. The epoxy looked nice and smooth when I rolled and tipped it, but after 30 minutes or so, it developed this ugly texture.

I later did some experimenting, and determined that a small amount of cell-o-fill mixed in, at the rate of 1T per 4oz of epoxy, will take care of this. It seems to have something to do with laying the epoxy over epoxy that has graphite in it.

So, yet another round of sanding with the long board! After doing that again, I wasn't about to risk another coat of epoxy, and I decided I didn't want to paint over the graphite epoxy. So, I made a decision to lay down some primer.
Here we are after the latest sanding project. And the really bad part of doing all that sanding (besides all the black dust!) is that it is so noisy that I can't hear Car Talk episodes on my little bluetooth speaker - probably should get a headset.
Picture
Picture
Picture
So, on to the skegs. Feels good to be building something again ! Layed out the pattern for the new improved skegs on some scrap ply, and fit it as close as I could to the hull on the starboard side.
Picture
Picture
I went to the local lumber store to get some Ash for the skegs, but I didn't like any of the pieces they had. So, I bought some maple - pretty hard stuff. I used my friend John's bandsaw to rough cut the parts, and then nailed the pattern to a skeg and did a few passes with a top bearing router bit at increasing depths, and then flipped over the skeg and finished with a bottom bearing bit.

Picture

Routing the finger holds with a 3/4" bit. The clamps on the skegs act as stops for the router.
Picture
Next, I cut and fit UHMW strips to the skeg bottoms, drilled pilot holes in the skegs, overdrilled these holes and filled with thickened epoxy, and then gave the skegs three coats of clear epoxy.

Here the skegs are being glued in place. I put two screws through the hull into each skeg - one at each end - which I could reach from below (above?). These served to position the skegs while the epoxy cured. As you can see, I also applied pressure from above and clamps at the stern.

Then large fillets were applied to really hold those skegs onto the hull.
Picture
Picture

While skeg epoxy was curing, I crawled around under the boat applying fillets to the underside of the deck to plank and deck to carlin joints. And here you can see the bottom of one of my deck cleat backing plates.

Access to some of these joints was a real pain, what with saw horses in the way. I did not put fillets between BH1 and BH2 - might have been able to reach them, but I probably would have hurt myself doing it.

Getting ready for primer. The stern transom will be finished clear, so here it is being masked off. And below, a 1/2" space around the centerboard slot is also masked off for the special 3M tape that will hold the slot gasket. I understand the tape may not stick to paint too well.

Picture
Picture
Picture

Here we are after 3 coats of primer. I used Interlux PrimeKote, which is a two-part product intended for use under two-part paints - I am using Interlux Perfection paint on the bottom of the hull, also a two-part product, for its durability.

I used pretty close to two quarts of primer on the hull. It doesn't flow out very well, so the first two coats required a fair bit of sanding to remove the brush marks. So, on the third coat, I used the roller to do the tipping by floating the roller over the paint about as lightly as possible and still be touching the surface. The result was a light orange peel texture which was much easier to sand than brush strokes.

The two-part products are pretty smelly, so you definately want to have the right safety equipment. I used a tyvek suit with a hood, full face respirator, gloves, and my usual bank of box fans to keep air moving. You don't want to have any skin exposed while applying this stuff, as it is a skin irritant. And you definately don't want to spray it.

I finished sanding with 320 grit, and then started masking.
Picture
Picture


Here we are after applying 3 coats of Perfection, about 8 oz per coat. I thinned it about 12-13% each coat.

This paint took some practice to do well (not sure I am quite there yet, but better). It runs easily, and takes just the right touch to tip out the bubbles without leaving brush strokes.

The 2nd coat was really hard to get right - I applied it one day after first coat, without sanding - so I literally could not see what I was applying. The only clue you have for coverage is the size and consistency of the bubbles. The result was some dry spots where I started and hadn't quite figured things out yet.

I waited one more day and sanded lightly between 2nd and 3rd coats, and it was much easier to see the applied paint. But no matter what I tried, there is still tons of dust in every coat. Seems like you would have to take the boat to an auto paint shop where they can filter the air to avoid this.

In a couple days, I will mask again and paint the topsides - they will be dark blue.
3 Comments

Glassing bottom, then sanding, sanding, sanding, .....

1/3/2015

1 Comment

 
Picture
On to glassing the bottom!

I decided I wanted to reinforce the garboard/bottom joint with a second layer of glass cloth, and so I stole the idea to double glass the entire garboard plank from Dan in Victoria (bcbimmer). Here we are ready for wet out of the first layer.

Also, I decided I wanted to lay the bottom glass on top of all this before the wet-out on the garboard planks had cured so I didn't have to put a fill coat on it and then sand it. Ideally, I would have laid the bottom glass on top on the garboard glass first layer without the separate wetout step, and then wetout the double layer. But, I couldn't convince myself that I could keep the glass in place before/while wetting it out. Hence, two steps.

However, this means that the entire process starting with the glass shown at left, through 4 fill coats took two long days, starting at about 2am one morning and finishing at 4pm the afternoon of the next day. I waited about 7-8 hours between coats.

The one downside of this process I can see (besides two nights of interrupted sleep!) is that I couldn't adequately sand/smooth the edge of the garboard glass on the bottom before laying the bottom glass, so a bit of filling will be required. But not as much as I had feared, as it turns out.

Here the garboard glass is wet out. Back to bed!
Picture
The next morning (actually, later in the same morning!), my friend John Bouwsma came over to help with the bottom glassing. I used a single 60" wide sheet, which comes about 1.5" short on each side, but avoids having to deal with a joint.

I sanded (if that is what you can call it when the epoxy is only cured for about 6 hours) the garboard glass edge on the bottom as best I could, and we laid the bottom glass. It tended to catch a little bit on the garboard glass, but not too much.

John mixed epoxy while I spread it with a squeegee. I couldn't keep up with him, so he came behind me squeegeeing excess. This division of tasks worked really well, and the glass job came out looking really nice I think. And it took only an an hour from the first batch to finished squeegeeing.

I was a bit concerned about epoxy getting into the ballast tank drain hole, so I swabbed the inside with WD-40, but it turns out that no epoxy dripped in after all (I avoided squeegeeing large amounts of epoxy directly over the hole).

Picture
Picture
Here you can see the portion of the garboard plank that is not covered by 2 layers of glass, due to the 60" wide glass.
Picture
I used a wall paper brush to smooth the glass before wet out. This worked much better than trying to use my hand.

Here is the 3rd fill coat. First two were epoxy with a small amount (~15% by volume) of 410 filler to make sanding easier and to help avoid runs on the planks. 3rd and 4th fill coats also include graphite powder, as the bottom and topside paint will be a darker color.

You can see the overlap of glass on the edge of the bottom. After all the fill coats, and subsequent sanding, this is much less noticable, and will required just a small amount of filling I think.
Picture
Picture
Next up is glassing the transoms. I overlapped the stern transom glass onto the planks but not onto the bottom, as the bottom glass had already overlapped onto the transom.

I will be finishing the stern transom with a clear finish, so fill coats on it are all clear epoxy. Bow transom gets the same fill treatment as the bottom and garboard planks. The transoms only got 3 fill coats though.
Picture
The 2nd and 3rd planks get the usual 3 coats of epoxy - first one clear, allowed to cure overnight, scraped and lightly sanded, then two coats the same day. However, the 2nd and 3rd coats included 410 filler and graphite powder.
Picture
And now the fun begins! Starting to sand the bottom using primarily a long board.

It turns out that having two clear fill coats and two black fill coats on the glass made it much easier to tell where I was in the epoxy layers when sanding. When I could start to see wood color, I could tell I had sanded through the top two coats, but still had a couple fill coats to go.
Picture
Picture
Picture
Picture
After many hours of sanding, the bottom, the inside edge of the centerboard trunk (which had glass lapped into it), both transoms, and the port garboard plank are sanded.

As you can see from the plank pix above, it takes a fair amount of sanding to go from epoxy with an orange peel finish to a smooth finish.

My plan is to finish sanding the planks, then fill the low spots I have found, sand those out, and then put one more coat of epoxy on the entire hull (with graphite except stern transom). After another sanding, hopefully this will be good enough for paint. We shall see!!
1 Comment

Cabin top done, prep for bottom glassing

12/8/2014

6 Comments

 
Picture


Here, you can see how I chose to join the doublers, and how the cabin side cleat fits over the  top of the cabin side. The small gap is easily filled with thickened epoxy.

I had to put small nails in the aft cabin side doublers to keep them from sliding around when I first installed them, which was before installing the aft cabin top doubler.

Well, its been a while since my last post, but work has proceeded. Just been a bit busy to write it all down.

Here, the cabin top is being glued down. I was able to use the three straps to get the edges to within about an inch of the cleat, and then I needed to use clamps, and hand power to close the gap and put in the screws.


Picture
Picture
Picture

The foreward cabin top doubler is yellow cedar. I chose to steam it to make it easier to install. Here it is resting from the steam box.


There was too much to trim from the edge of the cabin top to use just a sander or rasp, so I wanted to use a plane. However, I was concerned about occasionally catching the blade on the cleat. So, this arrangement helped with that. The strip of wood rides on the cleat and allowed me to trim most of the cabin top edge.
Picture
Picture
Picture
Adding fillets to the all of the cabin side and top joints was time consuming, however I decided to switch to the Howard Rice/Russell Brown filler mixture, and to also follow Russell's advice of sanding the fillets within a couple days of applying them. This has made fillet sanding much easier (though still tedious work, and worthy of multiple Car Talk podcasts).


However, the fillets on the underside of the cabin top between BH3 and BH2 remain to be sanded. Heck, it was hard enough applying them (though it probably would have been much easier had I waited until the hull was upside down).

Here, the fiberglass on the cabin top has been wetted out. This took more epoxy than I was expecting - I used a roller to apply it, which was pretty easy, and it was easy to control the amount of epoxy being applied, but it was a bit slow. Perhaps not the way to go for a larger surface - not sure.

The corners turned out pretty well, thanks to help from a nice e-book written by Russell Brown on fiberglassing corners (a companion to his Epoxy Basics book).

After a couple more fill coats and sanding, the cabin top is done for now.
Picture
Picture
Time to "Turn The Boat". As you can see, I chose the strap rotation method. This was complicated a bit by the low ceiling clearance in my shop - we had to lower the aft strap quite a bit to clear the cold air return duct above.

After about 10-15 minutes of fiddling, we had her over, and with scarcely any damage. BTW, if you haven't heard it from other SCAMP builders, don't trust your ability to slowly release ratchet straps. Nuff said.

Thanks for the help Sergei!
The successful result! It was surprising how far forward, at this point, the balance point of the hull is. There is not much weight on the aft horse to the extent that shims from the floor to the mast trunk are needed to keep the whole thing from turning into a teeter-totter when working at the bow.
Picture
Picture
Applying and then sanding the fillets between planks and the garboard/bottom joint took a surprising amount of time. Quite a few Car Talk episodes worth.
Picture
Way back, when I glued on plank 2, it was difficult to tell exactly how much to overlap it with the garboard plank. The top of the plank mates with corners in the bulkheads, true, but this is a somewhat imprecise location.

As you can see here, the overlap between planks 1 and 2 (above), and the overlap between planks 2 and 3 (below it) are not equal. I noticed this when I was installing plank 3, in that there were spots in the middle of the plank where the plank 2 bevel was not quite covered by plank 3. So, be forewarned about this and be somewhat more careful than I was about the positioning of the planks. I dont think this is a problem with ANNIE B, as I have put glass tape on the inside of all three plank joints.
I rounded over the edges of the centerboard slot, in anticipation of wrapping fiberglass fabric part way in.

Which is the next step - that is, glassing the bottom. Stay tuned....
Picture
6 Comments

Deck trimming, cabin sides

10/28/2014

2 Comments

 
Picture
Picture
I needed to trim the edges of the deck even with the carlins, and with the gunwales. I started using a hand plane, but it was too difficult to keep from taking a bite out of the supporting piece, so I decided to try using a router with a bottom bearing bit.

The angle between the deck and the gunwale forward of about BH5 is pretty close to 90 degrees, so the router worked well there. Aft of BH5, the router bit would leave some of the deck edge untrimmed, but at least it reduced the amount to be removed by hand (which I mostly did by sanding). The angle between the deck and the carlin is a little more than 90 degrees, and is pretty constant, so I added an angled spacer to the router to match the angle. Worked quite well.


Picture
Next, I trimmed the cabin sides to fit and started playing with fit of the cabin top.

You can see the port lights I am going to install here. They are really nice looking bronze parts, but the flange extending into the cabin is 15mm deep. I have a trim ring to go on the inside, but it doesn't fit over the flange, but is designed to sit on top of the edge of the flange.

So, I decided to put a layer of 9mm ply on the inside of the cabin side between BH3 and BH4 so that the port light flange will be roughly flush with the inside of the cabin side. Fortunately, I have some plywood left over from other things.


Picture
Here are the additional cabin side pieces.  And below, they are being glued in place. They cover and are screwed to the carlins.
Picture


Picture
Next up are the cabin top cleats. These are a bit of work to create. The cabin side is curved, so I steamed the cleats to fit the curve - though I probably didn't need to.

My cabin sides don't extend up to the underside of the cabin top (about 1/2" short),  so a rabbit on the back of the cleat was needed. I also made a 45 degree cut to approximate the curve of the cabin top, and hand planed the rest (quite the pile of shavings, as you can see). You can also see here that, because the cabin side is curved out at BH2, the cleat is narrower (shorter?) at that BH. I removed the cleat and planed the ends of the bottom of the cleat to obtain an approximate equal reveal over its' length, thinking this would look better.

Lastly, the cabin top doesn't quite extend to the edge of the cleat, mostly towards their ends, so I had to trim some off the width (depth?) of the cleat with the table saw.

Picture
And here the cleats are being glued in place. No, I didn't put two screws in the cleats - I got ahead of myself and screwed in the starboard cleat before I was ready to, so I repositioned the cleat when I drilled for screw holes for good.

The strips with blue tape on the gunwales are to protect it from the straps I am using to bend the cabin top.

Next up, installing the cabin top! (unless I think of something else I need to do first....).
2 Comments

Gunwales, carlins, deck

10/6/2014

3 Comments


Summer is mostly over, and it is time to get back to boat building. We had a great time working in the back yard, sailing the Potter and the Melonseed, enjoying the nice weather. In August, I attended the Small Craft Academy, and the SCAMP rally, and got quite a bit of SCAMP sailing time. So, now I am really stoked to get ANNIE B in the water.

So this post covers work I did back in May and early June, as well as recently.

Picture

After playing around with trying to bend single wood strip gunwales, I decided to make the gunwales (and carlins)  from two strips laminated together. And even with those thicknesses, I decided it would be easier for a single hander to deal with these if they were steam bent.

So, I bought a steamer, and created this setup using PVC pipe. The pipe needs to be supported at frequent intervals as it becomes very soft when heated by the steam.
Picture

I steamed one gunwale piece for (in this case) the port side, then pulled one out of the steam box and clamped it in place.

I then drilled countersinks for some of the screws from inside, plank to gunwale, and installed 3/4" screws to hold the 1st gunwale piece in place. I then steamed the 2nd piece and clamped it in place on top of the 1st.

After letting that sit for several hours, I drilled countersinks for screws from the outside (outer gunwale piece to inner) and installed 3/4" screws, and finished the inner countersinks.
Picture
Picture

To glue the gunwales to the hull, I removed the inner screws holding the gunwale sandwich to the plank, primed the plank and inner gunwale, applied thickened epoxy to the plank, and screwed the gunwale sandwich to the plank from the inside, starting at the stern.

After cleaning up squeeze out, I removed the outer screws and the outer gunwale piece, primed, applied thickened epoxy, and screwed it back in place.

After cleaning up squeeze out again, I removed the inner 3/4" screws one-by-one and replaced them with 1 1/4" screws that penetrate both gunwale pieces (I had to countersink each hole again before installing the longer screw).

This process allowed me to do the entire job without help, and gave a good result.
Picture

 On to the carlins!

Here the inner carlins have been steam bent, and are clamped in place allowing them to take their shape. Then I trimmed them at the bow end.

Next day, I steamed and clamped in place the inner carlins, and trimmed at the bow (below is before trimming).

Picture
Picture

Gluing the carlins was done differently than the gunwales, since they are not screwed to anything, and I didn't want to screw them together.

I put one screw between the two pieces at the stern, removed them from the hull, then primed and glued the two pieces together, clamping frequently with spring clamps, as you can see at left. After cleanup (and before the epoxy cured), I installed them with glue to the bulkheads. I clamped them at each bulkhead to keep them parallel with the front surface of the bulkhead, so that the coamings will fit against that surface later.
Picture

After much planing work, primarily with a spokeshave, the gunwales and carlins are ready for a deck!
Picture

I made a nice deck cleat that glues to the forward side of BH2, and supports the aft edge of the foredeck. After coats of epoxy, it was glued in place.
Picture

I didn't have room in my shop to glue the 5 deck pieces together, except over the hull. So, here the 4 puzzle joints are clamped and curing. I put 4 screws through the edges of the plywood pieces, and then clamps in the middle to keep the surfaces parallel.
Picture

I made an H shaped jig that clamps onto the side deck pieces in the middle and at the stern, so that I can handle the deck by myself. I was able to lift it up and turn it over by myself, though carefully as it is pretty floppy.

Here, 3 coats of epoxy are being applied to the underside of the deck. The 2nd and 3rd coat have white pigment added, so that I don't need to try to paint the underside of the de
ck (cant imagine how messy that might be!)

I also cut and dry fit backing plates for the 6 deck cleats to be installed (sorry, no pix). These were made from a material called G-10, which is a fiberglass and epoxy mix, and comes in 1/2" thick sheets. I chose it because it doesn't need to be coated with epoxy, and holes dont need to be overdrilled/epoxy filled. But mostly I just wanted to try it out.

I cut these backing plates to barely fit between the carlins and inside of the plank so that the edges can be glued to them when the deck goes down.

Picture

Here is the deck "hover craft", waiting to be eventually lowered in place.

But this was to be much later, as summer started and boat building was put on hold.

Picture

Well, summer is over, and last week the deck was glued down.

Here all is ready for epoxy to be spread in the carlins, gunwales, bulkheads, and backing plates (which are temporarily held in place with bolts/nuts through the eventual cleat holes).
Picture

After a pretty hectic epoxy mixing and spreading session (thank heavens for slow hardener and cool temps!), and quite a few screws, the deck is glued down!

I started by gluing the deck cleat backing plates to the underside of the deck, supported by the temp bolts/nuts. Then spread thickened epoxy on the gunwales and carlins, followed by a bead of thickened epoxy on the edges of backing plates.

Then I lowered the foredeck down onto the hull, followed by the middle and then the after part of the deck. You have to pull the sides of the foredeck down (I used a strap around the bows) in order to be able to push the aft edge of the foredeck snug against the foreward side of BH2. This was followed by half the screws, then the other half, then endless cleanup.

Picture

This is a backing plate under the port foreward edge of the foredeck for a bow eye to be used for anchoring. Howard Rice described a method that allows handling the anchor from the cockpit, and involves running the rode through an eye on the foredeck.

Now, he recommended putting the eye on the starboard side, which will allow the boat to fall off on a starboard tack when leaving an anchorage, thus having right-of-way. But, my rode storage locker is under the port seat, back at the transom, so to simplify rode handling I put the bow eye on that side.

The backing plate is 3 layers of 9mm ply glued together, edge glued to the carlin, deck beams and bow transom, with the 3rd layer overlapping under the deck beam, and finally the whole mess glued to the underside of the deck. And yes, there is some squeeze out that wasn't cleaned up when the deck went down. I spent most of the time cleaning up squeeze out under the deck elsewhere, and didn't crawl up there to do it. I can live with that.

And in case you're wondering, I can reach this point under the deck via the BH3 hatches. I can just get my entire upper body through them - it is NOT comfortable, but it works, and I will be able install the nuts for both bow eyes (you can just see the backing plate for the bow transom bow eye at the lower edge of the pix - it is made of G-10).

3 Comments

Seat tops

4/27/2014

6 Comments

 
Picture
Now that Annie B has a sole, she needs seat tops. But, there are a few things to finish first (there is always something that needs to be done first).

Keith Nasman had a good idea he calls a glove box - a smaller area in the aft-of-B4 area that will hold little stuff that otherwise rattles around. I have one of these in my Potter, and it is very useful. Sort of like the junk drawer in the kitchen. Anyway, here is my glove box, accessed from the B4 hatch which opens into the veranda.

Picture
Also, the seat top edges/sliding seat cleats need to be installed. They are mostly held on with screws (and epoxy of course), with the exception of along the centerboard trunk. You can't really see it in this picture, but the port cleat stops just over 18mm short of the stern transom, so that I can later sneak in the two layers of 9mm ply for the outboard doubler.

Picture
And finally, the seat tops go on. I did each seat top separately, using a double bead of thickened epoxy on cleats, and single on the inside of the planks, and then filling all of the screw holes. I attempted to make fillets of the squeeze out along the underside of the seat top/plank joint. Neither doing a fillet in a mirror, nor doing one standing on your head is much fun.

At right, the starboard seat top fillets have been added.

Picture
Picture
I wanted to do a neat job on the seat top fillets, and always struggle with smoothing out the "swoosh" that happens when you need to start the fillet from one bulkhead and then have to stop before you get to the other bulkhead because the fillet stick is in the way.

Then I remembered seeing a 1 pager in the latest Small Craft Advisor magazine, which described a spherical fillet tool. I went to the local craft store and bought various size "doll heads" and round beads, and stuck them onto the end of short pieces of dowel. Also shown is one of the standard fillet sticks I have been using.

I used the middle one for the seat top fillet (1" diameter doll head) and it worked really well. You can fillet the span between bulkheads without stopping, by merely rotating the "head" as you go along. Pretty slick!


Picture
As others have done, I added a book/chart rack forward of B3. I liked Dale Simonson's design, so I stole it - thanks Dale! At left are the various pieces for the shelf, and installed at right. I used some left-over teak, and want to just put an oil finish on it (or I may leave it bare wood). Turns it, you have to be VERY careful to not get epoxy where you don't want it in a situation like this. It is amazing where epoxy shows up - on the plastic on the bench top, on your gloves (natch), too much squeeze out, etc. Wiping with isopropyl alcohol took care of most of the boo-boos, except in the end grain.
Picture
6 Comments
<<Previous

    Author

    Craig Bryant. Never built a boat before, so should be interesting.

    Links

    Dave's (WoodnMetalGuy) SCAMP blog

    Brent's Shackleton build blog
    -----------------------------------

    Archives

    September 2015
    July 2015
    May 2015
    March 2015
    February 2015
    January 2015
    December 2014
    October 2014
    April 2014
    March 2014
    January 2014
    December 2013
    November 2013
    May 2013
    April 2013
    March 2013
    February 2013

    Categories

    All

    RSS Feed

Powered by Create your own unique website with customizable templates.